




















25331672107 Kenmore Refrigerator - Instructions
Keep searches simple. Use keywords, e.g. "leaking", "pump", "broken" or "fit".
Fan motor no longer functioning and needed to be replaced
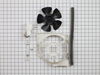
The most difficult part was the removal of the existing fan and shroud. There is very little room to work between the condenser and the coils where the fan is located. The old shroud had to be removed as it was not compatible with the mounting for the new fan motor and blade. Make sure to unplug the refrigerator and give the coils some time to cool down. The first step was to remove the old fan blade... it simply pulls off. Next you need to remove the two bolts holding the fan shroud to the floor of the refrigerator. Then you need to remove the old fan motor from the shroud... unplug the wire connection and remove two small bolts that hold it on. I was lucky to have a VERY small ratchet to get into these tight spaces. Now is the really hard part, removing the metal fan shroud takes a lot of twisting and turning to get it out. The coils have a little play in them, but you must be very careful of the tubing and connections. Also, the coils are very sharp. Once this is out, IF you can get it out....I had my doubts along the way, you can start to put the new parts in... beginning with the new fan shroud which fortunately is made of plastic and has some give which makes it easier to get in. Then you can mount the new motor to the shroud with the three new screws. Plug in the wire connection, add the foam tape to the shroud and mount the shroud to the floor of the frig with the original two bolts. Lastly, attach the fan blade. This replacement kit is well constructed, fits perfectly and contained all the necessary parts (fan motor with wiring connection, mounting screws, wire connection adapter, fan shroud, foam tape and fan blade), but no detailed instructions come with it. I was lucky to get the old fan shroud out without doing any damage to the surrounding parts, but this part was very difficult for a do it yourself person. I would be interested to know if a professional has some other tips for this part of the replacement process.
Parts Used:
-
Amber from SHERMANS DALE, PA
-
Difficulty Level:Very Difficult
-
Total Repair Time:1- 2 hours
-
Tools:Nutdriver, Pliers, Socket set
12 of 12 people
found this instruction helpful.
Was this instruction helpful to you?
Thank you for voting!
Replacing Icemaker
Pull refrigerator from wall and disconnect the water line and unplug the power.
On top of the icemaker, two machine screws hold the icemaker to the side of the refrigerator. You will have to feel around to find the machine screws, but once you do, it is simple to slip the appropriate size socket over the hex heads. I found it helpful to have an extension on the socket wrench. Disconnect the power cable inside the refrigerator (there are little pressure clips on the side that help release the cable) and move it out of the way for the time-being.
Back out both machine screws several turns, but do not remove them completely. The icemaker slips over the screws, so leaving them in the side of the refrigerator makes that process a lot easier. Hand tighten the machine screws once you have positioned the new icemaker in place. One thing to be sure and do is make sure the water line hose coming out of the back of the refrigerator inside is on top of the icemaker. It fits into a slot in the top of the icemaker - failing to do this will result in water pouring into the freezer compartment, not into the icemaker..
Reconnect the power cable to the new icemaker and tuck it up behind the icemaker assembly. Tighten the machine screws completely, but do not over-tighten.
Reconnect the water line on the back of the refrigerator at the wall, and plug in the refrigerator. You should hear the unit fill immediately.
In about an hour you should have ice filling the bin. Enjoy!
On top of the icemaker, two machine screws hold the icemaker to the side of the refrigerator. You will have to feel around to find the machine screws, but once you do, it is simple to slip the appropriate size socket over the hex heads. I found it helpful to have an extension on the socket wrench. Disconnect the power cable inside the refrigerator (there are little pressure clips on the side that help release the cable) and move it out of the way for the time-being.
Back out both machine screws several turns, but do not remove them completely. The icemaker slips over the screws, so leaving them in the side of the refrigerator makes that process a lot easier. Hand tighten the machine screws once you have positioned the new icemaker in place. One thing to be sure and do is make sure the water line hose coming out of the back of the refrigerator inside is on top of the icemaker. It fits into a slot in the top of the icemaker - failing to do this will result in water pouring into the freezer compartment, not into the icemaker..
Reconnect the power cable to the new icemaker and tuck it up behind the icemaker assembly. Tighten the machine screws completely, but do not over-tighten.
Reconnect the water line on the back of the refrigerator at the wall, and plug in the refrigerator. You should hear the unit fill immediately.
In about an hour you should have ice filling the bin. Enjoy!
Parts Used:
-
Richard Allen from PHOENIX, AZ
-
Difficulty Level:Really Easy
-
Total Repair Time:30 - 60 mins
-
Tools:Socket set
10 of 10 people
found this instruction helpful.
Was this instruction helpful to you?
Thank you for voting!
Food compartment not cooling, freezer working well.
Fantastic!
Sent in a brief description of problem and model number. Reply and description of other customers experiences guided us to the exact problem.
We ordered the part on Friday and it was here on Tuesday.
I prepared the freezer compartment for the removal of the old motor and on Sunday husband installed new Evaporator Fan Motor.
It works and is cooling like it did when it was new.
This has been a great experience as all repairmen wanted at least 60.00 to just come out and determine what the problem was. I can only imagine what the final bill would have been.
This was easy and inexpensive.
Thanks for all the help.
Sent in a brief description of problem and model number. Reply and description of other customers experiences guided us to the exact problem.
We ordered the part on Friday and it was here on Tuesday.
I prepared the freezer compartment for the removal of the old motor and on Sunday husband installed new Evaporator Fan Motor.
It works and is cooling like it did when it was new.
This has been a great experience as all repairmen wanted at least 60.00 to just come out and determine what the problem was. I can only imagine what the final bill would have been.
This was easy and inexpensive.
Thanks for all the help.
Parts Used:
-
Mary from Kenmore, WA
-
Difficulty Level:Easy
-
Total Repair Time:30 - 60 mins
-
Tools:Nutdriver, Screw drivers
13 of 19 people
found this instruction helpful.
Was this instruction helpful to you?
Thank you for voting!
Not running
After waiting over 2wks for my part to arrive, I purchased the part locally and made the repair the same day as I am still waiting for the part to arrive from you guys. Your customer service really needs improving. I paid for 2 day shipping, what a joke. I will be returning the part as soon as I receive it thanks.
Parts Used:
-
Kenneth from SAVANNAH, GA
-
Difficulty Level:Really Easy
-
Total Repair Time:Less than 15 mins
-
Tools:Nutdriver
10 of 12 people
found this instruction helpful.
Was this instruction helpful to you?
Thank you for voting!
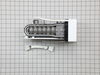
Ice maker was not making ice
I replaced the solenoid first because the ice maker was not getting water. After replacing the solenoid valve, I waited about 1/2 an hour, still no water. So, I ordered a replacement ice maker. I then installed the replacement ice maker, waited a 1/2 an hour, still no water. Then, I waited overnight. Yeah, ice! WORD OF ADVICE. WAIT OVERNIGHT TO SEE IF THE ICE MAKER CREATES ICE. Not sure how long a cycle takes, but it's longer than you would think. Hope your installation is a success!
Parts Used:
-
Jeffrey from Indianapolis, IN
-
Difficulty Level:Easy
-
Total Repair Time:Less than 15 mins
-
Tools:Nutdriver
9 of 10 people
found this instruction helpful.
Was this instruction helpful to you?
Thank you for voting!
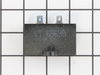
Coming from the refrigerator, there was an intermittent "clicking noise", occurring about every 30 seconds. The frig. eventually failed .
I removed the back cover and removed the clip holding the compressor- run capacitor and start relay. I replaced these 2 components and clean the dust from the frig., and from the bottom of the floor. I replaced the back cover ; Loss about $300 worth of meat when when the frig. failed. Then I thought that, during these turbulent times, there are many which don't have a refrigerator or any meat to place in it, The refrigerator is "running" normal again.
Parts Used:
-
winifred from LOUISVILLE, KY
-
Difficulty Level:Easy
-
Total Repair Time:30 - 60 mins
-
Tools:Nutdriver, Pliers
11 of 16 people
found this instruction helpful.
Was this instruction helpful to you?
Thank you for voting!
Ice maker failed
Watched YouTube video. Very easy. Used my cell phone camera in ‘selfie’ mode propped up in the upper right hand corner of freezer to see the 2 hidden screws.
Parts Used:
-
Mary from SOUTH LYON, MI
-
Difficulty Level:Easy
-
Total Repair Time:Less than 15 mins
-
Tools:Nutdriver, Screw drivers
9 of 11 people
found this instruction helpful.
Was this instruction helpful to you?
Thank you for voting!
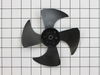
broken fan with vacumme cleaner
I remembered to unplug first. took the little cover off on the bottom, unscrewed the 3 screws. then just held the base that the fan is on and pulled rite off, pushed the other one rite on. it took me five min, i want to say thanks to parts select, had the part, fast shipping, great job, thank you.
Parts Used:
-
TIM from Lockport, IL
-
Difficulty Level:Really Easy
-
Total Repair Time:Less than 15 mins
-
Tools:Nutdriver
9 of 12 people
found this instruction helpful.
Was this instruction helpful to you?
Thank you for voting!
ice maker quit making ice
I basically followed the instructions offered when i searched for the ice maker. It was relatively easy to do, I undid the 2 screws holding the ice maker to the side of the freezer, the was the tricky part, holding a mirror so i could see the slots of the screws. loosened them, disconnected the electrical connection and reversed the process for the install. It took about 25 minutes and i was back making ice.
Parts Used:
-
Barry from Middletown, DE
-
Difficulty Level:Easy
-
Total Repair Time:15 - 30 mins
-
Tools:Screw drivers
8 of 10 people
found this instruction helpful.
Was this instruction helpful to you?
Thank you for voting!
Broken fan blade
Followed video instructions which were to unplug refrigerator, on lower back use screwdriver, loosen 4 screws, take off plastic cover, pull out fan, replace with new fan, replace cover and 4 holding screws, plug in refrigerator. I am female, 77 years old and if I can do it, anyone can.
Parts Used:
-
Venita from MENA, AR
-
Difficulty Level:Very Easy
-
Total Repair Time:Less than 15 mins
-
Tools:Screw drivers
7 of 8 people
found this instruction helpful.
Was this instruction helpful to you?
Thank you for voting!
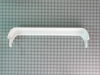
A shelf in the refrigerator was broken off by a renter.
It was very simple - just had to pop the part in. Delivery was quick - very slick!
Parts Used:
-
Sharon from Cannon Beach, OR
-
Difficulty Level:Really Easy
-
Total Repair Time:Less than 15 mins
7 of 8 people
found this instruction helpful.
Was this instruction helpful to you?
Thank you for voting!
Freezer door gasket with a holes

-
Karine Lepold /BM CARGO from Miami, FL
-
Difficulty Level:Very Easy
-
Total Repair Time:Less than 15 mins
7 of 8 people
found this instruction helpful.
Was this instruction helpful to you?
Thank you for voting!
Oven light bulb went dark; it needed replacing

-
Lise from CEDAR GROVE, NJ
-
Difficulty Level:Very Easy
-
Total Repair Time:Less than 15 mins
10 of 17 people
found this instruction helpful.
Was this instruction helpful to you?
Thank you for voting!
Lightning struct the house and fried the evap thermostat
Noticed the evap fan wasn't working, so trying to disconnect the wire broke the connection so had to order a new motor. Installed the motor but it still didn't work. Had a technician look at it and he said it was the control board. Ordered and installed control board and still didn't work. The only element left is the evap thermostat. Jumped the thermostat and it worked so ordered and installed a thermostat. It works now
Parts Used:
-
charles from parker, CO
-
Difficulty Level:A Bit Difficult
-
Total Repair Time:More than 2 hours
-
Tools:Nutdriver, Screw drivers, Socket set
8 of 11 people
found this instruction helpful.
Was this instruction helpful to you?
Thank you for voting!
I want to mention this is a garage ref with freezer on top. Freezer was to warm 20-32 deg.
Replaced thermostat and defrost timer and still freezer to warm.
After research with U-tube video of (Fixin it with Pappy) discovered that my fridge has one thermostat in fridge section and in cold months (live in ohio)the garage is cold therefore themostat in fridge does"nt need to tell the compressor to kick on. Pappy is a retired engineer and in very easy to follow instructions will show you how to fix this problem. Strongly suggest to search for his video on Utube. I did as he instructed and my fridge freezer works great in cold weather now. Its apparent to me I wasted my money on the parts. I didn't` need to replace. Just happy my Beer fridge is working all seasons now.
John from Ohio
After research with U-tube video of (Fixin it with Pappy) discovered that my fridge has one thermostat in fridge section and in cold months (live in ohio)the garage is cold therefore themostat in fridge does"nt need to tell the compressor to kick on. Pappy is a retired engineer and in very easy to follow instructions will show you how to fix this problem. Strongly suggest to search for his video on Utube. I did as he instructed and my fridge freezer works great in cold weather now. Its apparent to me I wasted my money on the parts. I didn't` need to replace. Just happy my Beer fridge is working all seasons now.
John from Ohio
Parts Used:
-
John from S CHARLESTON, OH
-
Difficulty Level:Easy
-
Total Repair Time:15 - 30 mins
6 of 6 people
found this instruction helpful.
Was this instruction helpful to you?
Thank you for voting!