




















2213229N414 Kenmore Dishwasher - Instructions
Keep searches simple. Use keywords, e.g. "leaking", "pump", "broken" or "fit".
Door gasket came off and bound up door
Searched internet found a YouTube video not quite the same model but close enough to get me going and the steps were the same
Parts Used:
-
Dennis from APACHE JCT, AZ
-
Difficulty Level:Easy
-
Total Repair Time:30 - 60 mins
-
Tools:Pliers, Screw drivers
6 of 6 people
found this instruction helpful.
Was this instruction helpful to you?
Thank you for voting!
I damaged the grommet when removing the recirc pump
repair went smooth for the grommet. suggest a small of vasoline to ease installation of grommet
Parts Used:
-
john from SANFORD, NC
-
Difficulty Level:Easy
-
Total Repair Time:30 - 60 mins
-
Tools:Pliers, Screw drivers
6 of 6 people
found this instruction helpful.
Was this instruction helpful to you?
Thank you for voting!
Kids loved to make squeaky sounds opening and closing the doors, finally snapped the door balance link on one side.
1) clear out the dishwasher
2) remove unit securing screws from top or sides of DW and cabinetry near the top or under the counter top
3) gently pull the dishwasher from the cabinetry about 20" is plenty, mind the connecting hoses and electrical connection
4) close the door! pull back the insulation from the area of the hinge and photograph both sides - this will save you the pain of going online
5) you will see the cord, the tensioning wheel assembly and the door balance spring on both sides
6) with the door closed to relieve tension on the cord, remove the cord from the balance spring - this can be done w/o tools at this point
7) remove the 5/16" screw from the plastic tensioning wheels and remove the tensioners, cord - leave the springs in place if not replacing them
8) install the door end of the cord to its hook on the hinge, install the new tensioning wheel assembly, install the old 5/16" self tapping screw through the lower wheel and into the outer hole in the frame
9) thread the cord from the door over the upper wheel and lower wheel. the lower wheel has cord retaining tabs to hold the cord on the assembly
10) hook the eye end of the cord to the balance spring and you are finished with the first side - repeat operations for the other side, reposition the insulation and slide the washer back in its cavity - do not forget to reinstall the stabilizing screws in the upper washer frame
11) you've done it!
12) have a cuppa and do your second washer that hasn't failed yet - it will soon.
2) remove unit securing screws from top or sides of DW and cabinetry near the top or under the counter top
3) gently pull the dishwasher from the cabinetry about 20" is plenty, mind the connecting hoses and electrical connection
4) close the door! pull back the insulation from the area of the hinge and photograph both sides - this will save you the pain of going online
5) you will see the cord, the tensioning wheel assembly and the door balance spring on both sides
6) with the door closed to relieve tension on the cord, remove the cord from the balance spring - this can be done w/o tools at this point
7) remove the 5/16" screw from the plastic tensioning wheels and remove the tensioners, cord - leave the springs in place if not replacing them
8) install the door end of the cord to its hook on the hinge, install the new tensioning wheel assembly, install the old 5/16" self tapping screw through the lower wheel and into the outer hole in the frame
9) thread the cord from the door over the upper wheel and lower wheel. the lower wheel has cord retaining tabs to hold the cord on the assembly
10) hook the eye end of the cord to the balance spring and you are finished with the first side - repeat operations for the other side, reposition the insulation and slide the washer back in its cavity - do not forget to reinstall the stabilizing screws in the upper washer frame
11) you've done it!
12) have a cuppa and do your second washer that hasn't failed yet - it will soon.
Parts Used:
-
Robert from GOLDEN, CO
-
Difficulty Level:Really Easy
-
Total Repair Time:15 - 30 mins
-
Tools:Nutdriver, Screw drivers
6 of 6 people
found this instruction helpful.
Was this instruction helpful to you?
Thank you for voting!
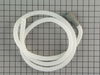
Drain hose leaking
I did not relize that the drain hose was in two parts. Naturally I ordered the wrong half. So after I relized my mistake, I re-ordered the correct part. Once the correct part was received the repair was easy and went well.
Parts Used:
-
Robert from Beaufort, SC
-
Difficulty Level:Easy
-
Total Repair Time:15 - 30 mins
-
Tools:Pliers
8 of 12 people
found this instruction helpful.
Was this instruction helpful to you?
Thank you for voting!
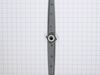
little tabs holding sprayer arm to to rack broke off
placed sprayer arm in position and twisted it into position, about a 1/4 turn, snaps into place. total of 15 seconds!
Parts Used:
-
David from WAYNESBORO, PA
-
Difficulty Level:Really Easy
-
Total Repair Time:Less than 15 mins
6 of 6 people
found this instruction helpful.
Was this instruction helpful to you?
Thank you for voting!
The door spring link broke.
Unplug dishwasher and slide it out from under cabinet. Remove old broken link (a heavy string between two plastic parts) and replace with new one. Slide dishwasher back and plug it in. Very easy and no tools required.
Parts Used:
-
Martin from Discovery Bay, CA
-
Difficulty Level:Really Easy
-
Total Repair Time:Less than 15 mins
7 of 9 people
found this instruction helpful.
Was this instruction helpful to you?
Thank you for voting!
old hose possible leakage
-
Fred from Kernersville, NC
-
Difficulty Level:Really Easy
-
Total Repair Time:Less than 15 mins
-
Tools:Nutdriver, Pliers, Screw drivers
8 of 13 people
found this instruction helpful.
Was this instruction helpful to you?
Thank you for voting!
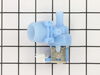
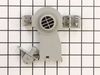
Dishwasher would not fill with water
The water valve float lever was broke. So I replaced that and the water level switch. Probably didn’t have to replace switch. Very easy!!
Parts Used:
-
Brian from DOYLESTOWN, PA
-
Difficulty Level:Really Easy
-
Total Repair Time:Less than 15 mins
7 of 10 people
found this instruction helpful.
Was this instruction helpful to you?
Thank you for voting!
Was not draining, did not hear motor
Installed new pump from the front. Power off remove front cover reached my hand behind pump for release clip, push down turned counter clockwise pump comes out. Disconnected electrical plug attached plug to new pump. Put pump in at 45 degrees rotated clockwise until hear clip lock in . Tested then replaced cover
Parts Used:
-
KEVIN from BEL AIR, MD
-
Difficulty Level:Really Easy
-
Total Repair Time:Less than 15 mins
-
Tools:Screw drivers
6 of 7 people
found this instruction helpful.
Was this instruction helpful to you?
Thank you for voting!
Door spring broke-Door falls down
Remove 2 screws on lower baseplate. Remove 2 screws that hold dishwasher inside cabinet( may be attached to counter top or side cabinets). Turn off water supply to dishwasher. Remove any connections such as water supply, electrical connection, or waste water line that prevent dishwasher from being pulled out about 3/4 of the way. With the dishwasher door closed, remove broken parts and replace with new parts. Pull on spring to make final connection of nylon cable. Reverse the above instructions for re-installing the machine.
Parts Used:
-
Peter from JERICHO, NY
-
Difficulty Level:Easy
-
Total Repair Time:15 - 30 mins
-
Tools:Screw drivers, Socket set, Wrench set
6 of 7 people
found this instruction helpful.
Was this instruction helpful to you?
Thank you for voting!
Door spring broke-Door falls down
Remove the mounting screws that hold the dishwasher under the counter top. Remove dust cover plates at the bottom of the machine. The machine will have to be pulled out, so turn off the water to the machine. Usually under the kitchen sink. Disconnect water supply and push it out of the way so the dishwasher can be pulled out. Pull machine out enough so you have access to the door cables and springs. The door will have to be in the closed(up) position to do the repair. Usually only one side is broken. Start with the broken side and copy the working side when installing new parts. Then repair the working side. To get the working side apart just pull on the spring and disconnect it from the cable. Do the reverse to reinstall.
Parts Used:
-
Peter from JERICHO, NY
-
Difficulty Level:Easy
-
Total Repair Time:15 - 30 mins
-
Tools:Screw drivers, Socket set, Wrench (Adjustable)
6 of 8 people
found this instruction helpful.
Was this instruction helpful to you?
Thank you for voting!
Drain hose broken.
Removed the old hose, after loosing metal looking rings. Installed new hose ad finally tight firmly the looking rings, using wrench and socket.
Parts Used:
-
Giorgio from Savannah, GA
-
Difficulty Level:Easy
-
Total Repair Time:15 - 30 mins
-
Tools:Screw drivers, Socket set, Wrench set
8 of 14 people
found this instruction helpful.
Was this instruction helpful to you?
Thank you for voting!
replace middle spray arm and water srayer
remove 2 locks on metal roller guides. remove top basket. turn upside down on counter.remove spray arm by pryng one side in and lift out then push other side down and the out. install same as removal. line spray arm and turn clockwise til you hear a click.install basket and install locking plugs.
Parts Used:
-
robert from INDIANOLA, IA
-
Difficulty Level:Really Easy
-
Total Repair Time:15 - 30 mins
-
Tools:Screw drivers
6 of 8 people
found this instruction helpful.
Was this instruction helpful to you?
Thank you for voting!
Broken Mounting bracket

-
Roy from HIGGINSVILLE, MO
-
Difficulty Level:Really Easy
-
Total Repair Time:15 - 30 mins
-
Tools:Screw drivers
8 of 14 people
found this instruction helpful.
Was this instruction helpful to you?
Thank you for voting!
Dishes were not getting cleaned and water was coming out the bottom of the door
The top and bottom parts of the lower wash arm were separating. This caused water to spray out the ends of the wash arm and come out the front of the dishwasher. In addition this water was not spraying upward resulting in dishes not getting cleaned. Took me a while to figure this out but the repair was simple.
Parts Used:


-
Dennis from U SADDLE RIV, NJ
-
Difficulty Level:Really Easy
-
Total Repair Time:Less than 15 mins
5 of 5 people
found this instruction helpful.
Was this instruction helpful to you?
Thank you for voting!