




















2213229N414 Kenmore Dishwasher - Instructions
Keep searches simple. Use keywords, e.g. "leaking", "pump", "broken" or "fit".
two wheels sets were Broken
Removed bad wheel sets using screw driver to help pry broken part loose. Then just snapped in replacement. Took less than 5 mins. Now it works great.
Parts Used:
-
KEITHCOLONA from ROANOKE, VA
-
Difficulty Level:Very Easy
-
Total Repair Time:Less than 15 mins
-
Tools:Screw drivers
13 of 15 people
found this instruction helpful.
Was this instruction helpful to you?
Thank you for voting!
Bottom Rack Wheel Assembly
Installation was very easy. The online video was excellent and clear.
Thanks
Thanks
Parts Used:
-
Albert from LIBERTY TWP, OH
-
Difficulty Level:Very Easy
-
Total Repair Time:Less than 15 mins
-
Tools:Screw drivers
15 of 19 people
found this instruction helpful.
Was this instruction helpful to you?
Thank you for voting!
Dishwasher door falls down as soon as it is unlatched and moved just a few inches open
This kit comes with the link cords and the balance wheels. I only needed the cords. I undid the set screws under the counter edge and slid the Dishwasher out from under the counter. One of the links had a broken cord and the spring had snapped to the very back of the space and was a bit hard to find. I used the good side as a guide to see how to thread the cord correctly. I did not replace the wheels since they appeared to be in good shape and looked like they might be a bit more difficult to replace than just the cord. For a second I thought I had ordered the wrong part because the new cord's attachment point at the hinge did not look exactly like the originals but the new design worked just like the original. I did need one other person to help stretch the spring and hold the door in the best position so I could attach the cord to the hinge. It's working perfectly now and I saved the wheels in case I need them later.
Parts Used:
-
Joellen from Castro Valley, CA
-
Difficulty Level:Really Easy
-
Total Repair Time:15 - 30 mins
-
Tools:Screw drivers
12 of 12 people
found this instruction helpful.
Was this instruction helpful to you?
Thank you for voting!
broken part
repair was easy. Pictures in the instruction not clear had to refer to old parts
Parts Used:
-
steven from GREER, SC
-
Difficulty Level:Easy
-
Total Repair Time:30 - 60 mins
-
Tools:Screw drivers
13 of 15 people
found this instruction helpful.
Was this instruction helpful to you?
Thank you for voting!
Detergent dispenser latch broken
Replaced the detergent dispenser module by first unscrewing the front outer cover from the dishwasher and removing it, then by unplugging the old detergent dispenser, then by bending the metal latch clips outward to remove the old detergent dispenser, then by bending the metal latch clips inward before inserting the new detergent dispenser, plugging the new one into the wiring harness then re-securing the front outer cover of the dishwasher door.
This repair could be done in under 15 minutes but my dishwasher is so old that there was a lot of gunk built-up around the screws that hold the front cover on that I wanted to take my time cleaning up real nice.
The detergent dispenser is VITAL for getting dishes clean. Without it working properly, the detergent will be removed from the wash during the pre-wash/soak function and your dishes will not come out clean. I HIGHLY recommend doing this repair if your detergent dispenser is not working, and I had a great experience with www.PartSelect.com
This repair could be done in under 15 minutes but my dishwasher is so old that there was a lot of gunk built-up around the screws that hold the front cover on that I wanted to take my time cleaning up real nice.
The detergent dispenser is VITAL for getting dishes clean. Without it working properly, the detergent will be removed from the wash during the pre-wash/soak function and your dishes will not come out clean. I HIGHLY recommend doing this repair if your detergent dispenser is not working, and I had a great experience with www.PartSelect.com
Parts Used:
-
Benjamin from KNOXVILLE, TN
-
Difficulty Level:Really Easy
-
Total Repair Time:30 - 60 mins
-
Tools:Screw drivers
12 of 13 people
found this instruction helpful.
Was this instruction helpful to you?
Thank you for voting!
Pictures need to be more clear would help tremendously
-
Scott from OLATHE, KS
-
Difficulty Level:A Bit Difficult
-
Total Repair Time:15 - 30 mins
13 of 17 people
found this instruction helpful.
Was this instruction helpful to you?
Thank you for voting!
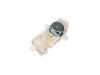
The dishwasher quit circulating the water and cleaning the dishes it filled heated drained
The cost part plus shipping for each piece which was described as not cleaning properly due to not spraying. Each of these prices is part plus shipping, diverter valve $28.32 diverter motor did not fix the problem diverter motor $125.08 did not fix the problem my next option is the motor assembly which comes out to $311.53. I think they lead you on with the little parts and you work your way up with the big ones expense wise at this point I will simply cut my losses and buy a new dishwasher because I'm almost at what it would cost for a new one and I've had this one for 4 years. When I went to look for what the problem was each one of these said not cleaning properly which I think now is a generic term to just go from the smallest to the largest if I'm going to replace the motor for 300 plus dollars I might as well just buy a new washer
Parts Used:
-
Carol from HARRAH, OK
-
Difficulty Level:Really Easy
-
Total Repair Time:Less than 15 mins
11 of 11 people
found this instruction helpful.
Was this instruction helpful to you?
Thank you for voting!
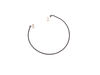
No heating for washing or drying
Was a cinch just watched the video whole procedure took an hr or so
Parts Used:
-
Dewey from UNIONTOWN, AL
-
Difficulty Level:Really Easy
-
Total Repair Time:30 - 60 mins
-
Tools:Pliers
11 of 12 people
found this instruction helpful.
Was this instruction helpful to you?
Thank you for voting!
Noisy door
I found instructions on line when I goggled my dishwasher name and model number with the words noisy door. There were three or four good suggestions at a couple of the sites I visited. I tried applying vasoline, then silicone to the rope where it travels through the plastic guides but that just cut the sound down about 50%. My dishwasher has plastic guides that look like rollers but they don't turn, they are fixed in place. The ropes squeak as the pass over the guides. The replacement part kit has plastic guides that turn like wheels now so the rope does not drag over them and squeak. This repair could be done by me in 20 minutes or less every time now that I know what I am doing.
I removed the black bottom metal cover then turned the nuts on the adjusting (leveling) bolts to lower the front end of the dishwasher so I could pull it out of the cabinet. Once I lowered is as low as it would go I opened the door and pushed down on it which tilts the dishwasher down and you pull out on it and the top lip clears the cabinet. If your dishwasher just pulls out the first time you try these steps may not be necessary.
Once the dishwasher is out the guides and rope are down at the bottom in the front by the door. It's obvious what to do to replace them.
I removed the black bottom metal cover then turned the nuts on the adjusting (leveling) bolts to lower the front end of the dishwasher so I could pull it out of the cabinet. Once I lowered is as low as it would go I opened the door and pushed down on it which tilts the dishwasher down and you pull out on it and the top lip clears the cabinet. If your dishwasher just pulls out the first time you try these steps may not be necessary.
Once the dishwasher is out the guides and rope are down at the bottom in the front by the door. It's obvious what to do to replace them.
Parts Used:
-
John from Minden, NV
-
Difficulty Level:Really Easy
-
Total Repair Time:30 - 60 mins
-
Tools:Screw drivers, Wrench (Adjustable)
14 of 22 people
found this instruction helpful.
Was this instruction helpful to you?
Thank you for voting!
Wheel broke off of dishwasher top rack
I followed the directions on YouTube and the paper that came with the part. The only problem is the 'little tabs' that they act like are easily pushed are rather more difficult since you don't want to break the things off.
Parts Used:
-
Glenajo from ROCKWALL, TX
-
Difficulty Level:Easy
-
Total Repair Time:30 - 60 mins
-
Tools:Pliers, Screw drivers
12 of 16 people
found this instruction helpful.
Was this instruction helpful to you?
Thank you for voting!
wheel fell off
-
Richard from BOSTON, MA
-
Difficulty Level:Really Easy
-
Total Repair Time:Less than 15 mins
13 of 19 people
found this instruction helpful.
Was this instruction helpful to you?
Thank you for voting!
Wheel assembly broken
Very easy to repair with the replacement wheel assembly. Popped out the broken one, popped in the new one. Price was nothing compared to having an professional repair person come to the home. Glad I found you on line!
Parts Used:
-
Daryle from WEYMOUTH, MA
-
Difficulty Level:Very Easy
-
Total Repair Time:Less than 15 mins
11 of 14 people
found this instruction helpful.
Was this instruction helpful to you?
Thank you for voting!
Replaced the wheels and adjuster on the top rack
Came as a box of loose parts with no directions. New parts looked totally different from OEM parts (better than OEM) on the rack. Luckily I went to the Partselect web site and they had a great short video preforming the task. Was a 15 minute job after the video.. If you get the Upper Rack Adjuster Kit with the wheels watch the short video and it’s a breeze!!
Parts Used:

-
Michael C from FLORENCE, MS
-
Difficulty Level:Easy
-
Total Repair Time:15 - 30 mins
-
Tools:Screw drivers
10 of 11 people
found this instruction helpful.
Was this instruction helpful to you?
Thank you for voting!
wheels on slider came off
replaced the whole bracket assembly very easy to do.
Parts Used:
-
MARIO from ALBUQUERQUE, NM
-
Difficulty Level:Really Easy
-
Total Repair Time:15 - 30 mins
-
Tools:Screw drivers
11 of 14 people
found this instruction helpful.
Was this instruction helpful to you?
Thank you for voting!
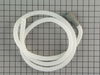
Unwanted water.
A Mouse friend had seen fit to chew through the original drain line. I used my Model Number, and was able to order the correct part . It arrived the next day. The job itself is fairly straight forward. You will need to access the rear of the machine. This may include shutting off, and disconnecting the water supply line. (Adjustable wrench). Mine is under the sink, on the "Hot" side. You may also need to un-plug the unit. (recommended) . A pair of (Pliers) will be needed for the spring clamp.
Parts Used:
-
David from PITTSBURGH, PA
-
Difficulty Level:Easy
-
Total Repair Time:30 - 60 mins
-
Tools:Pliers, Screw drivers, Wrench (Adjustable)
10 of 11 people
found this instruction helpful.
Was this instruction helpful to you?
Thank you for voting!