




















1985816152 Kenmore Freezer - Instructions
Keep searches simple. Use keywords, e.g. "leaking", "pump", "broken" or "fit".
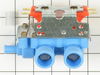
Water inlet valve had a crack and was leaking water.
I first shut off the cold and hot water hoses so that no water would run while replacing the part. After that I made sure to unplug the washer .Then I removed the plate that was holding the water inlet valve with a 1/2 " nut driver ,I think there were four bolts .Then I removed two more bolts from the center of the plate that were holding the water inlet valve.I then disconnected one 1/4 " screw or I should say loosened one which held the main water hose going into the washer which then released the part ,except from four wires. I then took one wire off at a time and attached to the new part one at a time.Finally, I was finished and reconnected everything .It worked perfected !I'am very happy and pleased . This washer is over 25 years old and still runs .
Parts Used:
-
Eric from Brook Park, OH
-
Difficulty Level:Easy
-
Total Repair Time:15 - 30 mins
-
Tools:Nutdriver, Screw drivers, Wrench (Adjustable)
1 of 2 people
found this instruction helpful.
Was this instruction helpful to you?
Thank you for voting!
Washing machine was filling very slowly
I checked the inlet hoses for hard water build up and noted that this was not a problem. Then checked the hose from the inlet valve to the washer drum and determined that it was clear so I knew the problem was a faulty inlet valve. After receiving my replacement valve, I removed the old valve by removing the hot and cold water hoses and unscrewing two screws securing the inlet valve and lifting the inlet valve out the metal holding bracket. This gave me complete access to the inlet valve allowing me to remove the hose clamp and hose to the washing machine drum. The new inlet valve was an exact match so I removed the four electrical wires one by one while putting them back on the new inlet valve to insure correct electrical connections. I added a piece of one half inch plastic tubing provided with the new inlet valve on the outlet nipple of the new inlet valve to prevent leaking. I then put the new inlet valve back into the holding bracket and screwed it down. I replaced the hot and cold hoses to the new inlet valve carefully so as not to cross thread the plastic connection on the new inlet valve. After turning the water back on, I checked for leaks and plugged the washing machine back on to test it with a washing cycle.
Parts Used:
-
Paul from San Antonio, TX
-
Difficulty Level:Really Easy
-
Total Repair Time:Less than 15 mins
-
Tools:Pliers, Screw drivers, Socket set
1 of 3 people
found this instruction helpful.
Was this instruction helpful to you?
Thank you for voting!
After first spin, cold water comes in for rinsh, the water would not come in, but would run out on floor.
Removed old valve and replaced with new. Wire for wire..screw for screw..
Parts Used:
-
Cas from Cary, NC
-
Difficulty Level:Really Easy
-
Total Repair Time:30 - 60 mins
-
Tools:Nutdriver, Pliers
1 of 3 people
found this instruction helpful.
Was this instruction helpful to you?
Thank you for voting!
Dishwasher power shutdown mid cycle
Removed door panel to get to the electric control conponents and noticed a burned wire to one of the door microswitches. Ordered the door switch repair kit from PartSelect. Also, ordered and replaced the thermal fuse at the same time since it was only $12 and didn't know if that blew at the same time the switch cooked. I had the parts coming standard delivery (3-5 days), but they arrived the very next day. Parts included easy to follow directions.Job went pretty smooth and the dishwasher works again Good experience!
Parts Used:
-
Richard from Hampden, MA
-
Difficulty Level:Easy
-
Total Repair Time:15 - 30 mins
-
Tools:Pliers, Screw drivers
0 of 1 people
found this instruction helpful.
Was this instruction helpful to you?
Thank you for voting!
Old water valve assembly cold water solenoid valve was leaking thru.
Shut off water supply, unplugged washer power, removed supply hoses from old washer valve assembly, removed valve mounting plate and removed old valve assembly from mounting plate, diagrammed and disconnected hot and cold solenoid valve wiring and removed valve assembly outlet hose. Installed and connected new valve, performing the preceding steps in reverse order. pressurized new valve, verified valve function and checked for leaks and placed washer back in service.
Parts Used:
-
Richard from Paducah, KY
-
Difficulty Level:Really Easy
-
Total Repair Time:15 - 30 mins
-
Tools:Nutdriver, Pliers, Screw drivers
0 of 1 people
found this instruction helpful.
Was this instruction helpful to you?
Thank you for voting!
Wouldn't flow cold water
Pushed machine out from wall; disconnected the supply hoses (after closing the valves at the wall); unplugged electrical cord; removed two wires from the solenoid connectors; removed two screws that secure valve assembly to backplane of machine. Installation of new assembly was the opposite procedure. We have private well, and silt was plugging the cold water side of valve. So, I also installed a large sediment filter behind the washer, so this will never happen again.
Parts Used:
-
Walter from College Station, TX
-
Difficulty Level:Easy
-
Total Repair Time:30 - 60 mins
-
Tools:Pliers, Screw drivers, Wrench (Adjustable)
0 of 1 people
found this instruction helpful.
Was this instruction helpful to you?
Thank you for voting!
water would not shut off
open top of washer
remove two screws that hold water inlet valve
disconnect four wires and hose;replace new water inlet valve and reversed operation
everything went well
remove two screws that hold water inlet valve
disconnect four wires and hose;replace new water inlet valve and reversed operation
everything went well
Parts Used:
-
Billy from Alamogordo, NM
-
Difficulty Level:Really Easy
-
Total Repair Time:30 - 60 mins
-
Tools:Nutdriver, Pliers
0 of 1 people
found this instruction helpful.
Was this instruction helpful to you?
Thank you for voting!
Wsher did not fill or run
Solved theprobel m by noticiing the HOT water filled the tub and it began to run when it was full. Figured out it was the solenoid valve. Ordered a new one. Simple to install and then it ran just fiine.
Parts Used:
-
James from Westwood, MA
-
Difficulty Level:Easy
-
Total Repair Time:30 - 60 mins
-
Tools:Nutdriver, Pliers, Screw drivers
0 of 1 people
found this instruction helpful.
Was this instruction helpful to you?
Thank you for voting!
water valve groaned and seemed to take forever to fill the tub
Washer is enclosed in a walled partition. I spent more time moving the washer out so I could get to the back of the machine. Due to Maytag's design of a removal sheet metal panel holding the valve the entire water valve replacement was performed outside of the machine. The replacement valve was an exact duplicate and made it a simple swap out. More time was spent removing inlet hoses and outlet hose then in actual valve replacement.
Parts Used:
-
Larry from Richmond, VA
-
Difficulty Level:Really Easy
-
Total Repair Time:30 - 60 mins
-
Tools:Pliers, Socket set
0 of 1 people
found this instruction helpful.
Was this instruction helpful to you?
Thank you for voting!
water would continue to drip after washer stopped.
Did the same as others. Loosened the three screws diconnected the wires and put them on the new valve. Disconnected fill hose and connected to new valve. 10-15 minutes. Replaced panel and tested new part. perfect, My repair was a little longer, I vaccumed up all the dust bunnies I could find before moving washer back. Good for another 35 years, I hope. Thanks for the help and experiences.
Parts Used:
-
vern from magnolia, TX
-
Difficulty Level:Easy
-
Total Repair Time:30 - 60 mins
-
Tools:Pliers, Screw drivers
0 of 1 people
found this instruction helpful.
Was this instruction helpful to you?
Thank you for voting!
Hot water only coming thru to washer as a drizzle
First turned off water and unplugged washer. Removed hoses and then removed bracket. The new part needed the bracket from the old mixer which was no problem - 3 screws. Removed electrical plugs from old mixer-placed on new one.No problems - worked like new. Thanks for your prompt shipment and the good illustrations of the parts when I was searching.. Also, half the price of local parts houses and it would still have to be ordered.
Parts Used:
-
william from maryland hgts, MO
-
Difficulty Level:Easy
-
Total Repair Time:30 - 60 mins
-
Tools:Pliers, Screw drivers
0 of 1 people
found this instruction helpful.
Was this instruction helpful to you?
Thank you for voting!
Cold water would not shut off, even after removing power.
Exactly as the video showed. This was a very simple repair. The only extra thing I did was to replace the mesh screen/gasket at the hose ends. They were plugged with crud. PartSelect saved me from buying a new washing machine. Yay!
Parts Used:
-
David from Belchertown, MA
-
Difficulty Level:Easy
-
Total Repair Time:Less than 15 mins
-
Tools:Screw drivers, Socket set
0 of 1 people
found this instruction helpful.
Was this instruction helpful to you?
Thank you for voting!
water coming in the wash tub when not in use
I took the hot and cold water hoses off with pliers.and then I took the one screw out towards the top of the water inlet valve plate.disconnected 4 wires,there is a small clamp on the small hose on the valve you have to remove.and last there is a cluster of wires that has to be removed from a bracket and (it is important to put these cluster of wires back in place otherwise they will wear a bare spot in them.)
Parts Used:
-
JEFF from FORT HILL, PA
-
Difficulty Level:Really Easy
-
Total Repair Time:Less than 15 mins
-
Tools:Nutdriver, Pliers
0 of 1 people
found this instruction helpful.
Was this instruction helpful to you?
Thank you for voting!
Slow fill using hot water
My experience with my repair is as follows:
After determining the "hot water" solenoid was weak and that a new fill valve was needed, I placed my order with PartSelect on Thursday and to my suprise, had it in my hand Friday evening (no special shipping). WOW talk about fast! But unfortunately the part was broken.
Called PartSelect back Saturday morn to explain my problem and was told that I would be credited for the broken part and that a replacement would be sent ASAP probably arriving on Wednesday. Again to my suprise, the part arrived on Tuesday morning.
Hats off to you guys for great service, prices and no hassles.
Dennis Fleming
North Billerica, MA
After determining the "hot water" solenoid was weak and that a new fill valve was needed, I placed my order with PartSelect on Thursday and to my suprise, had it in my hand Friday evening (no special shipping). WOW talk about fast! But unfortunately the part was broken.
Called PartSelect back Saturday morn to explain my problem and was told that I would be credited for the broken part and that a replacement would be sent ASAP probably arriving on Wednesday. Again to my suprise, the part arrived on Tuesday morning.
Hats off to you guys for great service, prices and no hassles.
Dennis Fleming
North Billerica, MA
Parts Used:
-
Dennis from North Billerica, MA
-
Difficulty Level:Easy
-
Total Repair Time:Less than 15 mins
-
Tools:Nutdriver, Pliers
0 of 1 people
found this instruction helpful.
Was this instruction helpful to you?
Thank you for voting!
water stopped flowing
pulled the front panel first, then lifted the top(2bolts in each).
Then unhooked water and unbolted the water inlet valve from the back left corner behind the tub.four wires are connected Pay attenion to where they go, for easy reinstallation.NOTE: watch the clips in the front of the washer they flew off and it took half an hour on the internet finding out how they went back on.
Then unhooked water and unbolted the water inlet valve from the back left corner behind the tub.four wires are connected Pay attenion to where they go, for easy reinstallation.NOTE: watch the clips in the front of the washer they flew off and it took half an hour on the internet finding out how they went back on.
Parts Used:
-
michael from Pearland, TX
-
Difficulty Level:Easy
-
Total Repair Time:Less than 15 mins
-
Tools:Nutdriver, Screw drivers
0 of 1 people
found this instruction helpful.
Was this instruction helpful to you?
Thank you for voting!