




















11027042600 Kenmore Washer - Instructions
Keep searches simple. Use keywords, e.g. "leaking", "pump", "broken" or "fit".
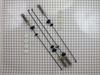
Thwe washer continually went off balance and displayed UL code
The instructions displayed the parts location and and some instruction. The top of the unit will release and pivot up after the two catches at the front are presed in at the front seam. The catches are located about 6 inches in from the sides. Before lifting the top though you should secure the lid to the top. I used some masking tape. Pivot the top up and brace the top to prevent it from falling back too far or forward over your work access. I leaned the top back against the wall behind the washer. Once the top was secure I began by lifting one conner of the tub assembly so that a corner dampner assembly could be removed. The top of the dampener assembly has a loop which grabes the plastic cup at the top frame of the washer. Lift the tub assembly (about 30lbs) on one corner and as the hook becomes free rotate the plastic cup to disengage the hook from the cup. To make it easier to work inside the washer frame I used the bar clamp to hold the tub asembly to one side so that I could reach along the damper assembly to pop loose the top retainer at the tub by pushing down with a screwdriver. Once the dampener assembly was loose it can be removed and the new one inserted in its place. I repeated these steps for each dampener and was done in about 30 minutes. You may want to note there is a wire clip on the right rear dampener and this was easily removed and reinstalled on the new assembly.
Parts Used:
-
Richard from Dallas, TX
-
Difficulty Level:Really Easy
-
Total Repair Time:15 - 30 mins
-
Tools:Screw drivers
Was this instruction helpful to you?
Thank you for voting!
Lid lock not engaging.
Unplug washer. Use scraper to depress spring steel catches under top cover of cabinet. Raise and support cover. Remove lock mechanism from cover using nut driver and remove switch and cable from spring tension clips. The last cable stay is zip tie/plug; pry it from hole in cover. Don't worry about saving this cable stay as the new switch has one pre installed. Before lowering cover place an object such as a rolled up towel over the cabinet spring catches to prevent engagement. Then lower cover. Locate two screw on back of control panel and remove with nut driver. Just below control panel on back side of cabinet is a single screw securing a small cover plate. Remove screw and plate. Lift control panel and turn it over. Locate plug for the latch switch and disconnect it. Then set control panel back in place. Raise and support top of washer again and pull faulty switch and cable assembly from washer. Attach new switch assembly to top cover and place cable into spring clip and insert plastic cable stay into hole. Route the connector through the opening the faulty one was pulled from. You may now close the top of the washer. Lift and turn over control panel connect new switch plug and set control panel back in place. Replace screws on back of panel and the small cover and screw. Plug washer power cord in and you should be done.
Parts Used:

-
George E from Lakeland, GA
-
Difficulty Level:Really Easy
-
Total Repair Time:15 - 30 mins
-
Tools:Nutdriver
Was this instruction helpful to you?
Thank you for voting!
Washer was noisy and had a lot of movement
The rod kit fixed the issue. I cant really explain how I did it, because I dint know if I did it the right way.
Parts Used:
-
Shawn from Indio, CA
-
Difficulty Level:Difficult
-
Total Repair Time:30 - 60 mins
-
Tools:Nutdriver, Screw drivers, Socket set
Was this instruction helpful to you?
Thank you for voting!
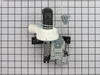
Won't drain the water
-
Jose from Verobeach, FL
-
Difficulty Level:A Bit Difficult
-
Total Repair Time:30 - 60 mins
-
Tools:Pliers, Socket set, Wrench set
Was this instruction helpful to you?
Thank you for voting!
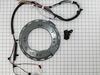
washing machine showed F50 code
I watched a video on how to do it.it wasn't very difficult the hardest part was getting the machine out of the laundry room and laying it over
Parts Used:
-
david from knoxville, TN
-
Difficulty Level:A Bit Difficult
-
Total Repair Time:30 - 60 mins
-
Tools:Pliers, Socket set
Was this instruction helpful to you?
Thank you for voting!
Broken retainer
How did I repair? I opened the box removed the part, handed it to my wife with a 1/2" nut driver and she installed it in 1 min.
Parts Used:

-
Mike from castlewood, VA
-
Difficulty Level:Really Easy
-
Total Repair Time:Less than 15 mins
-
Tools:Socket set
Was this instruction helpful to you?
Thank you for voting!
Replace a seal

-
Janet from Colfax, WI
-
Difficulty Level:Really Easy
-
Total Repair Time:Less than 15 mins
Was this instruction helpful to you?
Thank you for voting!
Old hinge broke, door did not open and close right.
I removed the screws from old hinge that had broke. The piece came right out with ease. I slid the new hinge in to the hole that it went in. No struggles with ease. Lined up the screw holes and put the screws back in. Finished! Works like a charm.
Parts Used:

-
tntsplace.com from MCALLEN, TX
-
Difficulty Level:Really Easy
-
Total Repair Time:Less than 15 mins
-
Tools:Screw drivers
Was this instruction helpful to you?
Thank you for voting!
The seal was broken on the agitator cap barrier
Removed the fabric softner at the top of the agitator (needed a screw driver to pry it loose) and reached in to grab the barrier with my hand and pulled it out, very simple to do.When I put the new one in I put some liquid soap on the gasket and it snapped right into place.Very easy to do, all is well now, thanks Part Select.
Parts Used:

-
Ralph from New Milford, NJ
-
Difficulty Level:Really Easy
-
Total Repair Time:Less than 15 mins
-
Tools:Screw drivers
Was this instruction helpful to you?
Thank you for voting!
Hinge pins were sheared off
I removed the screws holding the broken hinges and put the new hinges on. It only took a few minutes.
Parts Used:

-
James from Carrollton, TX
-
Difficulty Level:Really Easy
-
Total Repair Time:Less than 15 mins
-
Tools:Screw drivers
Was this instruction helpful to you?
Thank you for voting!
washer would not drain water
need to get washer turned on side where you can work underneath the machine. This job is alot easy if you get where you can see good and have plenty of room to work. You have to unhoook the wire from the old pump and then take the two mounting screws off from there you unhook each hose by squeezing clamp together and sliding backwards away from pump. A pair of needle nose pliers can make this process easier if the clamps are turned in an hard to get to position. You mount the new pump the same way as taking off the damaged pump. Take a screwdriver to help you slide the clamps up onto the new pump makeing sure the sleeves are completely over the new pump fittings and the clamps are slid up evenly, so you want have any leaks. Then replaces wiring harness and mounting screws.
Parts Used:
-
Jacob from Glennville, GA
-
Difficulty Level:Easy
-
Total Repair Time:Less than 15 mins
-
Tools:Nutdriver, Pliers
Was this instruction helpful to you?
Thank you for voting!
broken seal
-
Lorraine from Millsboro, DE
-
Difficulty Level:Easy
-
Total Repair Time:Less than 15 mins
-
Tools:Screw drivers
Was this instruction helpful to you?
Thank you for voting!
replaced leaking pump
Easy repair. Went to You Tube and saw PartSelect video. The best instructions...should make a link from parts page to video of install. Also replaced Heat element on Dryer. Watched video first.
Parts Used:
-
richard from asheville, NC
-
Difficulty Level:Easy
-
Total Repair Time:Less than 15 mins
-
Tools:Nutdriver, Pliers
Was this instruction helpful to you?
Thank you for voting!
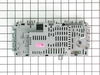
washer wouldn't go in the spin cycle-
Pulled washer from back of wall and disconnected power source. I removed three screws in back that houses the ol motor control board. Also, I had to pull the front control knob off so that I could lift the cover to expose control board. I took several pictures of the motor control board before unplugging the wires just in case I forgot where the wires needed to go. Very simple process and had machine working within 15 minutes.
Parts Used:
-
william from germantown, TN
-
Difficulty Level:Easy
-
Total Repair Time:Less than 15 mins
-
Tools:Nutdriver
Was this instruction helpful to you?
Thank you for voting!
Lots of gunk between fabric softener dispenser and where it attaches to the agitator
Rubber O ring around the Inner Cap was rotted and busted through. Replaced with new Inner Cap Seal. Easy as pie!
Parts Used:
-
Gregory from Sandy Springs, GA
-
Difficulty Level:Really Easy
-
Total Repair Time:Less than 15 mins
Was this instruction helpful to you?
Thank you for voting!