




















1068480110 Kenmore Refrigerator - Instructions
Keep searches simple. Use keywords, e.g. "leaking", "pump", "broken" or "fit".
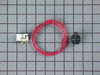
change relay
-
Robert from Boxborough, MA
-
Difficulty Level:Easy
-
Total Repair Time:15 - 30 mins
-
Tools:Screw drivers
3 of 12 people
found this instruction helpful.
Was this instruction helpful to you?
Thank you for voting!
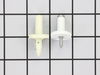
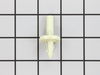
Broken shelf support studs
Took a while to determine how the broken studs were attached. Guessed correct rotation. New ones went in easy.
Parts Used:
-
Ken from Lawndale, CA
-
Difficulty Level:Easy
-
Total Repair Time:15 - 30 mins
-
Tools:Pliers
2 of 9 people
found this instruction helpful.
Was this instruction helpful to you?
Thank you for voting!
Starting relay went out
Forty years ago I serviced air conditioners and all kinds of refrigeration. At that time starting relays were electro mechanical, I hadn’t looked under a refrigerator in a lot of years and was surprised to find out that the new relays were solid state. The defective one had a bunch of broken pieces floating around in the case. I jury rigged a starting cord and confirmed that the compressor would start and looked at running current for thirty or so seconds. I ordered a new relay kit and it worked just right. I’m seventy five years old and it takes me longer to get up off the floor than it took to replace the parts. Your delivery was first rate the parts got here before I finished doing the paint touch-up on the door under the ice maker/water dispenser. Fed ex was easily three to five days faster than the brown truck.
Parts Used:
-
George from Conroe, TX
-
Difficulty Level:Really Easy
-
Total Repair Time:30 - 60 mins
-
Tools:Pliers, Screw drivers
5 of 18 people
found this instruction helpful.
Was this instruction helpful to you?
Thank you for voting!
Freezer not cooling.
Followed the video, very helpful! Basically a walk in the park.
Parts Used:

-
David from Ringwood, IL
-
Difficulty Level:Easy
-
Total Repair Time:15 - 30 mins
-
Tools:Nutdriver, Screw drivers
Was this instruction helpful to you?
Thank you for voting!
Temperature on refrigerator side was unstable. I was adjusting the thermostate control (center knob) frequently.
I followed the instructions shown in the on-line video for replacing the thermostate control. I had difficulty freeing the capilary tube from around the mechanical lever that controls the freezer side vent opening. I had to remove a screw that held the vent lever in place. This is a delicate activity. I was not happy with the way the on-line video delt with this particular issue. Otherwise, the video was right on and straight forward. The problem is fixed.
Parts Used:
-
L from Friendswood, TX
-
Difficulty Level:A Bit Difficult
-
Total Repair Time:30 - 60 mins
-
Tools:Nutdriver, Pliers, Screw drivers
Was this instruction helpful to you?
Thank you for voting!
The freezer would go ibto defrost mode and not cycle into freeze mode.
un-plug the power cord. remove both control knobs. pry off the cover. remove 1 screw on the right and left with the nut driver. remove two screws in back with the nut driver. remove the screw holding thermostat in place, loosen screw holding the left side of the l plate. lift thermostat up and remove two nut driver screws. remove the temperature sensing line from holding device. Remove cover down the side of refrigerator and the cover over the sensor (in back corner) carefully remove the sensor line. Carefully bend the sensor tube into the shape of the removed part(do not kink)install the new part in the reverse order of removing.. Use flat blade screw driver to press sensor line into the snaps. This was one of the easiest repairs I have ever completed.
Parts Used:
-
Charles from Georgetown, TX
-
Difficulty Level:Easy
-
Total Repair Time:30 - 60 mins
-
Tools:Nutdriver, Pliers, Screw drivers
Was this instruction helpful to you?
Thank you for voting!
Thermostate would either Stick "ON" or "OFF"
Unplugged Refer...Cleared top shelf...removed screws/covers to expose thermostate and capilary tube...removed old thermostate takeing care to notice how Capilary tube was routed and electrical connection were made (wire color coding)...removed sheath on old capilary tube and installed on new, always making sure to not "kink" tubing...installed new part just as the old one was...plugged refer back in and enjoyed trouble free operation.
Parts Used:
-
Richard from Sunnyside, WA
-
Difficulty Level:Really Easy
-
Total Repair Time:30 - 60 mins
-
Tools:Nutdriver, Pliers, Screw drivers
Was this instruction helpful to you?
Thank you for voting!
Refrigerator would stop running but when touched it would run again
1. Unplug the electric plug. 2 Either be in a well lighted place or get a flashlite. 3. Remove all food from top shelf. 4. Remove the knobs from both controls by pulling on them or use pliers to grab the center and pull. 5. Use the thin bladed knife and gently slip the knife under the thin plastic panel that covers the two controls and pop it off. 6.Go in back of the control panel and remove the two hex headed screws that holds the panel onto the roof of the refrigerator.7. Locate the right hand control, and use a philips screw driver to remove two philips screws that hold the temperature control body in place. and remove the wires from the terminals by pulling them with a long nose pliers.8. Locate the white panels that cover the thermostat sensor and remove the screws holding them onto the frig body. slip the long thin tube out of the plastic piece it is formed to fit.9.Draw on paper the shape and measure the deminsions,of the long thin tube. Straighten out the tube and remove the plastic covering it. Now slip that tubing over the new piece.10. Form the tubing into the odd shaped holder and gently place all of the new asssembly against the frig wall and cover with the two white panels that you removed to get to the long sensor tube. 11. Reassemble the controls in the same order you took it apart. Plug the frig back in to the electricity and set the control on 5 and it should run. Watch for a period to hear the unit cycle on and off. You are a genius and have saved at least 150 dollars.
Parts Used:
-
Wilton from Huntley, IL
-
Difficulty Level:Easy
-
Total Repair Time:30 - 60 mins
-
Tools:Screw drivers
Was this instruction helpful to you?
Thank you for voting!
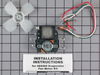
Intermitant squealing noise from freezer area.
I basically followed the step-by-step instructions at the parts order website. I removed the shelves and rear panels to access the fan. I noted the color coding on the wires and terminals, removed the two retainer screws, removed the old fan from the mounting bracket, installed the new fan using the rubber anti-vibration mounts, pressed-on the fan to the center drive shaft and re-installed the assembly to the back wall. I simply replaced the rear panels and shelves and plugged in the fridge. The only issue I had was the distance needed to press on the fan blade to preclude fan noise, which I found by trial and error, before re-installing the panels.
Parts Used:
-
Harry from Torrance, CA
-
Difficulty Level:Easy
-
Total Repair Time:15 - 30 mins
-
Tools:Nutdriver, Screw drivers
Was this instruction helpful to you?
Thank you for voting!
fresh food side not getting cold
I wasnt about to call Mr Appliance of Bayport NY the last time I called him I got a bill for $72.00 and he told me I needed a new frig. So I paid him then the next day I went to parts select and fixed it myself for about $50.00 But this time it was my Moms frig and the frig side (fresh food side) wasnt getting cold So again I went to parts select and put in a bimetel thermostat and it works perfect now. Im sure I saved a lot of $ and thanks to parts select, They helped me diagnose the problem and make the repair step by step! EASY! Thanks parts select...Garry from long island NY
Parts Used:

-
Garry from Sayville, NY
-
Difficulty Level:Really Easy
-
Total Repair Time:15 - 30 mins
-
Tools:Nutdriver
Was this instruction helpful to you?
Thank you for voting!
refrigerator would not run
The Sears man came out and told me it was the thermostat that needed to be replaced and it would cost $321 plus tax. I went on youtube and watched the Partselect video several times and decided to order the part after seeing how easy it was to install. Total cost $65. I put the laptop on the counter and watched it as I installed it. It helped that I could go back and watch a certain part if there was a problem. But I had no problems and installed it in 20 minutes. Very, very simple to do. Of course I had to pay $75 to the Sears man but I saved about $200 . Thanks Partselect.
Parts Used:
-
william from charlotte, NC
-
Difficulty Level:Really Easy
-
Total Repair Time:15 - 30 mins
-
Tools:Nutdriver, Pliers, Screw drivers
Was this instruction helpful to you?
Thank you for voting!
refer not getting cold
-
richard from WYANDOTTE, MI
-
Difficulty Level:Easy
-
Total Repair Time:15 - 30 mins
-
Tools:Nutdriver, Screw drivers
Was this instruction helpful to you?
Thank you for voting!
Replacethermostat
Simply follow the video instructions. Involves the removal of nine screws. to remove the old plastic sleeve cut the tube near the old thermostat and it slides of easily. Apply dish or hand washing soup to the new tube when putting the plastic sleeve onto the new probe. The hardest part is getting the end of the probe coiled to the right shape. Hey,` if I can do it with a broken collar bone, anybody should be able to do it.
Parts Used:
-
ron from Kent, WA
-
Difficulty Level:Really Easy
-
Total Repair Time:15 - 30 mins
-
Tools:Nutdriver, Screw drivers
Was this instruction helpful to you?
Thank you for voting!
Fridge stops cooling
Fridge would stop cooling, get way over temperature. I noticed it would start up again if I tapped near the thermostat. It would run for a while then stop again. Replaced the thermostat exactly as shown in video. Fridge works fine now.
Parts Used:
-
Daniel from Austin, TX
-
Difficulty Level:Easy
-
Total Repair Time:15 - 30 mins
-
Tools:Nutdriver, Screw drivers
Was this instruction helpful to you?
Thank you for voting!
The refrigerator would run but would not always come back on after de-frost mode.
I watched the installation video on "Parts Select". Unfortunately I watched it twice b/c the first part ordered last October only lasted 4 months. This part seems to be alright as the refrigerator has been running for approximately 6 days now - so far so good.
Parts Used:
-
Larry from Burkeville, TX
-
Difficulty Level:Really Easy
-
Total Repair Time:15 - 30 mins
-
Tools:Nutdriver, Screw drivers
Was this instruction helpful to you?
Thank you for voting!