




















ZREW3886RS0 Whirlpool Range - Instructions
Keep searches simple. Use keywords, e.g. "leaking", "pump", "broken" or "fit".
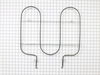
Broiler element failed
Slide range out,unplug range,remove rear cover to unplug element wires, open door remove screws inside oven remove element
Parts Used:
-
steven from SEDRO WOOLLEY, WA
-
Difficulty Level:Very Easy
-
Total Repair Time:15 - 30 mins
-
Tools:Screw drivers
9 of 10 people
found this instruction helpful.
Was this instruction helpful to you?
Thank you for voting!
DOOR HINGE BROKEN, NOT SUPPORTING DOOR
Followed youtube instructions: lifted clips on door hinges, removed door. removed screws, removed rear cover, replaced right hinge. reassembled door. caution: door handle will fall off when top two screws are removed. Alignment of screws is some what difficult, requires awl.
Replace door, return locking clips to forward position, check door for operation.
Replace door, return locking clips to forward position, check door for operation.
Parts Used:
-
Charles from PAYETTE, ID
-
Difficulty Level:A Bit Difficult
-
Total Repair Time:30 - 60 mins
-
Tools:Screw drivers
9 of 14 people
found this instruction helpful.
Was this instruction helpful to you?
Thank you for voting!
Bad element replacement
Took off top and pulled out old element and plugged in the new one
Parts Used:

-
Thomas from Warren, CT
-
Difficulty Level:Easy
-
Total Repair Time:30 - 60 mins
-
Tools:Pliers, Screw drivers, Socket set
9 of 17 people
found this instruction helpful.
Was this instruction helpful to you?
Thank you for voting!
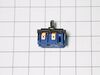
Bard burner switch
Removed rear panel disconnect power from wall removed old switch and replaced with new switch and reassembled
Parts Used:
-
Edward from KISSIMMEE, FL
-
Difficulty Level:Easy
-
Total Repair Time:1- 2 hours
-
Tools:Nutdriver, Screw drivers
5 of 6 people
found this instruction helpful.
Was this instruction helpful to you?
Thank you for voting!
The burner would operate at full power even with set to low.
The repair was successful. I know the dual element burner was good because it operated at full heat. After installing the dual element control switch, the burner was operating as expected with no further issues. After the back was removed, the dual element control switch was easy to access. After removal of the two Philips screws (and the knob), it's easy to pull out the switch to pry off the two cable harnesses (which are keyed). Removal of the cable harnesses was the hardest part because they come off very hard. I used a flat blade screwdriver to help pry off the harness. Installation of the new dual element control switch was very fast/easy, along with the back cover.
Parts Used:
-
Lance from West Salem, WI
-
Difficulty Level:Really Easy
-
Total Repair Time:15 - 30 mins
-
Tools:Pliers, Screw drivers
4 of 4 people
found this instruction helpful.
Was this instruction helpful to you?
Thank you for voting!
Broiler element not working
It went great. I am not very handy, but with a little help from your website reviews, I was able to easily remove the old broiler element and replace it with the new one in less than an hour. I immediately tested it and found that it worked great.
Parts Used:
-
Normand from Lincoln, RI
-
Difficulty Level:Easy
-
Total Repair Time:30 - 60 mins
-
Tools:Screw drivers
6 of 11 people
found this instruction helpful.
Was this instruction helpful to you?
Thank you for voting!
My drawer did not line up
Putting the drawer glides on was easy. My range drawer did not have any glides on so my drawer would fall out. The drawer glides popped right on the drawer. The glides for the track were easy to screw into the body of the range. I had to bend the tracks up a little on each side with a pair of pliers. One glide would go onto the track and the other one would go on top of the track. After bending them a little I was able to push them onto the track.at the same time.
Parts Used:
-
Angel from SN BERNRDNO, CA
-
Difficulty Level:A Bit Difficult
-
Total Repair Time:15 - 30 mins
-
Tools:Pliers, Screw drivers
4 of 5 people
found this instruction helpful.
Was this instruction helpful to you?
Thank you for voting!
The hinge was mounted on the right . The screw to remove it got it's square head chewed up because of using the wrong ssize driver
I left the old broken hinge in place, & put the new hinge on the left side.
Parts Used:
-
Howard from CROWNSVILLE, MD
-
Difficulty Level:Really Easy
-
Total Repair Time:30 - 60 mins
-
Tools:Screw drivers
3 of 3 people
found this instruction helpful.
Was this instruction helpful to you?
Thank you for voting!
The door wouldn't close.
Watched a video on you tube!
When I ordered the hinge it was recomended to replace both hinges. so I ordered two hinges not knowing that one of the hinges didn't have a spring. I ended up with an extra hinge.
When I ordered the hinge it was recomended to replace both hinges. so I ordered two hinges not knowing that one of the hinges didn't have a spring. I ended up with an extra hinge.
Parts Used:
-
Dorothy from PORT ST LUCIE, FL
-
Difficulty Level:A Bit Difficult
-
Total Repair Time:More than 2 hours
-
Tools:Screw drivers
3 of 3 people
found this instruction helpful.
Was this instruction helpful to you?
Thank you for voting!
The oven light shorted out causing the safety thermostat to blow.
Replaced the safety thermostat and disconnected the oven light.
Works great again...without the light
Works great again...without the light
Parts Used:

-
Joseph K from PAHRUMP, NV
-
Difficulty Level:Very Easy
-
Total Repair Time:15 - 30 mins
-
Tools:Pliers, Screw drivers
4 of 6 people
found this instruction helpful.
Was this instruction helpful to you?
Thank you for voting!
Burned out heating element.
I watched the video you provide and it answered all my questions. You estimate repair at 10 minutes. My wife said I waz done in under 10 minutes Watch the video, it explained every step and all the little tricks to the snap connections.
Parts Used:
-
Kenneth from AUBURNDALE, FL
-
Difficulty Level:Very Easy
-
Total Repair Time:Less than 15 mins
-
Tools:Pliers, Screw drivers
3 of 3 people
found this instruction helpful.
Was this instruction helpful to you?
Thank you for voting!
Broken spring hinge
the door came apart fairly easy getting it all back together was another story lining up glass and panels that have already been heated was fun but its back together and working fine.... It should be noted that I have a warranty for the stove but the hoops I had to jump thru and the time it would take for the tech to come it was easier to do it myself!!
Parts Used:
-
Ralph from TEATICKET, MA
-
Difficulty Level:Difficult
-
Total Repair Time:1- 2 hours
-
Tools:Screw drivers
3 of 4 people
found this instruction helpful.
Was this instruction helpful to you?
Thank you for voting!
Busted door hinge
Wrestled with it for ten minutes and then watched a youtube video on how to set the locks on the oven door hinges in order for the door to be installed. The video was instrumental
Parts Used:
-
Robert from DEERING, NH
-
Difficulty Level:A Bit Difficult
-
Total Repair Time:15 - 30 mins
-
Tools:Screw drivers
3 of 4 people
found this instruction helpful.
Was this instruction helpful to you?
Thank you for voting!
Oven door hinge spring was broken and made the door heavy to open and close
I took the door off the oven frame by releasing the hinge latches and lifting and pulling the door outward to remove it . Then I removed the glass outer cover by taking off the philips screws and then unscrewed the door hinges . I then reversed the order to replace it .
Parts Used:
-
Joseph from KENT, OH
-
Difficulty Level:Really Easy
-
Total Repair Time:30 - 60 mins
-
Tools:Screw drivers
3 of 4 people
found this instruction helpful.
Was this instruction helpful to you?
Thank you for voting!
The Range took forever to achieve the proper heating temperature with an inability to maintain a steady heat
I removed the bottom drawer,unplugged the Range and pulled it out to expose the rear cover panel. Using a nut driver (a screw driver can be used), I removed the rear panel to expose the Thermal fuse located almost dead center in the back of the Range. Unplug the two wires and loosen the screw holding it in position. Replace the thermal fuse, plug the two wires into the new part and replace the rear cover panel. Return the Range to its original position and plug it in. The job is done in less than 30 minutes.
Parts Used:
-
Robert from Mifflinburg, PA
-
Difficulty Level:Really Easy
-
Total Repair Time:15 - 30 mins
-
Tools:Nutdriver
3 of 4 people
found this instruction helpful.
Was this instruction helpful to you?
Thank you for voting!