




















ZFGP21HZJSS General Electric Refrigerator - Instructions
Keep searches simple. Use keywords, e.g. "leaking", "pump", "broken" or "fit".
Broken light switch
This was so easy I think it took me 2 minutes. I am not very mechanically inclined but that didn't matter! Works perfect thank you!
Parts Used:

-
Deborah from BRADLEYVILLE, MO
-
Difficulty Level:Very Easy
-
Total Repair Time:Less than 15 mins
-
Tools:Pliers, Screw drivers
1 person
found this instruction helpful.
Was this instruction helpful to you?
Thank you for voting!
Refrigerator not getting cold
-
Dan from COLUMBIA, SC
-
Difficulty Level:Really Easy
-
Total Repair Time:15 - 30 mins
-
Tools:Pliers, Socket set
1 person
found this instruction helpful.
Was this instruction helpful to you?
Thank you for voting!
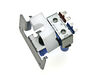
Water running out of ice cube maker
After turning the water off, I removed the silver covering located on the left side bottom. The valve was connected to the frame on the left side. I removed the defective valve and replaced it with the new one. Everything was color coded and the hoses were different sizes, making it impossible to screw up. It was over so fast I thought I made a mistake.
Parts Used:
-
Glenn from Pembroke, NH
-
Difficulty Level:Really Easy
-
Total Repair Time:15 - 30 mins
-
Tools:Pliers
1 person
found this instruction helpful.
Was this instruction helpful to you?
Thank you for voting!
Opend freezer door and found ice everywhere from dripping ice maker. Even with power unplugged water was still leaking through so I determined it must be the water valve at the back of the fridge that had failed.
Unplugged fridge. Shut off the water supply valve under sink. Removed lower access panel at back of the refrigerator (six screws). Removed single green screw holding water valve bracket and pulled assembly out to access wiring and hoses. It is a dual valve as one valve is for the water dispenser and one is for the ice maker. Disconnected the 2 electrical connectors (one for each valve). Unscrewed the compression fitting for the water inlet with 1/2 " wrench. Then the two water lines on the outlet which are quick disconnects. You must push the ring towards the valve and then the tubing can be pulled out by hand.
Reattach everything to the new valve and install and its ready to use.
Reattach everything to the new valve and install and its ready to use.
Parts Used:
-
Doug from Madison, WI
-
Difficulty Level:Easy
-
Total Repair Time:30 - 60 mins
-
Tools:Socket set, Wrench (Adjustable)
1 person
found this instruction helpful.
Was this instruction helpful to you?
Thank you for voting!
My water hose broke, the valve is 1 use.
1. remove back shield of fridge.
2. unscrew old valve.
3. remove electrical connections.
4. remove white inserts on new valve.
5. cut feed hoses next to old valve.
6. place white inserts on hoses.
7 insert hoses into recepticals on new valve.
8 shut off water supply to fridge.
9. remove water suply line from old valve.
10. attach water supply line to new valve.
11. connect electrical connections.
12. bolt valve back on to fridge
13. turn on water supply to fridge
14. test both ice maker and water dispensor
15. replace back shield to fridge
2. unscrew old valve.
3. remove electrical connections.
4. remove white inserts on new valve.
5. cut feed hoses next to old valve.
6. place white inserts on hoses.
7 insert hoses into recepticals on new valve.
8 shut off water supply to fridge.
9. remove water suply line from old valve.
10. attach water supply line to new valve.
11. connect electrical connections.
12. bolt valve back on to fridge
13. turn on water supply to fridge
14. test both ice maker and water dispensor
15. replace back shield to fridge
Parts Used:
-
Alan from Ruther Glen, VA
-
Difficulty Level:Really Easy
-
Total Repair Time:Less than 15 mins
-
Tools:Nutdriver, Wrench set
2 of 4 people
found this instruction helpful.
Was this instruction helpful to you?
Thank you for voting!
Light burnt out.
Turned the wire protector to the side. Turned out the old bulb and replaced it with the new. Turned the wire protector back in place and I'm like new.
Parts Used:

-
Roscoe G from ROCHESTER, NY
-
Difficulty Level:Very Easy
-
Total Repair Time:Less than 15 mins
2 of 4 people
found this instruction helpful.
Was this instruction helpful to you?
Thank you for voting!
Water dispenser would not stop leaking on the unit.
First, turn off main water valve. Then, at the rear of refrigerator remove the rear panel exposing the water valve assembly. Cautiously, proceed by disconnecting the water hose and electrical connections. To complete the task, just worked in the reverse steps to exchange the faulty equipment.
Parts Used:
-
Gratnie from Newport News, VA
-
Difficulty Level:Really Easy
-
Total Repair Time:15 - 30 mins
-
Tools:Nutdriver, Screw drivers, Wrench (Adjustable)
1 person
found this instruction helpful.
Was this instruction helpful to you?
Thank you for voting!
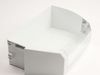
my shelf broke
-
Sheri from POCATELLO, ID
-
Difficulty Level:Very Easy
-
Total Repair Time:Less than 15 mins
1 person
found this instruction helpful.
Was this instruction helpful to you?
Thank you for voting!
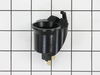
Fridge light dead even with new bulb
1- youtubed the potential diagnoses, 2- resourced and ordered parts, 3- removed old socket, installed new one :-)... My fridge is an older fridge and could've used a screwdriver for eyeglasses. Plug and play easy... YAY!
Parts Used:
-
marj from NEWBURY PARK, CA
-
Difficulty Level:Really Easy
-
Total Repair Time:15 - 30 mins
-
Tools:Screw drivers
1 person
found this instruction helpful.
Was this instruction helpful to you?
Thank you for voting!
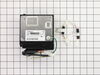
Refrigerator not cooling
1.Google troubleshooting for this issue. Determine the inverter card was bad. Installed new card and correct jumper harness per instructions. Total time to troubleshoot, remove & replace was about 30_45 min. Pretty simple
Parts Used:
-
Donald from Miamisburg, OH
-
Difficulty Level:Really Easy
-
Total Repair Time:15 - 30 mins
-
Tools:Nutdriver, Pliers, Screw drivers
1 person
found this instruction helpful.
Was this instruction helpful to you?
Thank you for voting!
Plugged water line reservoir
Turned water supply off; pressed dispenser sw to release presure ; cut tubing holding reservoir ; nuit driver to release screw holding reservoir and pulled out ; took outside and used hose nozzle to try to clear; did not clear at first then took weedeater string and disloged something and water flowed freely; turned out had to change waer solenoid valve (both) as the one for the water dispener was also plugged which did not show up before.
P.S. Had back flow water thru system before and changes of parts. Water flowed freely.
P.S. Had back flow water thru system before and changes of parts. Water flowed freely.
Parts Used:
-
Lary J from Destrehan, LA
-
Difficulty Level:Easy
-
Total Repair Time:15 - 30 mins
-
Tools:Nutdriver
1 person
found this instruction helpful.
Was this instruction helpful to you?
Thank you for voting!
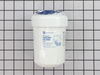
Bad tasting ice cubes
Took the old filter out and put the new one in.
Easy Breezy!!
Easy Breezy!!
Parts Used:
-
susan from hartford, WI
-
Difficulty Level:Really Easy
-
Total Repair Time:15 - 30 mins
2 of 4 people
found this instruction helpful.
Was this instruction helpful to you?
Thank you for voting!
No Water from dispenser
I changed the filter first as this has happened before when the filter got too old. Still did not work, so ordered the double outlet water valve as the ice dispenser was working. The part was easy to install with the video directions. However, water still did not dispense. Felt the water coil behind the crisper in the refrigerator and it seemed kind of hard. I wondered if it was frozen. Took a hair dryer to it for about 45 seconds and then tried the water again. Voila' This time it worked. Apparently it WAS frozen. I may have not needed to change the filter or water valve, but everything is working fine so I will leave well enough alone.
Parts Used:
-
JOHN from FARMINGTON, NM
-
Difficulty Level:Easy
-
Total Repair Time:15 - 30 mins
-
Tools:Nutdriver, Wrench (Adjustable)
2 of 4 people
found this instruction helpful.
Was this instruction helpful to you?
Thank you for voting!
light switch freezer door
put the gratefruit knife behind the old switch pooped it out pluged the new one in piece of cake 5min.even vacumed the dust off the coil
Parts Used:
-
Sumlorq from Cleveland, OH
-
Difficulty Level:Really Easy
-
Total Repair Time:Less than 15 mins
3 of 7 people
found this instruction helpful.
Was this instruction helpful to you?
Thank you for voting!
Light would stay on when door closed
Extremely easy repair, the hardest part was getting the old switch out. I used a pair of needle nose pliers to squeeze the tabs in and it came right out.
Parts Used:
-
James from Glendale Heights, IL
-
Difficulty Level:Really Easy
-
Total Repair Time:Less than 15 mins
-
Tools:Nutdriver, Pliers
3 of 7 people
found this instruction helpful.
Was this instruction helpful to you?
Thank you for voting!