




















ZFGP21HZJSS General Electric Refrigerator - Instructions
Keep searches simple. Use keywords, e.g. "leaking", "pump", "broken" or "fit".
brand new ge refrigerator delivered with broken access cover. cost 6.95 so i repaced it myself.
-
Gerald from Shelton, CT
-
Difficulty Level:Really Easy
-
Total Repair Time:Less than 15 mins
-
Tools:Nutdriver
4 of 9 people
found this instruction helpful.
Was this instruction helpful to you?
Thank you for voting!
Water dispenser inoperative
Replaced Double Outlet Water Valve then defrosted coiled plastic water tubing at bottom position inside refrigerator into pan of hot water for 10 minutes. Water still did not flow. Defrosted refrigerator and water dispenser immediately resumed operation. Suggestion -
defrost refrigerator first.
defrost refrigerator first.
Parts Used:
-
Gregory from The Villages, FL
-
Difficulty Level:Really Easy
-
Total Repair Time:1- 2 hours
-
Tools:Nutdriver
2 of 3 people
found this instruction helpful.
Was this instruction helpful to you?
Thank you for voting!
Defroster fan burned up
First I removed the ice tray rack lifting it out of the way to reach the back cover of the fan. Then, the whole back inside panel had to be removed. Two screws removed the fan and bracket from the freezer unit. The missing bumper lid just snapped into place. Replaced everything in reverse order. Pretty easy job.
Parts Used:

-
Peter M. from Lincoln Park, NJ
-
Difficulty Level:Easy
-
Total Repair Time:30 - 60 mins
-
Tools:Nutdriver, Pliers, Screw drivers, Socket set
3 of 6 people
found this instruction helpful.
Was this instruction helpful to you?
Thank you for voting!
water leak from water line and value housing
Unplugged unit. Removed back cover plate. Used 5/16 water line. Cut old broken line. Used water tube union and attached new line. Removed electrical contacts. Note very easy removeand replace the red and white hookups. Next remove water line at the old vale with1/2 wrench. Hook up water line to new valve. Icemaker line was not damaged so I removed from old valve and trimmed the end. Really installed line to valve. Plugged in fridge and turned water supply back on. Check for leaks. Had trouble locatingthe 5/16 water line but found bulk. PARTS SELECT had the guest connector and the replacement valve. I received the correct parts and saved me $$$$. Plus my wife happy right before the holidays! !!,
Parts Used:
-
Joseph from Stewartsville, NJ
-
Difficulty Level:Easy
-
Total Repair Time:30 - 60 mins
-
Tools:Wrench set
2 of 3 people
found this instruction helpful.
Was this instruction helpful to you?
Thank you for voting!
Replace water filter with bypass plug - filter is redundant with home osmosis system
If you have a reverse osmosis system for filtered water system in your home that also feeds the refrigerator, using another water filter in the refrigerator is redundant, so GE makes a Water filter Bypass Cap that allows you to run using the already filtered water without needing to expensive water filter. FIRST - using a phillips screw driver remove the toe kick plate at the bottom front of the refrigerator - two screws - one on each side of the plate that extends the entire width of the refrigerator. SECOND - Locate the water line (should be right in front) and the valve to turn off the water. Turn valve clockwise (right) until completely closed. Then test by attempting to fill a glass with water using the dispenser on the door. If any water continues to come out, continue turning the valve (without forcing it) clockwise until it has been turned as much as possible. If water still comes from dispenser, locate the source of the water line - most likely from under the kitchen sink. There should be another valve under the sink, or simply turn off (turn the cold water valve clockwise) until water cold water completely turned off. Test again as required. THIRD - clear the top right hand back shelf directly under the water filter screwed into the ceiling of the refrigerator in the rear top right side of the refrigerator. Place a small towel under the water filter, and slowly turn the filter 1/4 turn clockwise without using force. Continue turning until the full 1/4 turn is complete and the filter will drop down without pulling. Place the old filter upside down in the sink, thereby allowing the filter to drain any water present in the filter. FOURTH - remove the filter plug from package, notice notches in top of plug that align with gaps in the area where a filter would typically be screwed into the filter location in the ceiling above the top right shelf in the refrigerator. After aligning notches in the bypass plug with gaps in the screw mechanism, carefully turn the bypass plug 1/4 turn counter- clockwise - at which time the bypass plug should be firmly installed. FIFTH - Reverse step SECOND, and turn valve Counter-Clockwise until valve is completely open. Test to ensure no water is leaking from the Bypass Plug. SIXTH - Finally reverse step FIRST by reattaching the toe kick plate using the two phillips screws removed in Step FIRST. NOTE: The Bypass Plug is quite inexpensive, but after adding shipping from Canada - the cost is about the same as purchasing a new filter for the refrigerator. :-(
Parts Used:

-
Fred from LA QUINTA, CA
-
Difficulty Level:Very Easy
-
Total Repair Time:Less than 15 mins
-
Tools:Screw drivers
2 of 3 people
found this instruction helpful.
Was this instruction helpful to you?
Thank you for voting!
Refrigerator not defrosting, ice tray clogging up in ice tray, refrigerator making loud humming noise, and compressed running all the time.
First, turn off power - since I did not want to pull the refrigerator out on my wood floor I tripped the circuit breaker to that circuit and opened door to make sure interior light was off (ensuring power was off). This unit has a bottom freezer, I took out all shelves, ice maker and all parts in the way of accessing back of interior of freezer section. Removed back plastic section by removing one screw in middle top of back panel and prying it out. This was a bit difficult as it was in there a bit tight but once the plastic warmed up it pulled out ok. This revealed the compressor section and temp sensor that was attached to the copper coils with of all things - a zip tie! In pictures of this that I looked at on various web sites the sensor was on a metal bracket attached to the coil so it made me wonder if tf the factory took a shortcut? I cut the old sensor wire, stripped the two wires 1/2", and connected them to the new sensor wire with butt connectors, I put some silicone into the ends of the butt connectors to prevent moisture from entering into connectors and wrapped the connection in black electrical tape. I then "attached" the sensor to the coil using a zip tie, put the plastic back piece back on, inserted everything I took out and put power back to refrigerator. It's been 3 days and temp of refrigerator is stable, ice maker not clogging up, and compressor not running all the time! So far so good.
Parts Used:
-
Mark from ROSEMOUNT, MN
-
Difficulty Level:A Bit Difficult
-
Total Repair Time:30 - 60 mins
-
Tools:Screw drivers
2 of 3 people
found this instruction helpful.
Was this instruction helpful to you?
Thank you for voting!
noisy refrigerator
I followed your video and completely dismantled the refrigerator evaporator motor, fan, brackets, and grommet, I completely cleaned the refrigerator including the cooling coils. I then ordered the evaporator motor ,fan, grommets, lid bumper, and brackets. The order would take a week to arrive. In the meantime I cleaned and reassembled all the old parts, waiting for the new ones to come. Guess what! The refrigerator was quiet as a mouse. I really did not need the new parts, but I kept them anyway just for good luck. Not bad for a refrigerator that's twenty four years old.
Parts Used:
-
James from NEW YORK, NY
-
Difficulty Level:Easy
-
Total Repair Time:1- 2 hours
-
Tools:Nutdriver, Pliers, Screw drivers, Socket set
1 person
found this instruction helpful.
Was this instruction helpful to you?
Thank you for voting!
Light went out in refrigerator
Pop out switch, pull wires, attach wires to new switch and pop back in. Easy smeasy!
Parts Used:

-
Gary from EAST JORDAN, MI
-
Difficulty Level:Really Easy
-
Total Repair Time:Less than 15 mins
-
Tools:Pliers, Screw drivers
1 person
found this instruction helpful.
Was this instruction helpful to you?
Thank you for voting!
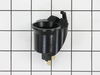
Lights did not work, bulbs were good
Took out the light sockets, plugged in the new ones. I found the manual on line to find the part numbers. Parts select parts were perfect
Parts Used:

-
Donita from O FALLON, MO
-
Difficulty Level:Easy
-
Total Repair Time:Less than 15 mins
-
Tools:Screw drivers
1 person
found this instruction helpful.
Was this instruction helpful to you?
Thank you for voting!
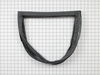
Door gasket was cracked, not sealing well.
I watched a you tube video for 2 minutes & did the replacement in1 minute.
Parts Used:
-
Donald from NORTH KINGSTOWN, RI
-
Difficulty Level:Very Easy
-
Total Repair Time:Less than 15 mins
1 person
found this instruction helpful.
Was this instruction helpful to you?
Thank you for voting!
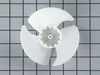
Ice built up around evaporator fan blades and blades chipped and broke. Refrigerator was making loud vibrating noises.
Removed ice bucket, and unplugged ice maker. Removed light cover. Removed ice maker. Pulled fan blades straight up and removed. Pushed new blades on to motor shaft. Fairly easy .
Parts Used:
-
David from KNOXVILLE, TN
-
Difficulty Level:Really Easy
-
Total Repair Time:15 - 30 mins
-
Tools:Nutdriver
1 person
found this instruction helpful.
Was this instruction helpful to you?
Thank you for voting!
My icemaker was leaking water into ice bucket .
I thought it must be the water valve leaking by so I ordered one and put it on myself which was a very easy job. It fixed my problem and everything works fine now. First I unplugged the refrigerator shut off water line block shutoff valve. Then I removed the back plate on refiigerator. Then I removed the water line from the water valve. After that I unplugged the two wiring harnesses. Then I removed the two plastic water lines from water valve. then I inbolted the water valve from refrigerator. Then I got new valve, plugged both water lines into it, plugged both wiring harnesses back into it, hooked main water line back up then turned water back on.
Parts Used:
-
Sam from Hannibal, MO
-
Difficulty Level:Easy
-
Total Repair Time:15 - 30 mins
-
Tools:Wrench set
2 of 4 people
found this instruction helpful.
Was this instruction helpful to you?
Thank you for voting!
No water at the dispencer
First time the water hose in the door was frozen. Thawed hose and started water flow. About 2 week later water stopped once again. Did a little trouble shooting and determined the valve stopped working. Ordered a unit, installed in a very shor time and all is good so far.
Parts Used:
-
martin from cedar hill, TX
-
Difficulty Level:Really Easy
-
Total Repair Time:15 - 30 mins
-
Tools:Nutdriver, Wrench (Adjustable)
1 person
found this instruction helpful.
Was this instruction helpful to you?
Thank you for voting!
Loud Squeal when fan was running
WE (WIFE) took out the old parts an replaced with new one ..Be careful to get the placement of the Grommet or they "POP" out on you. fast ship on the parts too.
Parts Used:
-
Daniel from BURNEY, CA
-
Difficulty Level:Easy
-
Total Repair Time:30 - 60 mins
-
Tools:Nutdriver, Socket set
1 person
found this instruction helpful.
Was this instruction helpful to you?
Thank you for voting!
No water to dispenser or ice maker.
Replacement valve fit perfectly but didn't fix the problem. More troubleshooting found blockage through the water filter assy although I don't use a filter and just have the the bypass plug installed...7 years like this. Used compressed air to blow out the line and got some crud out. Works now but can't turn water pressure up full or line hammers and stops flow. Left supply valve open slightly which supplies ice maker fine and dispenser ok. Must be something wrong with internal spring stopper in filter assy...keeps water from pouring out if filter or bypass not installed.
Parts Used:
-
Joe from Irmo, SC
-
Difficulty Level:A Bit Difficult
-
Total Repair Time:1- 2 hours
-
Tools:Nutdriver, Pliers, Screw drivers, Wrench (Adjustable)
2 of 4 people
found this instruction helpful.
Was this instruction helpful to you?
Thank you for voting!