




















YMER7700LZ0 Maytag Range - Instructions
Keep searches simple. Use keywords, e.g. "leaking", "pump", "broken" or "fit".
Compressor would not shut off at the maximum recommended pressure (150psi)
Removed face plate (4 screws). Removed 2 screws holding manifold in place. Detached wires from the switch. No need to mark them - they don't have to go back on any particular terminal. Remove the switch from the manifold with an adjustable wrench. Replace with new switch (thread sealing compound on the new switch is sufficient - no need for teflon tape). Reattach wires and reassemble manifold and face plate. Easy fix!
Parts Used:
-
Mark from SYLVA, NC
-
Difficulty Level:Really Easy
-
Total Repair Time:15 - 30 mins
-
Tools:Screw drivers, Wrench (Adjustable)
2 of 2 people
found this instruction helpful.
Was this instruction helpful to you?
Thank you for voting!
Oven not reaching temperature
Simple-pulled range away from wall, unplug from socket. Removed back panel unscrewed thermoses and replace. Put back panel back on plug in, tested temperature setting before sliding range back on place
Parts Used:
-
Marsha from Clermont, FL
-
Difficulty Level:Really Easy
-
Total Repair Time:Less than 15 mins
-
Tools:Screw drivers
2 of 2 people
found this instruction helpful.
Was this instruction helpful to you?
Thank you for voting!
Had lost one of the drawer glide
Just attached the glide to the drawer. It just popped in. No problem.
took about 5 minutes.
took about 5 minutes.
Parts Used:

-
Lydia from SAN ANTONIO, TX
-
Difficulty Level:Very Easy
-
Total Repair Time:Less than 15 mins
2 of 2 people
found this instruction helpful.
Was this instruction helpful to you?
Thank you for voting!
temp level uneven
-
Paul from HARMONY, MN
-
Difficulty Level:Very Easy
-
Total Repair Time:15 - 30 mins
2 of 3 people
found this instruction helpful.
Was this instruction helpful to you?
Thank you for voting!
the oven temperature was not working right. I installed a new oven sensor. Works get now
-
Rosalind from APOLLO, PA
-
Difficulty Level:Very Easy
-
Total Repair Time:15 - 30 mins
-
Tools:Screw drivers
3 of 6 people
found this instruction helpful.
Was this instruction helpful to you?
Thank you for voting!
Replace Door Hinges
So glad I found the parts I needed! I followed the GREAT video instructions on this site and when I opened the oven door up discovered there had only been ONE spring inside this whole time! I replaced both springs & hinges easily, cleaned up the glass while I had the door off, and everything went right back into place!
Parts Used:
-
Glenda from ROCK HILL, SC
-
Difficulty Level:Very Easy
-
Total Repair Time:30 - 60 mins
-
Tools:Screw drivers
2 of 3 people
found this instruction helpful.
Was this instruction helpful to you?
Thank you for voting!
Active spring broken
Removed the oven door listened to a video/You tube and the rest was easy.When you remove the door panels make sure all the parts are assembled correctly.
Parts Used:
-
Angelo from NAPLES, FL
-
Difficulty Level:A Bit Difficult
-
Total Repair Time:1- 2 hours
-
Tools:Screw drivers
2 of 3 people
found this instruction helpful.
Was this instruction helpful to you?
Thank you for voting!
cooktop on the rt side would just keep getting hot
Removed the ifinite controlswitch and replaced it but i dont believe it is wired correctly. now it wont get hot until it is set on four or so. think i the way it is wired.
Parts Used:

-
Michael from GRAND PRAIRIE, TX
-
Difficulty Level:Easy
-
Total Repair Time:1- 2 hours
-
Tools:Pliers, Screw drivers
1 person
found this instruction helpful.
Was this instruction helpful to you?
Thank you for voting!
Front dual burner would stay on.
First I threw the breaker for the stove to off. I pulled the whole stove out, removed the back cover, removed the knob from the faulty control switch and then unscrewed the two screws holding in the switch. I then pulled the wires from the back of the faulty switch, inserted the wires into the new switch, reattached the two screws that hold the switch in. I threw the breaker back on and turned the burner on long enough to make sure that both dual elements came on and went off like they should. At that point I reattached the back cover and shoved the stove back onto its' slot. All is well and all went well.
Parts Used:
-
DAVID from SAN ANGELO, TX
-
Difficulty Level:Really Easy
-
Total Repair Time:30 - 60 mins
-
Tools:Screw drivers
1 person
found this instruction helpful.
Was this instruction helpful to you?
Thank you for voting!
The dual element control switches were no longer regulating the burners properly (either on or off, no in-between)
1. Pull the stove away from the wall and unplug the stove from the 240 volt receptacle.
2. Remove the knob from the switch (it just pulls off).
3. Unscrew the top half of the back plate of the stove and removed (about eight or so screws).
4. Unscrew the two screws attaching the control switch in the front of the control panel (these were hidden by the control knob just removed).
5. Pull out the control switch and detach one at a time the two sets of wire connectors attached to the switch. In order not to confuse which plug goes where, attach each connector to the new switch as you remove them. (Note: the connectors may be quite tight to the original switch; do not pull on the wires but simply work each connector gently until it slides off. They will reattach to the new control switch much easier.)
6. Reinstall the new switch to the stove in reverse order of removal. Make sure that the control knob, when the switch is reattached, is in the off position pointing straight up.
7. Reattach the upper back plate of the stove. For safety's sake, do this before reconnecting the stove to power.
8. Plug in the stove and test to ensure that the switch is working properly.
2. Remove the knob from the switch (it just pulls off).
3. Unscrew the top half of the back plate of the stove and removed (about eight or so screws).
4. Unscrew the two screws attaching the control switch in the front of the control panel (these were hidden by the control knob just removed).
5. Pull out the control switch and detach one at a time the two sets of wire connectors attached to the switch. In order not to confuse which plug goes where, attach each connector to the new switch as you remove them. (Note: the connectors may be quite tight to the original switch; do not pull on the wires but simply work each connector gently until it slides off. They will reattach to the new control switch much easier.)
6. Reinstall the new switch to the stove in reverse order of removal. Make sure that the control knob, when the switch is reattached, is in the off position pointing straight up.
7. Reattach the upper back plate of the stove. For safety's sake, do this before reconnecting the stove to power.
8. Plug in the stove and test to ensure that the switch is working properly.
Parts Used:
-
Michael from Salem, OR
-
Difficulty Level:Easy
-
Total Repair Time:30 - 60 mins
-
Tools:Screw drivers
1 person
found this instruction helpful.
Was this instruction helpful to you?
Thank you for voting!
Electric burner element not working
Video said to remove screws and lift stove top off, remove contacts and ground. My stove top was hinged and required me to lift and pivot stovetop up. The burners were anchored to the stove base not the top. I secured the topso that it would not drop down and proceeded with repair
Parts Used:

-
Ronald from The Villages, FL
-
Difficulty Level:A Bit Difficult
-
Total Repair Time:30 - 60 mins
-
Tools:Pliers, Screw drivers
1 person
found this instruction helpful.
Was this instruction helpful to you?
Thank you for voting!
range would not heat right
-
bobby from HERSCHER, IL
-
Difficulty Level:Really Easy
-
Total Repair Time:30 - 60 mins
-
Tools:Screw drivers
1 person
found this instruction helpful.
Was this instruction helpful to you?
Thank you for voting!
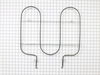
element not working properly
Remove 2 screws inside oven holding element . Remove screws holding back panel. Plug wires (2) into new element.Install back panel . Done.
Parts Used:
-
PHILIP from NORTH PORT, FL
-
Difficulty Level:Really Easy
-
Total Repair Time:15 - 30 mins
-
Tools:Screw drivers
1 person
found this instruction helpful.
Was this instruction helpful to you?
Thank you for voting!
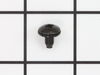
screw came off
very expensive to buy the part but just tighten the screw intot eh predefined place.
Parts Used:
-
Sandeep from EDINA, MN
-
Difficulty Level:Very Easy
-
Total Repair Time:Less than 15 mins
-
Tools:Screw drivers
1 person
found this instruction helpful.
Was this instruction helpful to you?
Thank you for voting!
Oven Demon Possession
Our repair was extrodinarily easy. As my husband was taking out the old element and the oven was off, the element heated up and actually burned him. He readjusted it and it refused to heat again. We figured at that point that there must be a short, so we never even opened the box with the new element. A short time later we decided to use the top of the stove for soup and a small fire started in the oven. We turned off the braker at that point and ordered a new oven.
Parts Used:
-
Kevin from Greensboro, NC
-
Difficulty Level:Really Easy
-
Total Repair Time:Less than 15 mins
1 person
found this instruction helpful.
Was this instruction helpful to you?
Thank you for voting!