




















WM2677HWM LG Washer - Instructions
Keep searches simple. Use keywords, e.g. "leaking", "pump", "broken" or "fit".
Washer wouldn't start when I closed the door. Door lock error code presented
Took the sealing ring off the gasket, unscrewed the door lock with two screws. Unplugged it. Plugged the new one in, screwed it back in. Put the ring back on and it started right up.
Parts Used:
-
Tom from BETHEL PARK, PA
-
Difficulty Level:Very Easy
-
Total Repair Time:Less than 15 mins
-
Tools:Screw drivers
3 of 3 people
found this instruction helpful.
Was this instruction helpful to you?
Thank you for voting!
Alarms about "Door Open"
Just removed the top cover only. Reached down and unplugged the door switch. Then removed the switch with 2 phillips head screws. Replaced with new switch. Reached down and plugged that new switch in. Problem solved!
Parts Used:
-
MARY from ANDERSON, IN
-
Difficulty Level:Really Easy
-
Total Repair Time:30 - 60 mins
-
Tools:Screw drivers
4 of 6 people
found this instruction helpful.
Was this instruction helpful to you?
Thank you for voting!
Water leaking under machine
Unplug and disconnect water lines. Move washer out. I used soapy water to make it easier to slide because it is stacked washer and dryer. Slid dryer onto large trash can saving my back. So easy. Make sure it is heavy duty . Removed lid. Removed old part by removing to screws in back. Disconnected 3 wires, disconnected one hose at a time while reattaching each one to new part. That way I was sure to get them back in the right place. Attached back to machine . Put water hoses back on and checked for leaks before but lid and dryer back in place. Ta da!! This was so easy. I am a 57 year old woman and this was pretty simple. I tried trouble shooting by using tub cleaner and everything as manual suggested but it still leaked. Watch a lot of you tube. Apparently lg has this happen with this part a lot. Thank you parts select. I’m sure this saved me a lot of money. I have had enough money bleeding from my pockets with bigger home problems. Thank you.
Parts Used:
-
Pam from FAIRMONT, WV
-
Difficulty Level:Very Easy
-
Total Repair Time:30 - 60 mins
-
Tools:Nutdriver, Screw drivers
3 of 3 people
found this instruction helpful.
Was this instruction helpful to you?
Thank you for voting!
The locking mechanism had a fault and would not lock so the washer continually posted the locking error
Followed the video supplied by this site and everything was as described!
Parts Used:
-
Thomas from FENTON, MO
-
Difficulty Level:Really Easy
-
Total Repair Time:15 - 30 mins
-
Tools:Screw drivers
3 of 3 people
found this instruction helpful.
Was this instruction helpful to you?
Thank you for voting!
Noticed water underneath the washer. After taking the top of the washer off I noticed that on top of the water inlet valve water was dripping from it.
I actually did the repair exactly as the video showed. If I would have had the part at the time of discovering the problem it would have been about a 45 minute repair from start to finish. Worst part of the whole fix was moving the heavy washer.
Parts Used:
-
Kenneth from DELTA, OH
-
Difficulty Level:Really Easy
-
Total Repair Time:15 - 30 mins
-
Tools:Pliers, Screw drivers
3 of 3 people
found this instruction helpful.
Was this instruction helpful to you?
Thank you for voting!
Leaking from 19 yr old cold water valve.
Figured out how to take off top of washer, look inside for problem, ordered new part, watched video how to replace part. All on line. $65.00 later and my 19 yr old washer is still working awesome.
Parts Used:
-
Denise from LAS VEGAS, NV
-
Difficulty Level:Very Easy
-
Total Repair Time:15 - 30 mins
-
Tools:Pliers
3 of 3 people
found this instruction helpful.
Was this instruction helpful to you?
Thank you for voting!
Hot & Cold Water Inlet Valves Leak
YouTube is your friend for many such repairs. See this link for an overall description:
https://www.youtube.com/watch?v=WuvLuC8x4_s
I had to remove the top panel to determine exactly which valve was leaking. It turned out both hot and cold-water valves were defective.
After unit is unplugged and top is removed, it's a simple matter to remove/replace hose connections and electrical connections. It took me less than an hour to complete the task once parts were in hand.
Again, YouTube is your friend for such repairs.
https://www.youtube.com/watch?v=WuvLuC8x4_s
I had to remove the top panel to determine exactly which valve was leaking. It turned out both hot and cold-water valves were defective.
After unit is unplugged and top is removed, it's a simple matter to remove/replace hose connections and electrical connections. It took me less than an hour to complete the task once parts were in hand.
Again, YouTube is your friend for such repairs.
Parts Used:
-
Dennis from Prescott, AZ
-
Difficulty Level:Really Easy
-
Total Repair Time:30 - 60 mins
-
Tools:Pliers
3 of 3 people
found this instruction helpful.
Was this instruction helpful to you?
Thank you for voting!
TE error. Replaced heater / thermistor assembly.
removed top and front. heater is at the base of the tub. the nut compresses the rubber seal and may take some wiggling to remove the old one.
Parts Used:
-
Andrew from BOTHELL, WA
-
Difficulty Level:Easy
-
Total Repair Time:30 - 60 mins
-
Tools:Screw drivers, Socket set
4 of 7 people
found this instruction helpful.
Was this instruction helpful to you?
Thank you for voting!
washing machine was leaking at bottom of door and on left side from the dispenser asm. bellow was replaced & door hinge was bad
watched the video provided on site, very helpful for bellow replacement. there was no door hinge video. ordering parts for the bellow replacement, one clamp was on one page of the manual and the other clamp was on the other page, so look at the manuals provided so you can get the right part. the bellow i ordered was suppose to be for the model i have. the part ordered had a drain on the bottom, my bellow did not have a drain so i bought a brass plug, some RTV and a small clamp and fitted the RTV to the plug and installed and fitted the small clamp. All works fine. they do have a part number without the drain at the bottom and would be helpful if the user manual for the model had the exact replacement part number listed, I.E. if customer has a model number it is confirmed or not if that model number has a drain port. i was going to send 2 of the 4 extra clamps for hoses i ordered and clamp for the bellow that was wrong back for credit. i was told i could dispose of the items when i requested a shipping label and i was credited the amount + a $10 nuisance rebate. This Business IMO has exemplary customer service and with my experience i would recommend them
Parts Used:



-
Darryl E from ALICE, TX
-
Difficulty Level:A Bit Difficult
-
Total Repair Time:More than 2 hours
-
Tools:Nutdriver, Pliers, Screw drivers, Socket set
4 of 7 people
found this instruction helpful.
Was this instruction helpful to you?
Thank you for voting!
Noisy Bearings
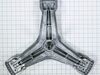
In order to replace the bearings of a front loader LG Washer you will need to disassemble the entire unit. you should have excellent mechanical skills to tackle this project with necessary tools. Plan on replacing both bearings and rear seal, also plan on replacing the spider and drum seal. The Spider that supports the inner drum will be corroded due in part to seal failure. By the time you are hearing the bearing noise the damage to the spider will have taken place and need replacing. You can watch a few videos on youtube with similar appliances to give you an idea of the project at hand. Once disassembled cleaned and inspected the assembly goes real smooth. The washer now works as good as new and is ready for another 10+ years of service. Doing this project myself has saved me from buying a new one and that savings amounts to over $1000 bucks. LG washers are built to last and you will see that while working on it! Good Luck and do your homework!
Parts Used:

-
Gary from Pine, AZ
-
Difficulty Level:Difficult
-
Total Repair Time:More than 2 hours
-
Tools:Nutdriver, Pliers, Screw drivers, Socket set, Wrench set
2 of 2 people
found this instruction helpful.
Was this instruction helpful to you?
Thank you for voting!
Washer was leaking.
After watching the video for installation of the bellow, I followed the suggested repair method and was able to repair my washer.
Parts Used:

-
Memo from LA MIRADA, CA
-
Difficulty Level:A Bit Difficult
-
Total Repair Time:1- 2 hours
-
Tools:Nutdriver, Screw drivers, Wrench (Adjustable)
2 of 2 people
found this instruction helpful.
Was this instruction helpful to you?
Thank you for voting!
Water wouldn't drain
I followed the video. Everything worked exactly as described. i ran a quick cycle and everything seemed to be fine. Started a wash and the machine was going fine but stopped, and wouldn't drain. I thought that maybe it might be the Rotor Position Sensor assembly, which I had already purchased just in case.But first i drained the machine and checked out the pump filter. Plugged solid. I'm guessing when the pump went there must have been a lot of lint and debris in the machine. something you might want to check out, after that repair. Thanks. you guys saved me a couple of hundred dollars
Parts Used:
-
lawrence from DOBBS FERRY, NY
-
Difficulty Level:Really Easy
-
Total Repair Time:30 - 60 mins
-
Tools:Pliers, Screw drivers
2 of 2 people
found this instruction helpful.
Was this instruction helpful to you?
Thank you for voting!
water failure
-
Harley from OKLAHOMA CITY, OK
-
Difficulty Level:Really Easy
-
Total Repair Time:30 - 60 mins
-
Tools:Pliers, Screw drivers
2 of 2 people
found this instruction helpful.
Was this instruction helpful to you?
Thank you for voting!
A tore bellow
-
Danny from MOUNT AIRY, NC
-
Difficulty Level:Really Easy
-
Total Repair Time:30 - 60 mins
2 of 2 people
found this instruction helpful.
Was this instruction helpful to you?
Thank you for voting!
Dishwasher would not fill
Used Youtube to look for a set of repair instructions. From start to end 35 min.
The difficult part was getting the door back on. Only 1 Youtube video I watched stated Do not remove the 2 center screws at the top. Wish I had seen that video first.
Overall very easy to do.
The difficult part was getting the door back on. Only 1 Youtube video I watched stated Do not remove the 2 center screws at the top. Wish I had seen that video first.
Overall very easy to do.
Parts Used:
-
Jesse from CARNEGIE, PA
-
Difficulty Level:Really Easy
-
Total Repair Time:30 - 60 mins
-
Tools:Nutdriver, Pliers
2 of 2 people
found this instruction helpful.
Was this instruction helpful to you?
Thank you for voting!