




















WM0742HGA (00) LG Washer - Instructions
Keep searches simple. Use keywords, e.g. "leaking", "pump", "broken" or "fit".
drain pump stopped working due to water in the case
ordered part from Part Select and it was here very quickly,but the part came damaged (not the fault of Part Select). I ordered another one and PartSelect had it here the next day. I watched the video on how to replace it and it was very helpfull.The particular part I replaced (pump motor) does not seem very durable. I will buy an American made washer the next time I need one. I will use Partselect in the future and recomend it to others.
Parts Used:
-
David from Mt. Pleasant, TX
-
Difficulty Level:Easy
-
Total Repair Time:30 - 60 mins
-
Tools:Pliers, Screw drivers
Was this instruction helpful to you?
Thank you for voting!
Water was not draining and was making a grinding noise
This was very easy to instal. The aplaiance repair co. wanted $240 my LG is six years old and would rather buy a new one if I had to spend that much, so I gave it a shot and it took me 20 min to install the part. Told my wife she owed me $ 180 for my labor.
Parts Used:
-
Chris from Walla Walla, WA
-
Difficulty Level:Really Easy
-
Total Repair Time:15 - 30 mins
-
Tools:Pliers, Screw drivers
Was this instruction helpful to you?
Thank you for voting!
Water was leaking from under the washer.
The bellows hose on the bottom of the tube had worn through where it flexed. This was an easy job except for the long reach you had to make under the washer to reach the hose clamps that held the part in place. These were spring loaded clamps which were easy to remove with pliers. I replaced them with ones that could be tightened with a socket wrench since it was hard to replace the sprung clamps.
Parts Used:
-
Richard from Blue Bell, PA
-
Difficulty Level:Really Easy
-
Total Repair Time:15 - 30 mins
-
Tools:Nutdriver, Screw drivers
Was this instruction helpful to you?
Thank you for voting!
Humming, no error code, not spinning
The problem ended up being the pump motor which discharges water from the washer. I figured out this was the problem after trying several things. I determined the motor was fine when it was empty. With the unit turned off, if you can rotate the tube with a quick spin and it lights up, probably this is OK. Then I tried to run it again and it went about 1/2 way through the cycle and stopped and started humming again. So I started emptying out the water, which I noticed was about 5 gallons which is way too much. so once empty, I took the pump off by turning unit on side. There are two hoses with hose clamps, and a few screws. Be careful to mark which wire plugs onto which side of the pump. One is brown and one is black. If you take the pump housing off, with the 3 screws, you should be able to pull the motor apart. Mine had water and scum from the wash in it, which was a dead give away that it was the problem.
Parts Used:
-
Brian from Camden, MO
-
Difficulty Level:Really Easy
-
Total Repair Time:15 - 30 mins
-
Tools:Pliers, Screw drivers
Was this instruction helpful to you?
Thank you for voting!
Will not start after dorr is closed. Shows Code dE. Door locks properly, two clicking is heard before code shows up.
1. Remove spring-loaded clamp assembly. 2. Partially pull out the large rubber gasket near the lock switch assembly to gain access to the lock switch assembly. 3. Unscrew two screws holding the lock switch assembly. Carefully separate the connector from the lock screw assembly and replace it with the new part. Reinstall in reverse sequence. Ensure that the electrical connector is fully seated unto the lock switch assembly and the connector latch is fully set against the lock switch body. Also make sure that the large rubber seal is fully seated around the door opening to prevent water leak. Restarted the washer and everything worked as before.
Parts Used:
-
Juan from Anaheim, CA
-
Difficulty Level:Easy
-
Total Repair Time:15 - 30 mins
-
Tools:Pliers, Screw drivers
Was this instruction helpful to you?
Thank you for voting!
My Washing Machine was not draining properly
The machine was making a grinding noise instead of draining. I spoke with the LG rep on the 800 line and was told to call a repair man. The Parts select diagram helped me to identify the part I needed. It was clear enough that I was confident it was the right one. Three days and six screws later the machine was working fine.
Parts Used:
-
matt from Fuquay Varina, NC
-
Difficulty Level:Easy
-
Total Repair Time:15 - 30 mins
-
Tools:Screw drivers
Was this instruction helpful to you?
Thank you for voting!
would not drain
During my troubleshooting, I removed the bottom to access the drain pump. I had to cut some wire ties so that I could make removing the wires easier. After checking the pump and putting everything back together, I determined that the pump itself was bad. Pump impeller should not rotate freely! After receiving new part, I installed it relatively easy. I didn't have to remove the bottom since there was enough room through the access hole. Just make sure to make where wires go before removing old part.
Parts Used:
-
Timothy from Williamsport, PA
-
Difficulty Level:Easy
-
Total Repair Time:15 - 30 mins
-
Tools:Pliers, Screw drivers
Was this instruction helpful to you?
Thank you for voting!
Water will not Drain
-
Nate-Talisha from Miramar, FL
-
Difficulty Level:Really Easy
-
Total Repair Time:15 - 30 mins
-
Tools:Socket set
Was this instruction helpful to you?
Thank you for voting!
my lg washer wasnt draining
It was so easy. i searched my model it brought up this site and the most common problem popped up without my even asking and recommended the part. i got it one week later and it was so simple to fix. a repair man wanted three times the part price to come to my home twice and would have had to wait longer. you guys were very helpful
Parts Used:
-
chris from glenwood springs, CO
-
Difficulty Level:Really Easy
-
Total Repair Time:15 - 30 mins
-
Tools:Screw drivers
Was this instruction helpful to you?
Thank you for voting!
Drain pump making noise and water wasn't being pumped out
I watched a video of how to replace the pump and it showed taking the top and front off to get to it. I actually found this could be done by removing the back panel from the washer. There were two hose clamps you have to squeeze and slide up and two wires going to the pump. There are three screws holding the pump that need to be removed from the front of the washer. Once these are removed all you have to do is push a tab down and the motor slide right out. The pump assembly can also be reached from the bottom of the washer.
Parts Used:
-
richard from rustburg, VA
-
Difficulty Level:Easy
-
Total Repair Time:15 - 30 mins
-
Tools:Pliers, Screw drivers
Was this instruction helpful to you?
Thank you for voting!
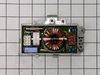
Washer will not power on
Disconnected power. Removed washer top; only 2 screws in back. Disconnected two wire connectors on Filter Assembly Circuit. Removed assembly; 1 screw. Installed new assembly, reconnected wires, and replaced washer top.
Parts Used:
-
Robert from Damascus, MD
-
Difficulty Level:Easy
-
Total Repair Time:15 - 30 mins
-
Tools:Screw drivers
Was this instruction helpful to you?
Thank you for voting!
Lock assembly displaying DE code
Unplug washer!!! 1. Remove retaining ring around rubber gasket with flat head screwdriver. Just slightly pry off and it will easily come off. 2. Just peel back rubber gasket on the side that the lock is on. 3. remove 2 screws from the front off the lock assembly. 4. gently reach in and lift the little plastic clip holding the wiring harness and lift straight off. If the clip is lifted it might be a little tight just use even steady pressure to pull off. 5. Reverse these instructions to replace. Note: replacing the retaining ring on the rubber is a pain. The spring has to be in the bottom. Using a couple of flathead screwdrivers you can wrangle it back in place after awhile. There is a tool that looks like a large reverse pliers that may make it easier. Anyway thats it, pretty easy. There is a youtube video that shows all of this.
Parts Used:
-
Robert from Saugus, MA
-
Difficulty Level:Easy
-
Total Repair Time:15 - 30 mins
-
Tools:Screw drivers
Was this instruction helpful to you?
Thank you for voting!
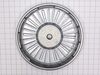
Drum not rotating
Replaced rotor assembly by removing the back panel off the washer. Removed center bolt to be able to take out roto assembly. Magnets made it a little resistant, but with a little wiggling came off fairly easily.
Parts Used:
-
Jim from Oak ridge, NJ
-
Difficulty Level:Easy
-
Total Repair Time:15 - 30 mins
-
Tools:Pliers, Screw drivers
Was this instruction helpful to you?
Thank you for voting!
water would not drain, nothing jamming pump
new pump was a little different ,but mounted properly. Tipped washer on its side, changed pump by working trough bottom and back access. It went pretty smoothly, works fine.
Parts Used:
-
nicole from chicago, IL
-
Difficulty Level:Easy
-
Total Repair Time:15 - 30 mins
-
Tools:Pliers, Screw drivers
Was this instruction helpful to you?
Thank you for voting!
It was torn and leaking.
Took off the old one and put the other one on. The only difficulty was that my husband has big hands and had a hard time getting to one end.
Parts Used:
-
Denise from Show Low, AZ
-
Difficulty Level:Easy
-
Total Repair Time:15 - 30 mins
-
Tools:Screw drivers, Wrench (Adjustable)
Was this instruction helpful to you?
Thank you for voting!