




















WA27F2WXFA Gibson Washer - Instructions
Keep searches simple. Use keywords, e.g. "leaking", "pump", "broken" or "fit".
Belt stretched out
lifted up top panel unscrewed two phillips screws at bottom of front panel, lifted up and out and removed the panel exposing motor and belt .pushed in belt tensioner and removed belt.Then I slid the new belt under the tub pulley and rotated it until belt was on both the tub pulley and motor pulley,released belt tensioner and the job was over,
Parts Used:

-
Kenneth from Port Monmouth, NJ
-
Difficulty Level:Really Easy
-
Total Repair Time:Less than 15 mins
-
Tools:Screw drivers
Was this instruction helpful to you?
Thank you for voting!
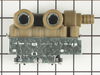
A Leak In The Water Inlet Valve
It took longer to remove and then replace the back of the washer than to replace the water inlet valve. The video made it look easy and it was!. For the next perso: remember that if the water valve springs a leak and the washer has water in it, turn the dial to spin and the water will leave the drum. No need to siphon out the water.
Parts Used:
-
Nancy from Oquossoc, ME
-
Difficulty Level:Really Easy
-
Total Repair Time:Less than 15 mins
-
Tools:Nutdriver, Pliers
Was this instruction helpful to you?
Thank you for voting!
Water overflowed not shutting off.
I turned off water valves. I then unplugged the AC. I took the 4 screws out on the back end of the top cover of the washer. I removed the two water lines from the water inlet vales and the two electrical connectors. I then removed the two screws holding the water valve assembly and it came out easy. Installed new water valve assembly mounted with two screws , then put the electrical connection and water lines back on new water valve assembly. I turned the incoming water vales on and installed the top cover with the four back screws and was done.
Parts Used:
-
Harold from Portland, OR
-
Difficulty Level:Really Easy
-
Total Repair Time:Less than 15 mins
-
Tools:Pliers, Screw drivers
Was this instruction helpful to you?
Thank you for voting!
My washer started making a loud, screeching noise and then stopped working.
Following the easy instructions on PartSelect's website, I first removed the screws from the bottom, front of the washer. Then, using the putty knife, I unhooked the clips holding the washer top to the front and pulled off the front. I pushed in the belt wheel and removed the old belt, which was being held on by one strand. Then, I put on the new belt, put the front back on, replaced the screws and then pushed the washer lid back down over the clips. It worked perfectly and took less than 15 minutes and cost me next to nothing. Thanks for a great site!
Parts Used:
-
Tom from Hamilton, OH
-
Difficulty Level:Really Easy
-
Total Repair Time:Less than 15 mins
-
Tools:Screw drivers
Was this instruction helpful to you?
Thank you for voting!
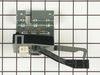
The washer lid lock was burned
UNPLUG APPLIANCE....very simple installation. Raise THE top and the switch is in the corner. Unplug the wiring harness and remove the 2 screws that hold the lid lock on. Reverse the procedure and replace the lid lock.
Parts Used:
-
William H. from Warsaw, OH
-
Difficulty Level:Really Easy
-
Total Repair Time:Less than 15 mins
-
Tools:Screw drivers, Socket set
Was this instruction helpful to you?
Thank you for voting!
Washer would not spin
-
Richard from Lafayette, LA
-
Difficulty Level:Really Easy
-
Total Repair Time:Less than 15 mins
-
Tools:Screw drivers
Was this instruction helpful to you?
Thank you for voting!
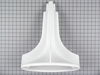
Broken Agitator
Unplug unit. Unscrew securing nut, remove agitator, install new part (ensuring splines mate properly) and secure with nut. The nut is molded into the plastic top of the agitator, therefore no tools were required. Very simple and straight forward.
Parts Used:
-
David from Portsmouth, VA
-
Difficulty Level:Really Easy
-
Total Repair Time:Less than 15 mins
Was this instruction helpful to you?
Thank you for voting!
Out of country repair needed
This appliance is being used in a third world country with no parts access. I discovered Partselect and easily found the schematic with parts listed. Needed parts were easily identified ordered online and received within 4 days in the US and in time to take on my day later flight outbound. The process was seamless and expeditious. Thank you Partselect!
Parts Used:

-
Jay from Venice, FL
-
Difficulty Level:Easy
-
Total Repair Time:1- 2 hours
Was this instruction helpful to you?
Thank you for voting!
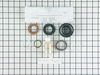
leaking water
removed all parts from trans shaft and replaced seal although had some difficulty removeing the agitator assembly due to age and mineral deposits but a little wd40 and tapping with a hammer helped
Parts Used:
-
charles from san leandro, CA
-
Difficulty Level:Really Easy
-
Total Repair Time:1- 2 hours
-
Tools:Pliers, Screw drivers, Socket set
Was this instruction helpful to you?
Thank you for voting!
would not drain
-
robertt from rio grande, NJ
-
Difficulty Level:Really Easy
-
Total Repair Time:1- 2 hours
-
Tools:Screw drivers
Was this instruction helpful to you?
Thank you for voting!
worn belt and broken lid strike
The longest part was cleaning and taking the washer apart , the screws were rusted to the bottom of the washer front,had to spray and pound on screws to get them out.after cleaning dirt and rust in the washer I greased the idle pulley.Putting on the belt was a snap.I also had to repair a leg screw that keeps the washer level, Washer runs like a new washer. very Pleased with the results. Its like having an old washer restored to new. it looks and sounds like a new washer.It took less then 5 mins to change the lid strike.
Parts Used:
-
Linda from Scio, NY
-
Difficulty Level:Easy
-
Total Repair Time:1- 2 hours
-
Tools:Pliers, Screw drivers
Was this instruction helpful to you?
Thank you for voting!
water leaking when washing machine went to spin
removed two screw at the bottom of front panel and pulled down on panel to remove, determined water coming out splash seal, splash cover held on with plastic clips around cover. Removed two screws on back side of top and hinged top over removed splash cover and cleaned old seal out replaced with new seal.Simple job but could not find parts locally and found Partselect on internet and ordered parts, very friendly and knowledgible person, ordered parts and had them in three days, would very highly recommend. Thank You Joe Lumpkin
Parts Used:
-
William J from Prattville, AL
-
Difficulty Level:Really Easy
-
Total Repair Time:30 - 60 mins
-
Tools:Screw drivers
Was this instruction helpful to you?
Thank you for voting!
No cold water
For the washer/Dryer combo, replacing water valve was easy, first you need to remove washer front panel and top lid, make sure that washer electrical is unplugged, turn off gas, turn off water valves.remove 1-screw holding water valve. reaching from top and using pliers remove retention clip holding hose. remove old water valve, there are two electrical connections for cold and hot water valves, make sure you mark them, remove them from old water valve. insert new water valve, connect hose and make sure that retaining clip is connected correctly.connect electrical wires. screw water valve into place from rear of washer. connect water hoses. before connecting panel and lid, turn on water valves and observe if there is any water leaks.
Parts Used:
-
Cruz from Babylon, NY
-
Difficulty Level:Easy
-
Total Repair Time:30 - 60 mins
-
Tools:Pliers, Screw drivers
Was this instruction helpful to you?
Thank you for voting!
tensioner torn up belt burnt up
removed front cover pushed in tensioner by hand walked belt off pulleys tilted belt removed lock ring pulled tensioner off noticed right rear lower tub brace broke at spot weods drilled out spot welds nut and bolted rear brace put springs back on base and installed belt works like new and saved myself from replacing lower washer tub frame so 70.00 and she up and running again
Parts Used:


-
patrick from northumberland, PA
-
Difficulty Level:Easy
-
Total Repair Time:30 - 60 mins
-
Tools:Nutdriver, Screw drivers, Wrench set
Was this instruction helpful to you?
Thank you for voting!
cold water continued to run and water leaked all over garage floor
The original inlet valve comes in from the rear and the replacement inlet valve mounts horizontally and this will not allow the use of the valve mounting plate and I needed to make a new plate so the supply hose could mount. After making the new plate and having the supply hose attach vertically, the system appears to be functioning properly. Having to make a new mounting plate was an unexpected adventure!
Parts Used:
-
Gary from Porter, ME
-
Difficulty Level:Easy
-
Total Repair Time:30 - 60 mins
-
Tools:Pliers, Screw drivers
Was this instruction helpful to you?
Thank you for voting!