




















TM16M (P7859209W) Amana Refrigerator - Instructions
Keep searches simple. Use keywords, e.g. "leaking", "pump", "broken" or "fit".
Freezer was cold, refrigerator was warm
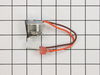
Removed panel at rear of freezer. Defrosted evaporator coil. Removed and replaced bimetal defrost thermostat. Had to replace the connector on the male lead wire in the freezer as the part supplied had a different type of connector than the original thermostat. Replaced panel at rear of freezer.
Parts Used:
-
Frank from Scranton, PA
-
Difficulty Level:Easy
-
Total Repair Time:15 - 30 mins
-
Tools:Nutdriver
Was this instruction helpful to you?
Thank you for voting!
Condensor fan motor quit working
Pulled the fridge out, Took bottom panel off. Removed 3 screws holding motor. Unplugged connector, cut wires, attached old connector on new motor. put blade on new motor.installed in fridge, put cover back on.
Parts Used:

-
David from New Albany, IN
-
Difficulty Level:Easy
-
Total Repair Time:15 - 30 mins
-
Tools:Nutdriver, Screw drivers
Was this instruction helpful to you?
Thank you for voting!
Switch didn't work
followed the video as instructed. Saved two repairman calls, one to find the problem, one to install. Net savings was about $130.00
Parts Used:

-
Don from Laramie, WY
-
Difficulty Level:Easy
-
Total Repair Time:15 - 30 mins
Was this instruction helpful to you?
Thank you for voting!
Frost build-up on freezer.
-
Don from Lowville, NY
-
Difficulty Level:Really Easy
-
Total Repair Time:15 - 30 mins
-
Tools:Screw drivers
Was this instruction helpful to you?
Thank you for voting!
Condensor Fan going bad
I knew the repair wasn't difficult. It was a matter of finding the replacement part. Luckily, I found the part via the internet on your site. Lucky for me, there was an installation video!! These videos are worth 1000 bucks!! Never have encountered a site with installation videos before. It gave me complete insight as to how the job was sequenced. I'm a very visual person, so videos are the perfect helper for me. With fewer and fewer affordable local service companies around to fix problems like mine, your site gave me the complete confidence to easily switch out the condensor fan. I completed the repair for about $63.00. Your site ROCKS! Keep up the repair videos because they are awesome and extremely helpful. I felt like your pricing was competitive for this item. Thanks again!!
Parts Used:
-
George from Hickory, NC
-
Difficulty Level:Really Easy
-
Total Repair Time:15 - 30 mins
-
Tools:Nutdriver, Pliers
Was this instruction helpful to you?
Thank you for voting!
Condensor motor was frozen
pull unit away from the wall, and unplug it. remove the grill, and cardboard guard on the lower back of the unit. remove Three screws for the motor bracket. Remove the bracket legs from the old motor and assemble them to the new motor. take the fan blade off the old motor, place it on the new. Cut the wires at the old motor, strip the insulation back, use supplied wire nuts to connect the new motor. Reverse order to reassemble. Plug in unit to test function.
Parts Used:
-
john from thibodaux, LA
-
Difficulty Level:Really Easy
-
Total Repair Time:15 - 30 mins
-
Tools:Nutdriver, Pliers
Was this instruction helpful to you?
Thank you for voting!
excessive water in condensate pan
just as video instructions said, very easy just following them ,part arrived in very short time and was exact fit completely satisfied, saved repair man service charges and wait time
Parts Used:
-
michael from woodstock, MD
-
Difficulty Level:Really Easy
-
Total Repair Time:15 - 30 mins
-
Tools:Pliers, Socket set
Was this instruction helpful to you?
Thank you for voting!
Broke the arm off the food compartment rocker switch
After receiving the new part almost immediately,using two screw drivers, removed the broken switch from the plastic frame. Be careful not to scratch or otherwise tear the plastic...very pliable. Since the original switch was factory installed and the wires were packed in fiberglass insulation, the switch came out but the wires and clips were still in place and could not reach the new switch. It was necessary to pull them down with bent long nose pliers...used a lot of "pull" but the wires held up.Connected the switch, turned the power on and there was light! Reports from other users really took the uncertainty out of the task.
Parts Used:
-
David from St. Pete Beach, FL
-
Difficulty Level:A Bit Difficult
-
Total Repair Time:15 - 30 mins
-
Tools:Pliers, Screw drivers
Was this instruction helpful to you?
Thank you for voting!
Freezer was not getting cold enough
Mine was alittle different than the online instructions. 1. I removed the motor. 2. I took the fan off the old motor and cut the wires about 3" back from old motor. 3. Mounted the new fan on bracket and put the fan on the new motor. 4.connected wires that were cut and used wire nuts to connect. 5. Mounted bracket and motor/fan to unit and it works like its brand new. Thank you PartSelect!
Parts Used:
-
David from Salem, WI
-
Difficulty Level:Easy
-
Total Repair Time:15 - 30 mins
-
Tools:Nutdriver, Pliers
Was this instruction helpful to you?
Thank you for voting!
Light switch went bad
Simply stick a putty knife between the switch and refrig wall. Pop out old swith, remove both wires by pulling off switch by terminals. Throw switch out. Put wires on new switch and push into slot and all done. Nothing to it! Took me 5 minutes if th
Parts Used:
-
Joseph T. from Morgantown, WV
-
Difficulty Level:Really Easy
-
Total Repair Time:Less than 15 mins
Was this instruction helpful to you?
Thank you for voting!
Light bulb failure
Received the part the day after ordering. Appreciated the quick service and repair took less than a minute.
Parts Used:

-
Grant from Alexandria, VA
-
Difficulty Level:Really Easy
-
Total Repair Time:Less than 15 mins
Was this instruction helpful to you?
Thank you for voting!
light switch sticking
I watched the video and thought "I can do this". Made some notes and then proceeded to remove the old switch and replace with the new one. Thank you.
Parts Used:
-
Paula from Rush, NY
-
Difficulty Level:Easy
-
Total Repair Time:Less than 15 mins
-
Tools:Pliers, Screw drivers
Was this instruction helpful to you?
Thank you for voting!
Light did not come on (bad bulb!) on TC18KL
I have never before seen a bulb with the filament intact not light. If the bulb's filament seems intact, screw the bulb into a known working lamp and see if it lights. When screwing it back into the socket in the fridge, it takes a bit of extra effort to fully seat (until it does, it won't light!). For replacing the switch, I unplugged the unit, used a paint scraper and worked it under the switch bezel from the right side. A bit of moxie, and the switch came out. The replacement switch had a different spade contact spacing than the original. I used a pair of scissors to cut the rubber bridge between the two switch wire connectors so I could connect to the new switch. In the end, it turned out to be the bulb. NOTE: The Model TC18KL is _not_ listed! What I finally found that the number "P7803211WL" on the sticker is actually a manufacturing code. Found this out by searching, and Sears' part search came up with matches.
Parts Used:
-
Louis from Beloit, WI
-
Difficulty Level:A Bit Difficult
-
Total Repair Time:Less than 15 mins
Was this instruction helpful to you?
Thank you for voting!
Light switch which turns on the lights when the door opens went out
This is an easy fix, simply remove and replace. What I was impressed with is that a how to video was provided along with my part. I wish all manufactures would offer this, the video was easy to understand and you had a good view of the operation. Thanks, a job well done.
Parts Used:
-
Dennis from Lawrenceville, GA
-
Difficulty Level:Really Easy
-
Total Repair Time:Less than 15 mins
-
Tools:Nutdriver
Was this instruction helpful to you?
Thank you for voting!
Light switch in the refrigerator was faulty from the first day we installed the fridge.
I had ordered some other parts for something entirely different off your website and service was great. So after almost ten years of a dark refrigerator, because of a defective switch, I decided to see if you had the part to fix it... You did and the part got here in 3 days. I had a working light switch and all the light in the world where my husband needed it most (in the fridge). It took me at the most ten minutes to replace the part. All is well now and I have a happy husband who can find the leftovers just fine. Thanks for your great service!
Parts Used:
-
Mary from Wasilla, AK
-
Difficulty Level:Easy
-
Total Repair Time:Less than 15 mins
-
Tools:Screw drivers
Was this instruction helpful to you?
Thank you for voting!