




















TBE24JASKRWH General Electric Refrigerator - Instructions
Keep searches simple. Use keywords, e.g. "leaking", "pump", "broken" or "fit".
Fan blade broken
Removed the broken fan blade (just pulled off) and replaced with part purchased PartSelect. Very easy repair, no tools required.
Parts Used:

-
John from Cumberland, MD
-
Difficulty Level:Really Easy
-
Total Repair Time:Less than 15 mins
2 of 5 people
found this instruction helpful.
Was this instruction helpful to you?
Thank you for voting!
Broken light switch
took a little more effort than the video show to remove old module and replace new. Works fine now.
Parts Used:

-
Ted from SANDWICH, IL
-
Difficulty Level:Easy
-
Total Repair Time:15 - 30 mins
-
Tools:Screw drivers
1 of 2 people
found this instruction helpful.
Was this instruction helpful to you?
Thank you for voting!
Change bulb

-
Louis from LEAGUE CITY, TX
-
Difficulty Level:Really Easy
-
Total Repair Time:30 - 60 mins
-
Tools:Nutdriver
3 of 8 people
found this instruction helpful.
Was this instruction helpful to you?
Thank you for voting!
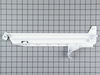
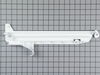
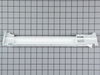
The vegie draw rack cover
Both side rails were busted. the parts were precise and it was extremely easy. Thanks again.
Parts Used:
-
PHYLLIS from BRONX, NY
-
Difficulty Level:Really Easy
-
Total Repair Time:15 - 30 mins
-
Tools:Screw drivers
2 of 5 people
found this instruction helpful.
Was this instruction helpful to you?
Thank you for voting!
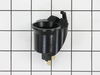
Short in the light socket.
Un Plugged the frig. Unlocked the socket by pressing down on the latch. Pulled the socket out ensuring I had enough slack. Unplugged the old socket installed the new. Plugged the frig back in. Tested the switch . Very easy-to-use.
Parts Used:
-
ED from ENON, OH
-
Difficulty Level:Very Easy
-
Total Repair Time:Less than 15 mins
1 of 2 people
found this instruction helpful.
Was this instruction helpful to you?
Thank you for voting!
Light burnt out.
Turned the wire protector to the side. Turned out the old bulb and replaced it with the new. Turned the wire protector back in place and I'm like new.
Parts Used:
-
Roscoe G from ROCHESTER, NY
-
Difficulty Level:Very Easy
-
Total Repair Time:Less than 15 mins
2 of 6 people
found this instruction helpful.
Was this instruction helpful to you?
Thank you for voting!
socket had melted
pluged the wire harness into the new socket from the back and snaped the socket in place.
Parts Used:
-
Chris from Charlotte, NC
-
Difficulty Level:Really Easy
-
Total Repair Time:Less than 15 mins
1 of 3 people
found this instruction helpful.
Was this instruction helpful to you?
Thank you for voting!
broken part
I ordered the part one day and it was in my refrigerator by the next day. No tools required. You guys are incredible. This is the second time I ordered parts from you. You never disappoint!!
Parts Used:
-
Minky from New York, NY
-
Difficulty Level:Really Easy
-
Total Repair Time:Less than 15 mins
1 of 3 people
found this instruction helpful.
Was this instruction helpful to you?
Thank you for voting!
The door activated light switch was missing.
Pulled the two wires out from the access hole in the lower part of the refrigerator. Put them in the spade connectors on the new switch, and pushed the switch into place.
Parts Used:
-
Don from Eugene, OR
-
Difficulty Level:Really Easy
-
Total Repair Time:Less than 15 mins
1 of 3 people
found this instruction helpful.
Was this instruction helpful to you?
Thank you for voting!
broken vegie bin slide rails
This was very easy. Just unscrew the broken side pieces and attach the new ones. If the rubber gaskets are still in good shape, gently pull them off and attach them to the new rails. I was very impressed with the service from Partselect.com. I gave them my appliance model number and they helped me find the right part. I ordered on Sunday evening and had the parts in hand by Tuesday. Great service! I will definitely use this company if I need more parts.
Parts Used:
-
Jacki from Iola, KS
-
Difficulty Level:Really Easy
-
Total Repair Time:Less than 15 mins
-
Tools:Screw drivers
0 of 1 people
found this instruction helpful.
Was this instruction helpful to you?
Thank you for voting!
the side rail broke because I kicked it
I took out all the stuff on the shelf, and the drawers.
then I took out the shelf, pulled off the cover so I could get at the screws.
I unscrewed 2 screws, threw out the old part, and screwed the new one into the shelf.
then I put the whole thing back together, in total the hardest part was cleaning off the shelves and then putting everything back in.
As a note, there was a gasket on the old rail that was not on this one. I had some silicone tabs that I used instead, but I really think the gasket should have been part of the order.
then I took out the shelf, pulled off the cover so I could get at the screws.
I unscrewed 2 screws, threw out the old part, and screwed the new one into the shelf.
then I put the whole thing back together, in total the hardest part was cleaning off the shelves and then putting everything back in.
As a note, there was a gasket on the old rail that was not on this one. I had some silicone tabs that I used instead, but I really think the gasket should have been part of the order.
Parts Used:
-
Peter from Prospect, CT
-
Difficulty Level:Really Easy
-
Total Repair Time:Less than 15 mins
-
Tools:Screw drivers
0 of 1 people
found this instruction helpful.
Was this instruction helpful to you?
Thank you for voting!
Light socket missing in refrigerator
Frig parts had been scavenged in an apartment complex. Restoring socket was only a matter of plugging in two spade contacts and clipping in socket.
Parts Used:
-
Wayne from Issaquah, WA
-
Difficulty Level:Really Easy
-
Total Repair Time:Less than 15 mins
1 of 4 people
found this instruction helpful.
Was this instruction helpful to you?
Thank you for voting!
The slide rail for the vegetable drawer broke in a refrigerator that is at least 15 years old.
Removed the broken rail (2 screws), replaced the new rail (2 screws), reassembled all in about 8 minutes. It was AWESOME!!! I had spent hours trying to repair it and, fortunately, gave up and decided to look online for the part. Didn't even think that the part would still be available. Not only was it available but it arrived in 2 days! Anything that is broken in the future: I am going to your website first! Thank you!!!
Parts Used:
-
ade from oceanside, CA
-
Difficulty Level:Really Easy
-
Total Repair Time:Less than 15 mins
-
Tools:Screw drivers
0 of 1 people
found this instruction helpful.
Was this instruction helpful to you?
Thank you for voting!
This part broke for whatever reason, I do not know.
I needed a pliers to extract the shelf reatainer from its place in the door of the fridge.
I found the part in the partSelect catalog, ordered it, opened the box, and snapped the replacement part into place. I then popped the Shelf retainer back into place where it belonged.
Piece of cake.
I found the part in the partSelect catalog, ordered it, opened the box, and snapped the replacement part into place. I then popped the Shelf retainer back into place where it belonged.
Piece of cake.
Parts Used:
-
John D from Chevy Chase, MD
-
Difficulty Level:Really Easy
-
Total Repair Time:Less than 15 mins
-
Tools:Pliers
0 of 1 people
found this instruction helpful.
Was this instruction helpful to you?
Thank you for voting!
Broken door shelf retainer
Just replace end cap and install. The beauty of this was the door was broken in the evening before July 4 when all retail had closed down early for the 4th weekend. I hit Part Select on the computer, scrolled down the partslist,looked at pictures and figured out from that the necessary piece I needed, hit the buy button and in less than 10 minutes had an order placed. July 7 UPS was at the door with the parts and my reefer was back in business. NO service call and no extra charges!!! Thank You, PartSelect!!!!
Parts Used:
-
Bill from Prescott, AZ
-
Difficulty Level:Really Easy
-
Total Repair Time:Less than 15 mins
0 of 1 people
found this instruction helpful.
Was this instruction helpful to you?
Thank you for voting!