




















SM230PXW3 Frigidaire Washer - Instructions
Keep searches simple. Use keywords, e.g. "leaking", "pump", "broken" or "fit".
water did not stop flowing into drum
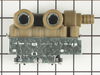
Watched the handy-dandy video, removed the defective part, waited for delivery, installed the new part and was back washing another load (minus the wet floor) in less than 10 minutes! Just one catch, I am a 56yo female with nominal hand strength, so technically, I had to recruit the help of a (stronger) person to tighten-up those self-tapping screws. I didn't feel so weak when I noticed that he had some difficulty as well. LOL! Ladies, don't be shy asking for help-I even tried the power drill with no success. Excellent video! Aside from the self-tapping screws, my grand-daughter could have managed this repair!
Parts Used:
-
ernest from Ravenden, AR
-
Difficulty Level:Easy
-
Total Repair Time:15 - 30 mins
-
Tools:Pliers, Screw drivers
Was this instruction helpful to you?
Thank you for voting!
I was only getting hot water
I removed the back cover after disconnecting the electric and shutting off the water. I then proceeded to disconnect the water lines and then removed the water inlet valve by removing the two screws holding it in place. Then I used pliers to remove the hose leading to the washer. After that I did everything in reverse and was back in business. The video was very helpful and it made me feel comfortable with the procedure. I now know a little more about washers. Thanks for the excellent information.
Parts Used:
-
Elmo from Apache Junction, AZ
-
Difficulty Level:Really Easy
-
Total Repair Time:15 - 30 mins
-
Tools:Nutdriver, Pliers
Was this instruction helpful to you?
Thank you for voting!
No cold water
For the washer/Dryer combo, replacing water valve was easy, first you need to remove washer front panel and top lid, make sure that washer electrical is unplugged, turn off gas, turn off water valves.remove 1-screw holding water valve. reaching from top and using pliers remove retention clip holding hose. remove old water valve, there are two electrical connections for cold and hot water valves, make sure you mark them, remove them from old water valve. insert new water valve, connect hose and make sure that retaining clip is connected correctly.connect electrical wires. screw water valve into place from rear of washer. connect water hoses. before connecting panel and lid, turn on water valves and observe if there is any water leaks.
Parts Used:
-
Cruz from Babylon, NY
-
Difficulty Level:Easy
-
Total Repair Time:30 - 60 mins
-
Tools:Pliers, Screw drivers
Was this instruction helpful to you?
Thank you for voting!
leaking water
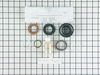
removed all parts from trans shaft and replaced seal although had some difficulty removeing the agitator assembly due to age and mineral deposits but a little wd40 and tapping with a hammer helped
Parts Used:
-
charles from san leandro, CA
-
Difficulty Level:Really Easy
-
Total Repair Time:1- 2 hours
-
Tools:Pliers, Screw drivers, Socket set
Was this instruction helpful to you?
Thank you for voting!