




















SBDE520SW Amana Refrigerator - Instructions
Keep searches simple. Use keywords, e.g. "leaking", "pump", "broken" or "fit".
broken end cap on ice icemaker bin
remove the tray from the freezer. unsnap the front cover from the bin. remove the four screws holding the metal helix and grinder assembly to the bin. slide the metal helix and grinder assembly out. slide the new end cap onto the end of the helix. (this is the only tricky part and takes some patience. The stub end of the helix has to slide into the hole in the end cap. You can't bend the helix, just work the end cap around until it slides over the helix end stub). Reassemble the grinder and helix to the bin, snap the cover on and slide back into the freezer.
Parts Used:

-
Bob from Oakland, MD
-
Difficulty Level:Easy
-
Total Repair Time:15 - 30 mins
-
Tools:Nutdriver
1 of 2 people
found this instruction helpful.
Was this instruction helpful to you?
Thank you for voting!
Ice Maker Auger Wouldn't Turn
I removed the ice tray and removed the front plastic cover that simply snapped off. I removed 4 hex screws with 1/4" nut driver. Then pulled the auger forward. This allowed me to slide the end cap into place. I put the auger in place and retightened the 4 hex screws, snapped on the plastic cover it worked fine
Parts Used:
-
Leonard from Reynoldsburg, OH
-
Difficulty Level:Really Easy
-
Total Repair Time:15 - 30 mins
-
Tools:Nutdriver
1 of 2 people
found this instruction helpful.
Was this instruction helpful to you?
Thank you for voting!
The ice stripper cracked from freezing.
There was three screws to remove to unmout the ice maker, and unplug the wire harness,then two to remove to slip in new stripper. All took about 20 mins.
Parts Used:

-
David from Discovery Bay, CA
-
Difficulty Level:Really Easy
-
Total Repair Time:15 - 30 mins
-
Tools:Nutdriver
3 of 8 people
found this instruction helpful.
Was this instruction helpful to you?
Thank you for voting!
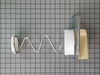
Arm to distribute ice quit working
removed the old part and replaced with new. Part came very quickly....
Parts Used:
-
Sherry from Terrell, TX
-
Difficulty Level:Easy
-
Total Repair Time:15 - 30 mins
-
Tools:Nutdriver
1 of 2 people
found this instruction helpful.
Was this instruction helpful to you?
Thank you for voting!
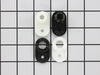
Replaced dorr closure cam on both doors of side-by-side
The fridge door was easy. Just unscrew top and lift off hindge. The freezer door took longer. But I had the user guide which helped. We unhooked the power harness at the top of the door, and disconnected the water line at the bottom of the door.
Frankly, it wasn't that hard for me because I had my son-in-law do it!
Frankly, it wasn't that hard for me because I had my son-in-law do it!
Parts Used:
-
Michael from Sandy, UT
-
Difficulty Level:A Bit Difficult
-
Total Repair Time:30 - 60 mins
-
Tools:Nutdriver, Screw drivers
1 of 2 people
found this instruction helpful.
Was this instruction helpful to you?
Thank you for voting!
end cap broke under tlhe weight of ice and other frozen items that were ill placed
removed the ice maker tray and screws and that held the cover to the rotating mechanism that crushes and dispenses the ice. the end cap is then attached to the rotating mechanism and ice container, the cover is replaced;finishing the job.
Parts Used:
-
albert from El Paso, TX
-
Difficulty Level:Really Easy
-
Total Repair Time:Less than 15 mins
-
Tools:Screw drivers, Socket set
1 of 3 people
found this instruction helpful.
Was this instruction helpful to you?
Thank you for voting!
The right door was sagging and the handles were rubbing together
First, remove the plastic cover off the top hinge by removing the single phillips head screw.
Removed the three hex-head screws holding the hinge to the body of the fridge and then lift the hinge off of the door.
Lift the door off the bottom hinge and place on a flat surface so you can easily access the bottom.
Remove the single hex-head screw from the center of the door part of the closure cam and pull it free. Install the new part.
Next, remove the bottom portion of the closure cam from the lower door hinge (still attached to the fridge) by removing the single hex-head screw. Install the new part.
If needed, lube the lower door hinge with Vaseline and carefully set the door back on. (This is the hard part if you are working alone, as it can be hard to line up the hole.)
Lube the top hinge, reinstall, and replace the plastic cover. Easy as 1, 2, 3.
Removed the three hex-head screws holding the hinge to the body of the fridge and then lift the hinge off of the door.
Lift the door off the bottom hinge and place on a flat surface so you can easily access the bottom.
Remove the single hex-head screw from the center of the door part of the closure cam and pull it free. Install the new part.
Next, remove the bottom portion of the closure cam from the lower door hinge (still attached to the fridge) by removing the single hex-head screw. Install the new part.
If needed, lube the lower door hinge with Vaseline and carefully set the door back on. (This is the hard part if you are working alone, as it can be hard to line up the hole.)
Lube the top hinge, reinstall, and replace the plastic cover. Easy as 1, 2, 3.
Parts Used:
-
Thomas from Edmond, OK
-
Difficulty Level:Really Easy
-
Total Repair Time:Less than 15 mins
-
Tools:Nutdriver, Screw drivers
1 of 3 people
found this instruction helpful.
Was this instruction helpful to you?
Thank you for voting!
19 year old light switch broke
Great service. Unpluged old switch and pluged in new one. Works great
Parts Used:

-
Fred from Watertown, NY
-
Difficulty Level:Really Easy
-
Total Repair Time:Less than 15 mins
0 of 1 people
found this instruction helpful.
Was this instruction helpful to you?
Thank you for voting!
light would work intermitently
removed the 2 screws that held the panel in place, had to reach up and push on locking tabs to lower trhe front of the panel. was able to then push on the locking tab of the switch to release it. removed the wires, replaced them onto the new switch, and snapped the switch into place. the rest was reverse of the uninstall process.
Parts Used:
-
Gregory from middle island, NY
-
Difficulty Level:Easy
-
Total Repair Time:Less than 15 mins
-
Tools:Screw drivers
0 of 1 people
found this instruction helpful.
Was this instruction helpful to you?
Thank you for voting!
door snapping when opening and closing
removed top hinge, lifted door off bottom hinge, replaced cam, installed door.
Parts Used:
-
robert from saint cloud, FL
-
Difficulty Level:Really Easy
-
Total Repair Time:Less than 15 mins
-
Tools:Socket set
0 of 1 people
found this instruction helpful.
Was this instruction helpful to you?
Thank you for voting!
Replace Bad Switch
Pry old switch and pull out. Disconect two wires. Put two wires on new switch, must be inserted right and connections not loose. Put switch in, making shure wies do not come off and snap in place
Parts Used:
-
carlos from haverstraw, NY
-
Difficulty Level:Easy
-
Total Repair Time:Less than 15 mins
-
Tools:Pliers, Screw drivers
0 of 1 people
found this instruction helpful.
Was this instruction helpful to you?
Thank you for voting!
old switch left freezer bulb always-on
Unplug appliance. Socket wrench to unscrew two screws. Module drops down. disconnected two press-on wires by prying off with screwdriver. Removed old switch. Press-fit new switch. Reconnected two wires (color coded). Screwed module back in place. Plug in appliance.
Parts Used:
-
JONATHAN from ELKINS PARK, PA
-
Difficulty Level:Easy
-
Total Repair Time:Less than 15 mins
-
Tools:Nutdriver, Screw drivers
0 of 1 people
found this instruction helpful.
Was this instruction helpful to you?
Thank you for voting!
rocker switch broke off
disconnected el. power to fridge. pried out broken switch with small screwdriner and pulled out w/water pump pliers. installed new switch and pressed into opening.
Parts Used:
-
STANLEY from OAKLAND, NJ
-
Difficulty Level:Really Easy
-
Total Repair Time:Less than 15 mins
-
Tools:Screw drivers
0 of 1 people
found this instruction helpful.
Was this instruction helpful to you?
Thank you for voting!
Internal light did not come on each time the door was opened.
After disconnecting the electricity. I followed the instructions as indicated in the "HOW TO" article on the website. I used a steel putty knife and pried the light switch out of its retaining hole. I worked the right side the most since this is the side with the retaining clip. After I removed the switch I transferred the two electrical outlets to the new switch and easily snapped it into place. Engaged the electric power and tested the switch.
Parts Used:
-
John from Jefferson Hills, PA
-
Difficulty Level:Really Easy
-
Total Repair Time:Less than 15 mins
0 of 1 people
found this instruction helpful.
Was this instruction helpful to you?
Thank you for voting!
Door Light switch cracked Mounting
I noticed that the refrigerator was having trouble maintaining temperature. Thought it might be time for new one until I found out that a new frig was $5k to $7K. Just happened to notice that the light switch didn't look quite right (was not sitting sqaure to the door). Once I pressed it it came loose. I then realized the the lights were staying on (50 watts of heating). Replaced the switch and the frig started working like new.
Parts Used:
-
Paul from Hinsdale, IL
-
Difficulty Level:Really Easy
-
Total Repair Time:Less than 15 mins
-
Tools:Screw drivers
0 of 1 people
found this instruction helpful.
Was this instruction helpful to you?
Thank you for voting!