




















RN1329CD1P (ASSEELC) LG Dryer - Instructions
Keep searches simple. Use keywords, e.g. "leaking", "pump", "broken" or "fit".
The latch on the dryer door was broken. I ordered the part, had it the next day and took it home to fix my dryer.
It only took about 5 minutes to fix the problem. Took out two screws, removed old part, put the new one on and replaced the screws. Works great now!
Parts Used:

-
Sarah from Burkesville, KY
-
Difficulty Level:Really Easy
-
Total Repair Time:Less than 15 mins
-
Tools:Screw drivers
Was this instruction helpful to you?
Thank you for voting!
Dryer door wouldn't stay latched
Unscrewed the dryer latch on the dryer (not the piece on the dryer door) and screwed in the new piece! Bam, done and done. The ordering process was a snap, very friendly on the phone. She even emailed me a picture of the part before I ordered to make sure it was the right one, and was so patient with me, while my kids were sort of loud in the background. Thanks PartSelect.com, your part is quality and employee rocks.
Parts Used:
-
Lisa from Parker, CO
-
Difficulty Level:Really Easy
-
Total Repair Time:Less than 15 mins
-
Tools:Screw drivers
Was this instruction helpful to you?
Thank you for voting!
Loud squealing noise coming from dryer.
Not knowing whether it was the pulley, tensioner, or drum roller I had previously pulled the dryer apart and noticed one roller shaft was rusty for some reason. When the part came in (which was quite fast)I disassembled the dryer to the point that I could remove the left rear drum roller. Replaced the roller and reassembled the dryer (to my surprise without any extra screws or parts left). Fairly easy job, just time consuming.
Parts Used:

-
Todd from Fremont, OH
-
Difficulty Level:Really Easy
-
Total Repair Time:30 - 60 mins
-
Tools:Screw drivers, Socket set, Wrench set
Was this instruction helpful to you?
Thank you for voting!
belt slipping, drum will not turn
I first took the top off, then the front control panel, unplugged the wires from panel (very easy), took the front panel off, the rum comes out very easy, be sure to look at the way the belt goes back on the pulley. I didn't and it took me a while to figure it out. All goes back together very easy.
Parts Used:

-
Donna from Iowa, LA
-
Difficulty Level:Really Easy
-
Total Repair Time:30 - 60 mins
-
Tools:Screw drivers
Was this instruction helpful to you?
Thank you for voting!
drum motor was not starting when warm, centrifugal switch had broken
removed the top of the dryer first by removing screws in the back and pulling the top back and up. Removed the control panel, followed by the door. The front panel and top brace were then removed. The belt was disengaged by pulling the tensioner idler and working the belt off the motor pulley. The drum was lifted out and set aside with the other parts. Holding the motor shaft with vice-grip pliers, and turning the nut on the blower wheel (left-hand thread!)removed the blower wheel. The motor is held by snap-on retainers and easily removed and swapped. Installation is reverse of disassembly. While in there, cleaned out the lint gathered everywhere. Also constructed a heat shield out of aluminum flashing and foil tape to cover the foil and foam tape between the burner assembly and sheet metal side. The foam had actually burned at some point in the past and the flashing should act as a better heat shield. A relatively easy repair, but should not have been necessary in a 7 year old dryer.
Parts Used:

-
James from Randallstown, MD
-
Difficulty Level:Easy
-
Total Repair Time:30 - 60 mins
-
Tools:Pliers, Screw drivers, Socket set
Was this instruction helpful to you?
Thank you for voting!
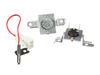
Not heating correctly
Removed Top, then front and drum. Parts easy to access once drum is out. Recommend reading up on drum replacement. Would appear that all repairs will require taking it out.
Parts Used:



-
Inland Commercial Appliance from Moreno Valley, CA
-
Difficulty Level:A Bit Difficult
-
Total Repair Time:1- 2 hours
-
Tools:Screw drivers
Was this instruction helpful to you?
Thank you for voting!