




















RJ745G4J3 General Electric Range - Instructions
Keep searches simple. Use keywords, e.g. "leaking", "pump", "broken" or "fit".
old burner had burned out and broken
removed old element and installed new, and oven is up and working like new
Parts Used:
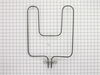
-
Ernie from Gualala,Ca, CA
-
Difficulty Level:Really Easy
-
Total Repair Time:Less than 15 mins
-
Tools:Nutdriver
0 of 1 people
found this instruction helpful.
Was this instruction helpful to you?
Thank you for voting!
Bake element went dead
Removed access screws from bake element cover, removed screws retaining wire connections on bake element, reverse procedure, and heat to burn off contaminants.
Parts Used:
-
William M. from Towaco, NJ
-
Difficulty Level:Easy
-
Total Repair Time:Less than 15 mins
-
Tools:Nutdriver, Screw drivers
0 of 1 people
found this instruction helpful.
Was this instruction helpful to you?
Thank you for voting!
Oven bake element broken
Took out the old (removed 2 screws holding the element to the back of the oven, disconnected the 2 screws attaching the electrical wires to the element). Decided to clean the oven with EasyOff. It took longer to spray this on, and then later wipe it up, than the repair itself. Reversed the procedure for the new element. A very simple repair - my wife is amazed!
Parts Used:
-
Norman from Houston, TX
-
Difficulty Level:Really Easy
-
Total Repair Time:Less than 15 mins
-
Tools:Nutdriver, Screw drivers
0 of 1 people
found this instruction helpful.
Was this instruction helpful to you?
Thank you for voting!
Old element burned out
Turn off power to oven. Make sure with tester that the power is indeed off. Disconnected the two fasteners holding the old unit face plate to rear of oven. Pull the unit outward to expose the leads. Disconnected the leads. Reform new element to remove minor bends so it will sit flat on the floor of the oven. With plies holding the leads straight connect new unit to oven leads. Push new unit back into mounting hole. Reconnect new unit face plate to back of oven. Check that unit is level. Turn the power back on. Test the unit. All works just fine.
Parts Used:
-
Keith from Wauwatosa, AL
-
Difficulty Level:Really Easy
-
Total Repair Time:Less than 15 mins
-
Tools:Nutdriver, Pliers, Screw drivers
1 of 4 people
found this instruction helpful.
Was this instruction helpful to you?
Thank you for voting!
Heating element brned out.
Removed two screws to release the burner, then two screws to disconnect the wiring and replace them. Then inserted the burner int position and replaced the two screws which were removed to remove the burner.
Very easy, however you will need a flashlight to see by since the back of the oven is rather dark.
Very easy, however you will need a flashlight to see by since the back of the oven is rather dark.
Parts Used:
-
Ben from Mena, AR
-
Difficulty Level:Easy
-
Total Repair Time:Less than 15 mins
-
Tools:Screw drivers
0 of 1 people
found this instruction helpful.
Was this instruction helpful to you?
Thank you for voting!
Heating element broke in several places
Turned off the power source to the oven. I then removed the two screws that hold the element in place, then pulled the element out about 3 inches and disconnected the two wires at the back. The hardest part was getting the screws turned to connect the new wires at the back.
Parts Used:
-
Michelle from Pasadena, TX
-
Difficulty Level:Really Easy
-
Total Repair Time:Less than 15 mins
-
Tools:Screw drivers
0 of 1 people
found this instruction helpful.
Was this instruction helpful to you?
Thank you for voting!
Baking Element not working
Repair was easy! I asked my son to take out the old and put in the new! He did! The oven works like new again for less than $50.00!!! Thanks!
Parts Used:
-
Nancy from Marietta, GA
-
Difficulty Level:Really Easy
-
Total Repair Time:Less than 15 mins
0 of 1 people
found this instruction helpful.
Was this instruction helpful to you?
Thank you for voting!
The bottom heating element in the oven was not heating
First I shut off power to oven. Then I removed two screws from the back of the oven. Pulled elemeent out a couple of inches and diconnected from the power source. I removed the old unit and replaced it with the new one. Connected it to power source. Pushed element back into place and replaced the screws. Turn the power back on and turned on the oven. ....And there was HEAT!
Parts Used:
-
Felicia from Little Rock, AR
-
Difficulty Level:Really Easy
-
Total Repair Time:Less than 15 mins
-
Tools:Nutdriver
0 of 1 people
found this instruction helpful.
Was this instruction helpful to you?
Thank you for voting!
Bake element burned out.
I removed the two screws that hold the element in place; pulled the element out, disconnected the two wires held on by screws, replaced the element with a new one and reversed the procedure.
Parts Used:
-
James from Lewisville, TX
-
Difficulty Level:Really Easy
-
Total Repair Time:Less than 15 mins
-
Tools:Screw drivers
0 of 1 people
found this instruction helpful.
Was this instruction helpful to you?
Thank you for voting!
Beke Element broke into 3 pieces
-
Ron from Flower Mound, TX
-
Difficulty Level:Really Easy
-
Total Repair Time:Less than 15 mins
-
Tools:Nutdriver, Screw drivers
0 of 1 people
found this instruction helpful.
Was this instruction helpful to you?
Thank you for voting!
Bake element hot spots and deformed
Looked up mfg. and part #,looked at blow up of stove on parts select, identified element. The part came overnite. Shut down power, removed 2 screws with a nut driver, pulled element foreward to reveal 2 screws attaching wires. Replaced in reverse order, turned on power, back in service. 10 minutes tops.
Parts Used:
-
Stephen from Andover, MA
-
Difficulty Level:Really Easy
-
Total Repair Time:Less than 15 mins
-
Tools:Nutdriver, Screw drivers
0 of 1 people
found this instruction helpful.
Was this instruction helpful to you?
Thank you for voting!
Bake Element Burned Out
It is simple.
Cut off the power. Remove racks. Remove burned out element and replace with new one.
Replace racks and turn on the power. Set the clock.
I've done this about 5 times and now keep a spare element.
Cut off the power. Remove racks. Remove burned out element and replace with new one.
Replace racks and turn on the power. Set the clock.
I've done this about 5 times and now keep a spare element.
Parts Used:
-
Hugh from Midland, TX
-
Difficulty Level:Really Easy
-
Total Repair Time:Less than 15 mins
-
Tools:Nutdriver, Screw drivers
0 of 1 people
found this instruction helpful.
Was this instruction helpful to you?
Thank you for voting!
Burn out the Heating element
Removed burn out element,very easy to installed, screwed them in, done that fast!
Parts Used:
-
Jesse from TULARE, CA
-
Difficulty Level:Really Easy
-
Total Repair Time:Less than 15 mins
-
Tools:Pliers
0 of 1 people
found this instruction helpful.
Was this instruction helpful to you?
Thank you for voting!
The heating element was broken in one place & wouldn't heat
Ordered the part on a Friday afternoon and was shocked to receive the box on Saturday AM! Turned off the power to the unit, unscrewed the screws holding in the old element, and hooked up the new one. We didn't have a socket wrench so we subbed a pliers. So easy & cheap! Seems like everything's breaking around this house & this is the ONLY thing that was easy & cost less than $20! Happy with Parts Select!
Parts Used:
-
Suzanne from PLAINFIELD, NJ
-
Difficulty Level:Really Easy
-
Total Repair Time:Less than 15 mins
-
Tools:Pliers, Screw drivers
0 of 1 people
found this instruction helpful.
Was this instruction helpful to you?
Thank you for voting!
baking element failure
I was able to find the part here and replaced it the same day. You could use smaller boxes and packing, but thanks you for the part and help.
Parts Used:
-
Curtis from Mc Kinleyville, CA
-
Difficulty Level:Really Easy
-
Total Repair Time:Less than 15 mins
-
Tools:Nutdriver, Screw drivers
0 of 1 people
found this instruction helpful.
Was this instruction helpful to you?
Thank you for voting!