




















RJ745G4J3 General Electric Range - Instructions
Keep searches simple. Use keywords, e.g. "leaking", "pump", "broken" or "fit".
family member melted fan with hair dryer
Unplugged fridge.Removed 2 screws holding a panel. After panel removed took off old fan and inserted new. Quite simple.
Parts Used:
-
Lauraine from Rocky Hill, CT
-
Difficulty Level:Really Easy
-
Total Repair Time:Less than 15 mins
-
Tools:Screw drivers
1 person
found this instruction helpful.
Was this instruction helpful to you?
Thank you for voting!
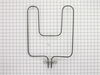
Replaced bake element after first one burnt out
The replacement was simple. I turned off the power to the oven, took out two nuts holding the element in place, unscrewed the element from the power and finished the job in 10 minutes. The company that we called was going to charge nearly $200 to complete this job. I saved a lot of money by doing it my self.
Parts Used:
-
Gene from Kingwood, TX
-
Difficulty Level:Really Easy
-
Total Repair Time:Less than 15 mins
-
Tools:Nutdriver, Screw drivers
1 person
found this instruction helpful.
Was this instruction helpful to you?
Thank you for voting!
Bake Element burned out after 23 years of use
Turned off circuit to oven. Unscrewed two screws holding element in place at back oven wall, pulled out old element and loosened nuts holding it to wiring. Discarded old element. Put new element in place and re-attached nuts to wiring (very simple). Pushed back into place and replaced screws to hold plate to back of oven wall. Turned circuit back on and put oven on to bake to test -- voila, success! Thank you PartSelect.com!
Parts Used:
-
Christina from Greenwich, CT
-
Difficulty Level:Really Easy
-
Total Repair Time:Less than 15 mins
-
Tools:Screw drivers, Wrench (Adjustable)
1 person
found this instruction helpful.
Was this instruction helpful to you?
Thank you for voting!
burned out element
remove 2 screws holding element to oven back wall/ unscrew wires from element/ new element install the reverse of removal
Parts Used:
-
david from woodbury, CT
-
Difficulty Level:Really Easy
-
Total Repair Time:Less than 15 mins
-
Tools:Screw drivers, Socket set
1 person
found this instruction helpful.
Was this instruction helpful to you?
Thank you for voting!
The bake element exploded and I thought I would need a new oven.
My husband removed the old element by shutting down the power, then unscrewing the element. Then he screwed in the new element and turned oven on for 5 minutes to break it in.
Very simple and so cheap!
Very simple and so cheap!
Parts Used:
-
Lisa from San Jose, CA
-
Difficulty Level:Really Easy
-
Total Repair Time:Less than 15 mins
-
Tools:Screw drivers
1 person
found this instruction helpful.
Was this instruction helpful to you?
Thank you for voting!
Fan blade broken
Removed the broken fan blade (just pulled off) and replaced with part purchased PartSelect. Very easy repair, no tools required.
Parts Used:
-
John from Cumberland, MD
-
Difficulty Level:Really Easy
-
Total Repair Time:Less than 15 mins
2 of 5 people
found this instruction helpful.
Was this instruction helpful to you?
Thank you for voting!
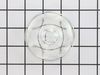
dropped & broke the oven light bulb cover
-
joseph from san jose, CA
-
Difficulty Level:Really Easy
-
Total Repair Time:Less than 15 mins
1 of 2 people
found this instruction helpful.
Was this instruction helpful to you?
Thank you for voting!
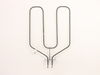
burned-out broiler element
turn off breaker in electrical panel....remove stove socket from outlet....remove rear panel from stove....undo wire connectios from broiler element....inside the oven, gently move thermostat wire out of the way....unbolt broiler plate from rear wall....remove broiler hanger and then broiler element....reverse procedure and you're all set.
Parts Used:
-
William from Carmel, NY
-
Difficulty Level:Easy
-
Total Repair Time:1- 2 hours
-
Tools:Nutdriver, Pliers, Screw drivers
2 of 5 people
found this instruction helpful.
Was this instruction helpful to you?
Thank you for voting!
Replace cracked broiler element
Unplugged Stove, pulled away from wall. With smaller wrenches, took the two screw-nuts off the inside back and above that hold the broiler element in place. Since it is an older stove...took the back panel off the stove with philips screw-driver which consisted of 10 screws. Once that was removed was able to unscrew the broiler element from the two wires that provide the electricity. Used the flash light when I had to unfasten the screw-nuts inside the stove because kitchen lighting wasn't strong enough.
Parts Used:
-
Deborah from Middletown, CT
-
Difficulty Level:Easy
-
Total Repair Time:30 - 60 mins
-
Tools:Screw drivers, Wrench set
1 of 2 people
found this instruction helpful.
Was this instruction helpful to you?
Thank you for voting!
Old element was burned out
Piece of cake to repair. I took both both heating elements off. I sprayed oven cleaner everywhere to soften the grime. I waited 10 minutes and wiped up the softened baking grime. Installation took 5 minutes for each element and about 15 minutes to clean the oven while both elements were removed.
Parts Used:
-
Jay from Mays Landing, NJ
-
Difficulty Level:Easy
-
Total Repair Time:15 - 30 mins
-
Tools:Screw drivers
2 of 5 people
found this instruction helpful.
Was this instruction helpful to you?
Thank you for voting!
bake element broke
I remove the back plate, pull out the wires, and unscrew the screws and put the new part. The problem that I had was reaching to the back of the oven to remove the screws. Other than that it was very simple.
Parts Used:
-
Alejo from Clifton, VA
-
Difficulty Level:Really Easy
-
Total Repair Time:15 - 30 mins
-
Tools:Nutdriver, Pliers, Screw drivers, Wrench set
1 of 2 people
found this instruction helpful.
Was this instruction helpful to you?
Thank you for voting!
broiler element not coming on
removed 2 nuts holding the element in the oven. removed 2 screws that secured the wires to the element. installed the new element in reverse.
Parts Used:
-
Michele from Roanoke, TX
-
Difficulty Level:Really Easy
-
Total Repair Time:15 - 30 mins
-
Tools:Nutdriver, Screw drivers
1 of 2 people
found this instruction helpful.
Was this instruction helpful to you?
Thank you for voting!
Broiler element burned out
The customer service at PartSelect.com is wonderful. They assisted me to located a part for a 40 year old oven. Took only a few minutes to take the old one out and put the new one in. Process was pretty self explanitory.
Parts Used:
-
Alyce from Littleton, CO
-
Difficulty Level:Really Easy
-
Total Repair Time:Less than 15 mins
-
Tools:Nutdriver
1 of 2 people
found this instruction helpful.
Was this instruction helpful to you?
Thank you for voting!
Broken broiler element
Replacing the part was fairly simple. Do not forget to dis-connect the element from the back.
Parts Used:
-
Michael from Medford, NY
-
Difficulty Level:Easy
-
Total Repair Time:15 - 30 mins
-
Tools:Nutdriver, Screw drivers
1 of 2 people
found this instruction helpful.
Was this instruction helpful to you?
Thank you for voting!
Element burnt in two
I removed the two screws holding it in place,Then pulled it out so
i could remove the two wires , then connected the new unit. Replaced it in the oven wall.
Turned the oven on and it worked like a new one.
i could remove the two wires , then connected the new unit. Replaced it in the oven wall.
Turned the oven on and it worked like a new one.
Parts Used:
-
Walter from Lake Kiowa, TX
-
Difficulty Level:Really Easy
-
Total Repair Time:15 - 30 mins
-
Tools:Nutdriver, Screw drivers
1 of 3 people
found this instruction helpful.
Was this instruction helpful to you?
Thank you for voting!