




















RF267AABP Samsung Refrigerator - Instructions
Keep searches simple. Use keywords, e.g. "leaking", "pump", "broken" or "fit".
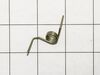
Brokjen spring
-
Sharol from Culdesac, ID
-
Difficulty Level:Really Easy
-
Total Repair Time:Less than 15 mins
0 of 1 people
found this instruction helpful.
Was this instruction helpful to you?
Thank you for voting!
french spring broke
after receiving spring installed spring in seconds. Thanks partselect.com Ryan Cappell
Parts Used:
-
RYAN from RIVERBANK, CA
-
Difficulty Level:Really Easy
-
Total Repair Time:Less than 15 mins
-
Tools:Pliers
0 of 2 people
found this instruction helpful.
Was this instruction helpful to you?
Thank you for voting!
Refrigerator Temperature Blinking
I removed all of the internal shelves from the refrigerator side. I then removed the cooling panels from the bottom area. this exposed the fan assembly and cooler. I found ice all over the unit. I had to unplug the refrigerator and used a hair dryer to melt the ice away. I then found the sensor and replace it. After putting the refrigerator back together, I plugged it in and let it cool overnight. I also put a thermometer to validate that cooling was stable. it has been a week with the new sensor and the refrigerator has not frozen over and has been very stable.
Parts Used:

-
Christopher from Queen Creek, AZ
-
Difficulty Level:Easy
-
Total Repair Time:1- 2 hours
-
Tools:Screw drivers
0 of 2 people
found this instruction helpful.
Was this instruction helpful to you?
Thank you for voting!
Refrigerator side wasn't cooling properly. Was staying at 55 degrees.
Took off the plastic panel in the interior. As usual, the evaporator was completely iced up. Took most of the time to de-ice it with a heat gun. Tested the components and the temperature sensor was bad which is on the top end of the evaporator fins. The ohms test wasn't any different whether hot or cold. I keep a spare sensor on hand because this is the third time one of the sensors have failed. The proper readings are available by doing some internet searching. Its been two weeks since I worked on it and everything is working fine.
Parts Used:
-
Robert from Simi Valley, CA
-
Difficulty Level:A Bit Difficult
-
Total Repair Time:1- 2 hours
-
Tools:Pliers, Screw drivers
4 of 17 people
found this instruction helpful.
Was this instruction helpful to you?
Thank you for voting!
French spring broke.
-
Andrew from Bensalem, PA
-
Difficulty Level:Very Easy
-
Total Repair Time:Less than 15 mins
6 of 26 people
found this instruction helpful.
Was this instruction helpful to you?
Thank you for voting!
Not making ice. Making ice slowly. Clicking sound when making ice.
(1) Set ice production to OFF from the front panel of the refridgerator. (2) Inside the fridge, remove the screw holding the panel covering the cable for the ice naker assembly. (3) Remove the panel. (4) Disconnect the power cable of ice maker. (5) Holding the assembly with one hand, release the locking clip of assembly housing, and slide assembly forward until it is free. (6) Remove the ice maker assembly. (7) Install the new assembly by reversing the previous steps. (8) Reset the ice maker by pressing the reset button and holding it for at least 8 seconds. The first time the ice maker is primed with water, there are 2 chimes. (1 High , 1 Low).
Parts Used:

-
Gregory from North Richland Hills, TX
-
Difficulty Level:Easy
-
Total Repair Time:Less than 15 mins
-
Tools:Screw drivers
Was this instruction helpful to you?
Thank you for voting!