




















PK7800SK2SS General Electric Wall Oven - Instructions
Keep searches simple. Use keywords, e.g. "leaking", "pump", "broken" or "fit".
Blown fuse in microwave
One small Phillips screwdriver and one fuse puller (I used cord). Unplug unit. Remove the two screws on the vent face plate. Remove the one screw on the panel assembly. Gently let hang. Pull the fuse located on the upper left wall. Replace fuse. Reassemble.
Parts Used:

-
Frank from VIPER, KY
-
Difficulty Level:Very Easy
-
Total Repair Time:15 - 30 mins
-
Tools:Screw drivers
8 of 9 people
found this instruction helpful.
Was this instruction helpful to you?
Thank you for voting!
A burnt out bulb
After opening the Oven door, I removed the glass cover to view and locate the bulb, at the inside, top front of the Oven. Removed the burnt out bulb by pulling it in a forward motion towards the front of the Oven, slid the new bulb into place and the Oven is again functional.
Parts Used:

-
George from PALM COAST, FL
-
Difficulty Level:Really Easy
-
Total Repair Time:Less than 15 mins
-
Tools:Screw drivers
11 of 19 people
found this instruction helpful.
Was this instruction helpful to you?
Thank you for voting!
The oven would not hold an even temperature.
I used a Trox bit to remove one screw, replaced the oven sensor and reinstalled the screw. The whole project took less than 5 minutes.
Parts Used:
-
Jack from Bremerton, WA
-
Difficulty Level:Really Easy
-
Total Repair Time:Less than 15 mins
-
Tools:Screw drivers
7 of 7 people
found this instruction helpful.
Was this instruction helpful to you?
Thank you for voting!
Oven wouldn't sensor reheat & error code on display
I looked at the exploded pic on your web site to find the location of the sensor. Next I removed the cover by unscrewing 15 screws then swaped the sensor and re assembled! Works great! Fixing it my self I saved at least 150$ and did not have to wait all day for a repair man who probaly would not have the part on the first visit.
Parts Used:
-
Chris from Springfield, VA
-
Difficulty Level:Easy
-
Total Repair Time:15 - 30 mins
-
Tools:Screw drivers
8 of 11 people
found this instruction helpful.
Was this instruction helpful to you?
Thank you for voting!
F97 code
Replaced upper cooling fan and board on double oven by removing covers on top and back.
Parts Used:


-
Don from BATON ROUGE, LA
-
Difficulty Level:Really Easy
-
Total Repair Time:30 - 60 mins
-
Tools:Nutdriver, Socket set
6 of 7 people
found this instruction helpful.
Was this instruction helpful to you?
Thank you for voting!
Sparking from the magnetron
Symptom: Terrible sparking coming from the right side of the microwave even with nothing in the microwave. The part that was behind the cover was the business end of what I learned was the magnetron,
Repair process: Without appliance repair experience I went onto Google and searched for parts for my model PEB1590DM2WW. I was able to find a great parts schematic on partselect.com. At first I ordered a magnetron and while waiting for the parts to arrive I also learned that the capacitor can also fail easily as described in the other install feedback on the partsselect website. So I ordered a capacitor just in case. These convection microwaves are around $600 new so a $80 in parts is not out of line for 8 years of service.
I installed the magnetron first and turned it on. sparking immediately continued so I quickly shut the unit off. After replacing the capacitor and letting it charge for several minutes before trying to start the microwave cycle was the issue. I choose to leave the replaced magnetron as the original unit was discolored and felt the replacement was inexpensive insurance. I also learned that if the wave guide (which is a plastic/metallic composite material) that covers the opening to the magnetron is burnt or has metal melted to it as mine did it will act similar to the microwave having metal inside the enclosure and will continue to spark and basically melt the wave guide further. Replacing the wave guide was very easy as well.
I am very thankful for the knowledge base and support available from Partselect.com as they made this repair possible on my own. Thank you partselect.com
Repair process: Without appliance repair experience I went onto Google and searched for parts for my model PEB1590DM2WW. I was able to find a great parts schematic on partselect.com. At first I ordered a magnetron and while waiting for the parts to arrive I also learned that the capacitor can also fail easily as described in the other install feedback on the partsselect website. So I ordered a capacitor just in case. These convection microwaves are around $600 new so a $80 in parts is not out of line for 8 years of service.
I installed the magnetron first and turned it on. sparking immediately continued so I quickly shut the unit off. After replacing the capacitor and letting it charge for several minutes before trying to start the microwave cycle was the issue. I choose to leave the replaced magnetron as the original unit was discolored and felt the replacement was inexpensive insurance. I also learned that if the wave guide (which is a plastic/metallic composite material) that covers the opening to the magnetron is burnt or has metal melted to it as mine did it will act similar to the microwave having metal inside the enclosure and will continue to spark and basically melt the wave guide further. Replacing the wave guide was very easy as well.
I am very thankful for the knowledge base and support available from Partselect.com as they made this repair possible on my own. Thank you partselect.com
Parts Used:
-
Reid from LITTLETON, CO
-
Difficulty Level:A Bit Difficult
-
Total Repair Time:30 - 60 mins
-
Tools:Screw drivers
5 of 5 people
found this instruction helpful.
Was this instruction helpful to you?
Thank you for voting!
The inner glass of the top wall oven had broken.
I ordered the glass assembly which promptly arrived and I proceeded to unscrew the broken glass assembly and (by myself) removed it with ease. I then placed the new glass assembly and replaced the screws. It was really an easy job, I just retraced my steps from removing the broken assembly and replacing it with the new assembly. By the way, it was the first time I had done this.
Parts Used:
-
robert from BOWIE, MD
-
Difficulty Level:Very Easy
-
Total Repair Time:15 - 30 mins
-
Tools:Pliers, Screw drivers, Wrench (Adjustable)
5 of 5 people
found this instruction helpful.
Was this instruction helpful to you?
Thank you for voting!
Microwave bulb was burnt out
It is easy to repair the burnt out bulb if one has the correct bulb. Your website is very user friendly and your service is great. I was not able to replace the bulb at this time because our RV is at the repair shop for some other matters. I am sure the installation of the new bulb will go smoothly. Thanks for asking. Sharry Kiehl
Parts Used:

-
Sharry from Lititz, PA
-
Difficulty Level:Really Easy
-
Total Repair Time:Less than 15 mins
-
Tools:Screw drivers
7 of 12 people
found this instruction helpful.
Was this instruction helpful to you?
Thank you for voting!
The oven was burning when cooking at same temperature we always cooked it on
there was one screw holding it on the back wall of the oven. It was easy enough that my daughter installed it with my guidance.
Parts Used:
-
Don from HASLET, TX
-
Difficulty Level:Really Easy
-
Total Repair Time:15 - 30 mins
-
Tools:Screw drivers
5 of 7 people
found this instruction helpful.
Was this instruction helpful to you?
Thank you for voting!
runs but does not heat
I removed the main cover ( torx security bit required) and tested the magnetron, capacitor, diode and door interlock switches according to instructions found on the internet. The capacitor and diode tested good but the magnetron looked burnt and corroded on the tip. The magnetron I received was an exact replacement for the original. It was easy to replace the magnetron which arrived in 2 days standard shipping. I also cleaned the fan while I had access to the inside area. Hoping to get another 18 years use from the microwave!
Parts Used:
-
Scott from PIEDMONT, CA
-
Difficulty Level:Easy
-
Total Repair Time:15 - 30 mins
-
Tools:Screw drivers
4 of 4 people
found this instruction helpful.
Was this instruction helpful to you?
Thank you for voting!
The inner glass on the door broke
Watched a video on how to replace , had no problem remaking the repair, part was a perfect fit and had no hang up or issues
Parts Used:
-
James from METAIRIE, LA
-
Difficulty Level:Really Easy
-
Total Repair Time:30 - 60 mins
-
Tools:Nutdriver, Screw drivers
4 of 4 people
found this instruction helpful.
Was this instruction helpful to you?
Thank you for voting!
Replaced under hood surface light bulb
Very easy to replace. This replacement part is the perfect fit for my microwave since the original part has been discontinued. It does have the night light and bright light feature.
Parts Used:
-
Dottie from NEW MILFORD, CT
-
Difficulty Level:Very Easy
-
Total Repair Time:Less than 15 mins
-
Tools:Screw drivers
4 of 5 people
found this instruction helpful.
Was this instruction helpful to you?
Thank you for voting!
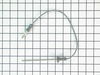
Oven meat probe broken
This item worked as described. I paid more for this 'oem' probe than the generic 1 because i didn't want to chance it not working as others have reported.
- works great. tested it....snaps in, reads correctly, snaps out.
- works great. tested it....snaps in, reads correctly, snaps out.
Parts Used:
-
robert from FAIRFIELD, OH
-
Difficulty Level:Very Easy
-
Total Repair Time:Less than 15 mins
3 of 3 people
found this instruction helpful.
Was this instruction helpful to you?
Thank you for voting!
The part was burnt and was causing sparking inside the microwave
Removed the old canopy mica, it has tabs that slip into slots on the top of the microwave. Then installed the new part, the tabs are inserted into the same slots.
Parts Used:

-
Bill from MAGNOLIA, TX
-
Difficulty Level:Very Easy
-
Total Repair Time:Less than 15 mins
3 of 4 people
found this instruction helpful.
Was this instruction helpful to you?
Thank you for voting!
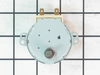
Turntable motor was making noise
Unscrewed and dropped the bottom panel of the Advantium on its rear hinge, disconnected the light and the motor, removed the motor screws, and replaced the motor. Very simple.
However, not related to the Advantium or the motor, trim had been applied to the bottom of the wall cabinets after installation of the Advantium. This trim prevented the lowering of the panel (and future removal of the whole oven), so I had to chisel and file and repaint the trim to get it out of the way.
However, not related to the Advantium or the motor, trim had been applied to the bottom of the wall cabinets after installation of the Advantium. This trim prevented the lowering of the panel (and future removal of the whole oven), so I had to chisel and file and repaint the trim to get it out of the way.
Parts Used:
-
Allan from LOUISVILLE, KY
-
Difficulty Level:Very Easy
-
Total Repair Time:Less than 15 mins
-
Tools:Screw drivers
2 of 2 people
found this instruction helpful.
Was this instruction helpful to you?
Thank you for voting!