




















PGB995SET2SS General Electric Range - Instructions
Keep searches simple. Use keywords, e.g. "leaking", "pump", "broken" or "fit".
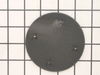
Burner cap replacement
I got really great customer service on finally getting the right part. It came really fast it fit perfect but the cap is a high gloss black instead of a flat black. I will need to call customer service again to see if they can the correct color this time.
Otherwise everything was great!
Otherwise everything was great!
Parts Used:
-
Rita from ST AUGUSTINE, FL
-
Difficulty Level:Really Easy
-
Total Repair Time:Less than 15 mins
1 person
found this instruction helpful.
Was this instruction helpful to you?
Thank you for voting!
flame was inconsistent. too much air.
-
Raymond J. from EASTPORT, NY
-
Difficulty Level:Really Easy
-
Total Repair Time:Less than 15 mins
1 person
found this instruction helpful.
Was this instruction helpful to you?
Thank you for voting!
The old burners were damaged by the prior owners.
The repair was extremely easy. Just removed the old burners and dropped in the new ones. No tools needed.
Parts Used:
-
Mohammad from BARTLETT, IL
-
Difficulty Level:Very Easy
-
Total Repair Time:Less than 15 mins
1 person
found this instruction helpful.
Was this instruction helpful to you?
Thank you for voting!
Burners wouldn't light
Had two burners on the stove that would not light. Had tried cleaning them but they still did not ignite. Replaced both burner heads. Once replaced. they ignited right away and have worked ever since.
Parts Used:
-
Robert from SOUTH ELGIN, IL
-
Difficulty Level:Very Easy
-
Total Repair Time:Less than 15 mins
1 person
found this instruction helpful.
Was this instruction helpful to you?
Thank you for voting!
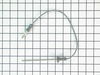
Temp probe was defective
Threw the old one out - plugged the new one in. Steak came out just as ordered - medium rare.
Parts Used:
-
Eric from SOUTHBURY, CT
-
Difficulty Level:Very Easy
-
Total Repair Time:Less than 15 mins
1 person
found this instruction helpful.
Was this instruction helpful to you?
Thank you for voting!
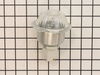
shortage in wiring cause the housing to burn out
Replaced new light housing.
Thanks to you guys for the prompt response
Thanks to you guys for the prompt response
Parts Used:
-
fred from PALM COAST, FL
-
Difficulty Level:Really Easy
-
Total Repair Time:Less than 15 mins
1 person
found this instruction helpful.
Was this instruction helpful to you?
Thank you for voting!
Replace temp sensor in gas range
Part came as ordered. Hardest part was fitting plastic wiring harness through the hole with 2 layers of steel with insulation in between. Used electrical tape to stiffen the end about an inch or 2 back from harness. Job done, problem solved
Parts Used:

-
Ron from PAINESVILLE, OH
-
Difficulty Level:Easy
-
Total Repair Time:15 - 30 mins
-
Tools:Nutdriver, Screw drivers
1 person
found this instruction helpful.
Was this instruction helpful to you?
Thank you for voting!
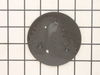
Food ran over the burner and damaged it.It was easy to place it back inII
It only required placing the new burner in the proper location.
Parts Used:
-
Alan from PASADENA, TX
-
Difficulty Level:Really Easy
-
Total Repair Time:30 - 60 mins
1 person
found this instruction helpful.
Was this instruction helpful to you?
Thank you for voting!
Oven sensor not working
-
Mary from TUCSON, AZ
-
Difficulty Level:Really Easy
-
Total Repair Time:30 - 60 mins
-
Tools:Nutdriver
1 of 2 people
found this instruction helpful.
Was this instruction helpful to you?
Thank you for voting!
gas burners not heating evenly
remove old burner, put new in place
Parts Used:

-
Juanita from GAINESVILLE, GA
-
Difficulty Level:Very Easy
-
Total Repair Time:15 - 30 mins
1 of 2 people
found this instruction helpful.
Was this instruction helpful to you?
Thank you for voting!
burner cap wasn't working proper.
-
GLENN from ST CLR SHORES, MI
-
Difficulty Level:Really Easy
-
Total Repair Time:Less than 15 mins
1 of 2 people
found this instruction helpful.
Was this instruction helpful to you?
Thank you for voting!
Part does not look like the part that needs to be replaced
I have no clue what wire goes where because there is no thing to refer to or instructions of any kind . I have not been able to install the part.
Parts Used:

-
P from FULLERTON, CA
-
Difficulty Level:Really Easy
-
Total Repair Time:30 - 60 mins
1 of 3 people
found this instruction helpful.
Was this instruction helpful to you?
Thank you for voting!
Gas Oven will not light
I was disappointed with this parts recommendation..neither part solved the problem, a first with partselect. The Range Oven sensor change out was easy and straight forward once the back lower panel was removed. The SPARK MODULE was time consuming..the module is located and accessible only by removing the range top. Having gas burners requires unscrewing all the burners before tipping up the top and removing it, then removing the guard over the Module is next..it's a project, sure wish it worked when I was done!..turned out to be the oven glow bar....
Parts Used:
-
Daniel from NASHVILLE, TN
-
Difficulty Level:A Bit Difficult
-
Total Repair Time:More than 2 hours
-
Tools:Nutdriver, Screw drivers
1 of 3 people
found this instruction helpful.
Was this instruction helpful to you?
Thank you for voting!
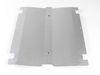
Deflector oven/gas flame deflector replaced due to hole melted from glowbar igniter
Removed oven convection fan cover for more room to remove/replace lower oven bottom. Deflector is attached underneath oven bottom and you will need new self tapping sheet metal screws to replace old ones. My deflector actually had hole melted in it from glowbar igniter directly underneath it. Glowbar remains white hot until selected oven temp is reached...poorly designed.
Parts Used:
-
Barry from Coventry, RI
-
Difficulty Level:Easy
-
Total Repair Time:Less than 15 mins
-
Tools:Nutdriver, Screw drivers
0 of 1 people
found this instruction helpful.
Was this instruction helpful to you?
Thank you for voting!
Broken Probe Sensor
-
Michael from Tucson, AZ
-
Difficulty Level:Really Easy
-
Total Repair Time:Less than 15 mins
0 of 1 people
found this instruction helpful.
Was this instruction helpful to you?
Thank you for voting!