




















PCE23NGTDFSS General Electric Refrigerator - Instructions
Keep searches simple. Use keywords, e.g. "leaking", "pump", "broken" or "fit".
Groove for retainer clip on auger nut was broken out.
After removing three screws on the ice bucket, it basicly came apart by itself. I needed to use pliers to remove the old nut because it had over tightened itself onto the shaft. Be careful here - it is a left hand nut - not a normal right hand nut! Reassembly was a snap putting the parts back together in reverse order. Unit has been working great since the repair.
Parts Used:
-
William from Nazareth, PA
-
Difficulty Level:Easy
-
Total Repair Time:15 - 30 mins
-
Tools:Pliers, Screw drivers
13 of 26 people
found this instruction helpful.
Was this instruction helpful to you?
Thank you for voting!
Refrigerator side freezing food
Replaced both temp sensors worked good for 2 days then began freezing food. Looked into it further on line. Found small motorized door broken that controls the cold air from the freezer
Parts Used:
-
M &M Aviation from ESCANABA, MI
-
Difficulty Level:Easy
-
Total Repair Time:15 - 30 mins
-
Tools:Screw drivers
7 of 8 people
found this instruction helpful.
Was this instruction helpful to you?
Thank you for voting!
My Door Stop Broke
I had to remove 2 screws to get the broken door stop off then I put the new door stop on by using the 2 same screws.
Parts Used:
-
M from STERLING HEIGHTS, MI
-
Difficulty Level:Really Easy
-
Total Repair Time:Less than 15 mins
-
Tools:Screw drivers
7 of 8 people
found this instruction helpful.
Was this instruction helpful to you?
Thank you for voting!
frezer door light switch broke (I have 2 boys :)
The repaire guy came in tooke it out and told me it is goin to coast $20 for the part and $50 for the labor..... So I looked, It was soooo eeezzz ALL you have to do is get the switch out( with help of my butter knife :) it plugs in to a little outlet on the wire (on the botom side) so take out the old one and plug in the new one wich I got for $8 + $6 shipping = $15 THANK YOU PART SELECT for saving me $55 Im a 36 y/o stayathome mom and Ihave never don this before, Im very proud of my self. well... it was very easy!
Parts Used:
-
inessa from manalapan, NJ
-
Difficulty Level:Really Easy
-
Total Repair Time:Less than 15 mins
9 of 14 people
found this instruction helpful.
Was this instruction helpful to you?
Thank you for voting!
The door when opened had swung back and made contact with the hinge. Over time it had bent the hinge upward so the pin was coming out of the door and it was not closing (sealing) properly.
I removed the screws out of the hinge while my wife put pressure on the door to hold it in place. I removed the hinge, replaced it with a new one, and screwed it back in place. Took just a couple of minutes. Easy and fast. The refrigerator was not leveled properly and that was why the door had swung back so fast, with enough force to eventually bend the hinge. I contacted geappliances.custhelp.com and used the chat option to speak to someone about how to lower the back wheels. They were extremely helpful in walking me through it. Now the refrigerator is leveled, and the door, when opened, will not swing back and contact the hinge. My overall experience in fixing this problem, from locating and ordering the correct part, to installing it, and then fixing the problem that led to the hinge being damaged in the first place, was outstanding.
Parts Used:

-
Bill from Pinehurst, NC
-
Difficulty Level:Really Easy
-
Total Repair Time:Less than 15 mins
-
Tools:Socket set
6 of 6 people
found this instruction helpful.
Was this instruction helpful to you?
Thank you for voting!
Low water flow from indoor water dispenser
Disconnect main water line from behind refrigerator
Remove bottom panel from refrigerator
Disconnect hose from water valve
Remove metal hose guard from top left of refrigerator Carefully remove plumbers putty from around filter hose (you will be reinstalling this putty around new hose assembly)
Inside refrigerator remove MWF water filter and guard, and then remove two screws holding filter assembly in place (this requires socket set with 4” extension bar)
Carefully pull filter hose assembly towards you from front of refrigerator. Once assembly is out remove Styrofoam cover from old assembly and install on new assembly
To reassemble, simply follow this process in reverse. Good luck
Remove bottom panel from refrigerator
Disconnect hose from water valve
Remove metal hose guard from top left of refrigerator Carefully remove plumbers putty from around filter hose (you will be reinstalling this putty around new hose assembly)
Inside refrigerator remove MWF water filter and guard, and then remove two screws holding filter assembly in place (this requires socket set with 4” extension bar)
Carefully pull filter hose assembly towards you from front of refrigerator. Once assembly is out remove Styrofoam cover from old assembly and install on new assembly
To reassemble, simply follow this process in reverse. Good luck
Parts Used:
-
Ricky from Virginia Beach, VA
-
Difficulty Level:Easy
-
Total Repair Time:30 - 60 mins
-
Tools:Nutdriver, Pliers, Screw drivers, Socket set, Wrench (Adjustable)
7 of 9 people
found this instruction helpful.
Was this instruction helpful to you?
Thank you for voting!
GE Profile Arctica food locker was below freezing
The trouble shooting information on the web site indicated that the damper door within the climate control unit may be broken. This was easily confirmed and the replacement of the climate control unit immediately returned the food locker temperatures to the digital electronic thermostat settings. The part has an improved ventilation gasket interface between the food locker and freezer. The unit works perfectly again, and the food locker temperature is exactly what the thermostat setting is.
Parts Used:
-
Frederick K from Kingston, TN
-
Difficulty Level:Easy
-
Total Repair Time:30 - 60 mins
-
Tools:Screw drivers
7 of 9 people
found this instruction helpful.
Was this instruction helpful to you?
Thank you for voting!
Stripped Front Leveling Roller & Screw
Raised side of fridge enough to get 1/4" ratchet with 1/4" socket under roller wheel assy. Removed three hex-head screws to separate damaged wheel assy from fridge frame. From panel below fridge compartment, backed-out stripped leveling screw. Mounted new roller assy and then threaded in new leveling screw from front. Lowered fridge and adjusted leveling screw for proper height. Suggest putting a 2x4 under fridge for safety when hands are under unit.
Parts Used:
-
George from ARLINGTON, VA
-
Difficulty Level:Easy
-
Total Repair Time:30 - 60 mins
-
Tools:Socket set
6 of 6 people
found this instruction helpful.
Was this instruction helpful to you?
Thank you for voting!
Ice Would Not Come Out
Removed tray, threw out ice , removed 3 screws used 2 screw drivers to seperate part & re installed
Parts Used:
-
RICHARD from SPRING HILL, FL
-
Difficulty Level:Easy
-
Total Repair Time:15 - 30 mins
-
Tools:Screw drivers
7 of 10 people
found this instruction helpful.
Was this instruction helpful to you?
Thank you for voting!
Freezer Light switch broke
Your instructions were "spot on"! Pried out broken switch with screwdriver-reinstalled new switch. Very easy! Ordered on line on a Wednesday new part arrived on following Saturday-Great service and will definately use again. Highly recommend PartSelect!
Parts Used:
-
Kenneth from Milford, CT
-
Difficulty Level:Really Easy
-
Total Repair Time:Less than 15 mins
-
Tools:Screw drivers
8 of 13 people
found this instruction helpful.
Was this instruction helpful to you?
Thank you for voting!
Ice dispenser was always crushing ice, and slow water dispensing
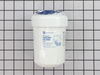
Replacing the water filter with the new style water filter was no problem...twist to the left, drop the old filter, line up arrows on housing and new filter, twist to the right and done.
Ice maker was always crusing ice. There is a spring deflector wound around the actuating rod towards the back of the ice dispenser. Pulled the ice dispenser out, slid the damaged spring off, and slid the new spring deflector on making sure to engage the actuator rod to restore it's action. Easy fix.
Ice maker was always crusing ice. There is a spring deflector wound around the actuating rod towards the back of the ice dispenser. Pulled the ice dispenser out, slid the damaged spring off, and slid the new spring deflector on making sure to engage the actuator rod to restore it's action. Easy fix.
Parts Used:
-
Gerald from Lincolnwood, IL
-
Difficulty Level:Really Easy
-
Total Repair Time:Less than 15 mins
13 of 29 people
found this instruction helpful.
Was this instruction helpful to you?
Thank you for voting!
Water will not dispense and the refrigerator drawers were freezing our foods and vegetables.
It was a simple remove and replace. The new part fits directly in place of the old part. Its a pain to remove the light but once you get the light out the job is simple. The light must be pried out gently. It is snapped in place toward the air inlet cover and needs to be pried loose. Once the light is out there are 4 screws holding the air inlet cover in place. Remove the 4 screws and unfasten the wiring harness. Once the screws and wiring harness are disconnected remove the old part. Reinstall the new part in reverse order.
Parts Used:
-
Jeff from Manteca, CA
-
Difficulty Level:Easy
-
Total Repair Time:30 - 60 mins
-
Tools:Screw drivers
5 of 5 people
found this instruction helpful.
Was this instruction helpful to you?
Thank you for voting!
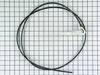
water line (from the PS304374 Dual Inlet Water Valve) to the ice maker was craked and leaking
1. Removed the back panel of the fridge to get access to the inlet water valve.
2. Removed black poly water line from valve (pull back on white ring where line is attached and pull the line out)
3. Removed the inlet tube from top-back of fridge (where it goes into the ice make). use putty knife to get under the sticky white gasket beneath the black oval housing and pull the tube out form the back of the fridge.
4. Replace the water line with new part taking care to properly seat the line into the the bottom water valve and pushing the water tube into the hole for the ice maker.
Note: Be sure to take off the protective covering from the white - sticky grommet and push to adhere to metal on fridge.
to be safe - use a bit of clear silicone chaulking round the perimeter of the grommet and push to tighly bond the water inlet tube to the fridge.
The reason for this - is that if you do not get a good bond using the white - sticky gormmet alone - you may have the water tube inside the ice maker freeze up.
Also once the new water line is installed be sure to secure the line to the metal back of the fridge - so the line will not move. some fridges come with metal hose clamps to do this - otherwise use duct tape
2. Removed black poly water line from valve (pull back on white ring where line is attached and pull the line out)
3. Removed the inlet tube from top-back of fridge (where it goes into the ice make). use putty knife to get under the sticky white gasket beneath the black oval housing and pull the tube out form the back of the fridge.
4. Replace the water line with new part taking care to properly seat the line into the the bottom water valve and pushing the water tube into the hole for the ice maker.
Note: Be sure to take off the protective covering from the white - sticky grommet and push to adhere to metal on fridge.
to be safe - use a bit of clear silicone chaulking round the perimeter of the grommet and push to tighly bond the water inlet tube to the fridge.
The reason for this - is that if you do not get a good bond using the white - sticky gormmet alone - you may have the water tube inside the ice maker freeze up.
Also once the new water line is installed be sure to secure the line to the metal back of the fridge - so the line will not move. some fridges come with metal hose clamps to do this - otherwise use duct tape
Parts Used:
-
Daniel from ZIONSVILLE, PA
-
Difficulty Level:Easy
-
Total Repair Time:30 - 60 mins
-
Tools:Nutdriver
5 of 5 people
found this instruction helpful.
Was this instruction helpful to you?
Thank you for voting!
Items were broken

-
Jeanne from Milledgeville, GA
-
Difficulty Level:Really Easy
-
Total Repair Time:Less than 15 mins
5 of 6 people
found this instruction helpful.
Was this instruction helpful to you?
Thank you for voting!
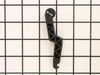
Fresh Food lever, under door, missing roller, make loud sound when closing door.
Removed tension spring, removed old lever, installed spring on lever, inserted lever in hole, re-attached spring to hook under front of refrigerator.
Parts Used:
-
Dennis from AUSTELL, GA
-
Difficulty Level:Really Easy
-
Total Repair Time:Less than 15 mins
-
Tools:Pliers
5 of 6 people
found this instruction helpful.
Was this instruction helpful to you?
Thank you for voting!