




















PB909TP1WW General Electric Range - Instructions
Keep searches simple. Use keywords, e.g. "leaking", "pump", "broken" or "fit".
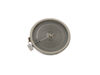
Outside portion of Element broken
First unplug range from electrical outlet!
Removed screws under front edge of stove top, propped it open with long paint stick, pried clips off of the element, unplugged and plugged in new element, push element back into clips, closed top on stove, plug back into socket, tested new burner, put screws back in under top front edge of stove top!!!
Removed screws under front edge of stove top, propped it open with long paint stick, pried clips off of the element, unplugged and plugged in new element, push element back into clips, closed top on stove, plug back into socket, tested new burner, put screws back in under top front edge of stove top!!!
Parts Used:
-
Tiffany from Lexington, OH
-
Difficulty Level:Really Easy
-
Total Repair Time:30 - 60 mins
-
Tools:Pliers, Screw drivers, Socket set
1 person
found this instruction helpful.
Was this instruction helpful to you?
Thank you for voting!
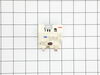
Knob stem broke off.
Pulled stove out to access back panel. Unscrew broken switch/stem. Replaced each wire one at a time to make sure they went in right spot. Screw in new switch. Replaced back panel.
Parts Used:
-
DALE from FREMONT, NE
-
Difficulty Level:Very Easy
-
Total Repair Time:Less than 15 mins
-
Tools:Nutdriver, Pliers, Screw drivers
1 of 2 people
found this instruction helpful.
Was this instruction helpful to you?
Thank you for voting!
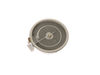
Heating element burned out
-
William from CONCORD, MA
-
Difficulty Level:Very Easy
-
Total Repair Time:30 - 60 mins
-
Tools:Pliers, Screw drivers
1 of 3 people
found this instruction helpful.
Was this instruction helpful to you?
Thank you for voting!
Oven will not heat
As many people have encountered, my oven would not heat but the igniter would be bright orange and glow! Over time, the igniter wears and degrades causing oxidation to the surface. This cause the igniter to fail and operate at a lower current level, below 2.8 amps! Normal igniters operator over 3.0 to 3.1 amps. When is happens, a low current igniter does not have enough input to the control valve to tell the valve to open to allow gas to flow over the igniter to light the oven, thus heat the oven! This has got to be the NUMBER one reason for an oven not heating!
Parts Used:

-
Joseph from Homosassa, FL
-
Difficulty Level:Easy
-
Total Repair Time:15 - 30 mins
-
Tools:Pliers, Screw drivers
1 of 3 people
found this instruction helpful.
Was this instruction helpful to you?
Thank you for voting!
oven was not getting up to temp
Once I opened up the back of the range, the sensor wires where there and burnt just like your info said. One nut to take off in the oven and the sensor came right out and the new one went right in. The oven works great, cooked the turkey today. The worst part of the repare was the cleaning behind and under the range, it hasn't moved since it was put in 6 years ago. Very pleased with PS.
Parts Used:

-
walter from townshend, VT
-
Difficulty Level:Really Easy
-
Total Repair Time:Less than 15 mins
-
Tools:Nutdriver
0 of 1 people
found this instruction helpful.
Was this instruction helpful to you?
Thank you for voting!
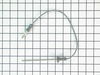
Broken Probe Sensor
-
Michael from Tucson, AZ
-
Difficulty Level:Really Easy
-
Total Repair Time:Less than 15 mins
0 of 1 people
found this instruction helpful.
Was this instruction helpful to you?
Thank you for voting!
F2 error when oven was heating up, along with a beeping noise and then it shut off
Unplugged oven, turned off breaker, took cover off back of oven, removed old sensor by disconnecting in back of oven and undoing screw inside oven. Pulled old one out replaced with new took 15min. Cost me less than $20. Parts Select rocks! Even received part in two days with standard shipping!
Parts Used:
-
Lori from Paris, TN
-
Difficulty Level:Really Easy
-
Total Repair Time:15 - 30 mins
-
Tools:Screw drivers, Socket set
0 of 1 people
found this instruction helpful.
Was this instruction helpful to you?
Thank you for voting!
rear drawer supports broke
Directtions were by diagram only, no written instructions. Drawing was small and difficult to follow but the repair itself was easy.
Parts Used:
-
TERRY from RICHMOND, VA
-
Difficulty Level:Really Easy
-
Total Repair Time:15 - 30 mins
-
Tools:Socket set
Was this instruction helpful to you?
Thank you for voting!
The oven temperature could not be controlled
Disconnect the range from the mains. Open the door. Remove the single screw holding the temperature sensor - this is located on the back wall on center and is screwed to the broiler mounting plate. Remove the four screws holding the boiler element and allow it to hang down on the wire; this exposes a space to feed the wire through later. Now move to the back of the range and remove the six screws that hold the central cover plate. Now push the insulation to up out of the way and you can disconnect the temperature sensor, pull it out through front, insert the new one and connect it. Reassemble in the reverse order. Mine worked perfectly!
Parts Used:
-
Keith from Annapolis, MD
-
Difficulty Level:Easy
-
Total Repair Time:15 - 30 mins
-
Tools:Nutdriver, Socket set
Was this instruction helpful to you?
Thank you for voting!
Oven slow to heat up
Removed oven door. Removed 2 screws from heat sensor on rear upper wall of oven. Pulled unit out to access rear of unit. Removed six screws on shield on back of unit. Dis connected heat sensor wire and pulled old sensor through from inside of oven. Feed wire of new sensor through from inside and plug in. Everything in reverse. I also had the gas(propane) company come out and check the pressure coming out of the "low pres." regulator. It was low, they changed the regulator.
Parts Used:
-
Joe from Harkers Is., NC
-
Difficulty Level:Easy
-
Total Repair Time:15 - 30 mins
-
Tools:Nutdriver
Was this instruction helpful to you?
Thank you for voting!
Oven door trim rusted (bottom of door)
This repair is really easy unless the trim piece has rusted so badly that it's attached itself to the front door glass. It took a long time and some WD-40 to pry the trim off w/o breaking the glass. REPAIR: Remove the door and lay it on a flat surface. Unscrew the 3 bottom screws w/ small pliers, then unscrew the top two inside door screws w/ a small metric allen wrench. Remove the door trim to get to the last four side trim screws. Once the old trim is out just clean up any residue/rust remaining on the glass, install the new trim and reverse the steps to put the door back together. If the old trim comes off easily it should only take @ 20-30 minutes.
Parts Used:

-
thomas j from canal winchester, OH
-
Difficulty Level:Easy
-
Total Repair Time:15 - 30 mins
-
Tools:Pliers, Wrench (Adjustable)
Was this instruction helpful to you?
Thank you for voting!
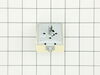
Dual Burner was not turning off or turning on by itself
Pulled the top back panel off, pulled off burner control knob, removed 2 screws which released switch, removed 5 wires from switch and connected them to new switch (pulled off faily easily). Reconnected the 2 screws to range and pushed knob back on. Replaced panel and reconnect the electric. Now works as it should.
Parts Used:
-
Michael from North Miami Beach, FL
-
Difficulty Level:Easy
-
Total Repair Time:15 - 30 mins
-
Tools:Nutdriver, Screw drivers
Was this instruction helpful to you?
Thank you for voting!
F2 reading
-
lynn from sunnyside, NY
-
Difficulty Level:Really Easy
-
Total Repair Time:15 - 30 mins
-
Tools:Nutdriver, Pliers
Was this instruction helpful to you?
Thank you for voting!
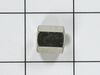
Convection fan came loose from shaft
Convection fan came loose from the shaft with a lout rattle and grinding as the fan spun down. Had to remove four metal screws to remove the fan cover. Initially tried to just put the nut back on to hold the fan. However, I could not get the nut to start, so I assumed that threads were stripped on the nut or the shaft. Ordered the replacement nut, hoping that it was the nut that was the problem. However, I had the same problem with the new nut. I could see no damage on the shaft. It finally occurred to me that the nut and shaft had left-hand threads (counter-clockwise to tighten). At that point, it was extremely easy to put the nut back on and tighten it. I did not try using the old nut, since I had already received the new one, but I'm certain that if I had come to that realization earlier, I could have saved time and money. So, if you have the same problem, try putting the nut on "backwards."
Parts Used:
-
Thomas from Albuquerque, NM
-
Difficulty Level:Easy
-
Total Repair Time:15 - 30 mins
-
Tools:Socket set
Was this instruction helpful to you?
Thank you for voting!
Hard to move drawer in and out because the rear drawer supports broke off.
Repair was very easy - less than a few minutes - just had to screw in 2 screws to the new drawer supports.
Parts Used:
-
Steven from Lansdale, PA
-
Difficulty Level:Really Easy
-
Total Repair Time:Less than 15 mins
-
Tools:Screw drivers
Was this instruction helpful to you?
Thank you for voting!