




















PAV2250AWA Maytag Washer - Instructions
Keep searches simple. Use keywords, e.g. "leaking", "pump", "broken" or "fit".
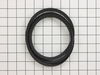
Noticed nick in drive belt durng inspection and cleaning
Washer was making noise especially when spinning. I took the washer apart to clean it, That is what it really needed. Also adjusted the water level to prevent overflows which caused soap and water to get underneath into the drive belt area as well. During inspection noticed a nick in the drive belt, Although this was not really causing immediate problem wanted to repalce it to prevent problems. Ordered the belt; it came in two days with no special postage. To install, just leaned the washer over on its front on a slight incline. Took old belt off and put new on by turning the big pulley. It is spring tensioned, so no tools. This may be the easiest part repacement I ever did. Took longer to write this paragraph than to repalce the belt.
Parts Used:
-
Brian from Plainville, CT
-
Difficulty Level:Really Easy
-
Total Repair Time:Less than 15 mins
5 of 5 people
found this instruction helpful.
Was this instruction helpful to you?
Thank you for voting!
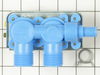
No hot water was making it into the laundry cycle.
First I unplugged the machine, then turned the water supply off in order to disconnect the hoses at the back of the machine. Next I pulled the top up and leaned it back so I could access the water valve at the rear of the machine (You might have to use a screw driver to pry the top off the pins which hold it down in front...). I then unscrewed the the valve and disconnected the wiring and, in order, re-connected to the new valve. Now reverse and turn on the water and yes, the new valve fixed the hot water problem. We can now do the "whites".
Parts Used:
-
Neil from Ann Arbor, MI
-
Difficulty Level:Really Easy
-
Total Repair Time:15 - 30 mins
-
Tools:Nutdriver, Wrench (Adjustable)
6 of 8 people
found this instruction helpful.
Was this instruction helpful to you?
Thank you for voting!
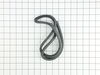
I had water leaking from the top of the tub.
I opened up the top of the washer which exposed the tub, I took the top ring off the tub and under in side of the ring is the seal. Took the old one out and put the new one in. The old seal was completely wore out.
It was real easy.
Finding the part is usually the hardest part, but thanks to Parts Select finding the part was the easiest part of the repair.
It was real easy.
Finding the part is usually the hardest part, but thanks to Parts Select finding the part was the easiest part of the repair.
Parts Used:
-
Lester from Elk Grove, CA
-
Difficulty Level:Really Easy
-
Total Repair Time:15 - 30 mins
6 of 8 people
found this instruction helpful.
Was this instruction helpful to you?
Thank you for voting!
No hot water on wash or rinse cycles
I read some stuff on the internet where folks with the same problem replaced the water inlet valve to repair this same problem. So I did the same. However, after I installed the new water inlet valve, the problem was still there. It was at that point I decided not to guess at the what issue was and instead test the components in the washer. Yes, I am a lazy dumb ass. There are many of us out there. I decided to use a continuity tester to test all components in the hot water fill circuit and determined that the water temperature switch was bad. So I ordered a new switch from Parts Select (they rock - it showed up next day) replaced the water temperature control switch and...walla. fixed!!! Only took about 30 minutes to replace. Lesson learned: Don't be a dumb ass and guess. Test.
Parts Used:
-
James from Buffalo Grove, IL
-
Difficulty Level:Really Easy
-
Total Repair Time:More than 2 hours
-
Tools:Nutdriver, Screw drivers
5 of 5 people
found this instruction helpful.
Was this instruction helpful to you?
Thank you for voting!
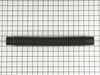
Hoes had a leak in it
The Repair went well . I had the hose on in about 30 seconds . The best part about this ordeal was the ease of finding the part on your website , and the speed of the delivery . I had my part in about 2 days , put it on and back to the fun part of clothes washing . I would recomend this company to everyone. Thanks, Rick K.
Parts Used:
-
Richard from moyock, NC
-
Difficulty Level:Really Easy
-
Total Repair Time:Less than 15 mins
-
Tools:Pliers, Screw drivers
5 of 6 people
found this instruction helpful.
Was this instruction helpful to you?
Thank you for voting!
Water pump failure
Disconnect electricity....remove front panel by gently prying up lid.... Remove two small screws at corners of front panel. You may need small nutdriver here or very small hands, you can easily swivel tub out of the way....once front panel is off water pump is at the bottom right... It is only connected by two squeeze clamps and 3 nuts... This is obviously where the adjustable wrench and nutdriver come in very handy... Otherwise this job will be a bit longer....be prepared for residual water to pour out...you will need towels or a bucket....replace old with new one by reversing the process...at this point tilt the entire washer on it's backside or at least at a 45 degree angle to access the bottom... Swivel the motor away to slack up the belt...remove belt and replace in reverse order of diassembling.... Should take no more than 15 minutes.... Good luck!!!!!
Parts Used:
-
John from Alhambra, CA
-
Difficulty Level:Easy
-
Total Repair Time:Less than 15 mins
-
Tools:Nutdriver, Pliers
5 of 6 people
found this instruction helpful.
Was this instruction helpful to you?
Thank you for voting!
broken pump, burned belt
I removed four screws to remove a plate to get access to the pump. Then I removed 3 screws to remove the pump. I then put the new pump in place and put the 3 screws back in the pump. Then I put the plate back on and put the 4 screws back in. Then I put the belt on and put the washing machine back in place and connected the water lines and drain line and plugged the washing machine back in and then tested the washing machine to make sure it worked. Job completed.
Parts Used:
-
Jeffery from Omega, GA
-
Difficulty Level:Easy
-
Total Repair Time:15 - 30 mins
-
Tools:Nutdriver, Socket set, Wrench set
5 of 6 people
found this instruction helpful.
Was this instruction helpful to you?
Thank you for voting!
WASHER OUT OF COUNTER BALANCE
Problem fix after replace Snubber ring, I also replace suspension spring and driver belt due to the fact I'm already taking it a part
Parts Used:


-
Ryan from SAN DIEGO, CA
-
Difficulty Level:Really Easy
-
Total Repair Time:1- 2 hours
-
Tools:Pliers, Screw drivers, Socket set
4 of 4 people
found this instruction helpful.
Was this instruction helpful to you?
Thank you for voting!
Broken agitator caused intermittent shutoff
1. Pulled top off (liquid softener dispenser section)
2. Put 2 socket extension and a 13 mm socket together with socket wrench (tool).
3. Insert tool with 13mm socket end into old agitator and unscrew bolt.
4. Remove tool and then remove old agitator.
5. Turn old agitator upside down to remove bolt.
6. Insert new agitator where old agitator was in washer.
7. Insert bolt.
8. Insert tool with 13mm socket end into old agitator and screw in bolt.
9. Pop top back on.
Hardest part was finding extensions because one wouldn't reach.
2. Put 2 socket extension and a 13 mm socket together with socket wrench (tool).
3. Insert tool with 13mm socket end into old agitator and unscrew bolt.
4. Remove tool and then remove old agitator.
5. Turn old agitator upside down to remove bolt.
6. Insert new agitator where old agitator was in washer.
7. Insert bolt.
8. Insert tool with 13mm socket end into old agitator and screw in bolt.
9. Pop top back on.
Hardest part was finding extensions because one wouldn't reach.
Parts Used:
-
Tai from Lenexa, KS
-
Difficulty Level:Really Easy
-
Total Repair Time:15 - 30 mins
-
Tools:Socket set
6 of 10 people
found this instruction helpful.
Was this instruction helpful to you?
Thank you for voting!
Washer was making noise during spin cycle
Hardest part was finding part that needed the needed repair. Searching the web for issues associated with the sound resulted in many links. Once the sound was found, I went to the video to see how to remove the Water Pump so I could examine it to confirm that was the correct piece. It took about 15 minutes to remove the part. Since I had to remove the belt to get it out, I realize that the belt needed replacement as well. So both parts were ordered. Replacing the parts also took about 15 minutes. Relatively easy repair. Be aware that the video on the part select video shows the water pump in a different location than the Maytag washer. To get to the Maytaq water pump, there is a panel in the back that had to be opened to access the water pump.
Parts Used:
-
William from MORGANVILLE, NJ
-
Difficulty Level:Really Easy
-
Total Repair Time:15 - 30 mins
-
Tools:Pliers, Screw drivers, Socket set
4 of 4 people
found this instruction helpful.
Was this instruction helpful to you?
Thank you for voting!
Original drain hose (rubber) was kinking, piece of junk. I replaced it with a new corigated drain hose .
Leaned washer forward, removed clamp and old hose, replaced with new hose, reinstalling clamp.
Parts Used:
-
Edwin from Eagar, AZ
-
Difficulty Level:Easy
-
Total Repair Time:Less than 15 mins
-
Tools:Nutdriver
6 of 11 people
found this instruction helpful.
Was this instruction helpful to you?
Thank you for voting!
Agitator had broken fin
Popped off bleach cap on top then got socket and long extension removed bolt, cleaned a little then replaced new agitater top.Replaced bleach cap and i was done.
Parts Used:
-
Floyd from Davidsville, PA
-
Difficulty Level:Really Easy
-
Total Repair Time:Less than 15 mins
-
Tools:Socket set
5 of 8 people
found this instruction helpful.
Was this instruction helpful to you?
Thank you for voting!
Washer had broken suspension spring, difficulty balancing during spin cycle
Removed entire cabinet from base, removed drive belt, removed suspension springs, removed tub and transmission together.
Removed 6 screws from brake housing to access snubber. Didn't have the special tool to compress the spring for reassembly, but used 3 longer screws to pull the brake housing back down...worked fine. Reinstalled transmission / tub and replaced all 6 springs. Reassembled cabinet. Unit spins great now...like new.
Removed 6 screws from brake housing to access snubber. Didn't have the special tool to compress the spring for reassembly, but used 3 longer screws to pull the brake housing back down...worked fine. Reinstalled transmission / tub and replaced all 6 springs. Reassembled cabinet. Unit spins great now...like new.
Parts Used:
-
Dwayne from Maryville, TN
-
Difficulty Level:A Bit Difficult
-
Total Repair Time:More than 2 hours
-
Tools:Nutdriver, Pliers, Screw drivers, Socket set, Wrench set
5 of 8 people
found this instruction helpful.
Was this instruction helpful to you?
Thank you for voting!
tub banging against cabinet during spin cycle with load evenly distributed
I'm not a washing machine technician but I did nurse a new Kenmore machine for 23 years and was ready for a replacement. Craigslist advertised a Maytag I was interested in and I bought it with the seller's assurance that it worked perfectly. It didn't and I went online to try and figure out what might be wrong. Clearly, the tub was traveling beyond it's design limit and I suspected a spring or two might be involved. Somewhere online, I found the illustrated parts diagram and then went looking for additional information. To my extreem delight, I came across a do it yourself repair video that demonstrated the procedure well enough that I was completely confident I could make the repair with little effort. That video was one of several service related appliance videos offered for free throughhttp://www.do-it-yourself-washing-machine-and-dryer-repair-help.com/index.html/ The final consideration was whether I could buy the replacement suspension springs and snubber ring for less than I paid for the washer. I found PartSelect and within minutes, I had the parts ordered. The parts arrived within 4 or 5 days, as promised, well packaged and in perfect shape. This morning, using the video as a final reference and the new parts, I completed the repair with only a minor hitch. Without the special spring tool used in the video, I struggled a bit with getting the new springs attached. That's where my wife came in handy (after all, she was movitated). Having her tilt the drum toward the spring landing made it much easier for me to stretch it into place using an adjustable locking plier. I actually enjoyed the whole procedure.
Parts Used:
-
Wayne from Parish, NY
-
Difficulty Level:Easy
-
Total Repair Time:More than 2 hours
-
Tools:Nutdriver, Pliers, Screw drivers, Socket set
4 of 5 people
found this instruction helpful.
Was this instruction helpful to you?
Thank you for voting!
weak suspension springs
Removed front panel also right side panel to get to the springs. Used vise grips to extend springs and used coins to keep springs open for replacing.
Parts Used:
-
Edward from Exeter, NH
-
Difficulty Level:A Bit Difficult
-
Total Repair Time:1- 2 hours
-
Tools:Nutdriver, Pliers, Screw drivers
3 of 3 people
found this instruction helpful.
Was this instruction helpful to you?
Thank you for voting!