




















P2S975SEM4SS General Electric Range - Instructions
Keep searches simple. Use keywords, e.g. "leaking", "pump", "broken" or "fit".
The storage drawer came without supports.
I just removed the drawer and installed the rear supports as instructed on paper included with the part.
Parts Used:

-
Dock from Aurora, CO
-
Difficulty Level:Really Easy
-
Total Repair Time:Less than 15 mins
-
Tools:Nutdriver
2 of 4 people
found this instruction helpful.
Was this instruction helpful to you?
Thank you for voting!
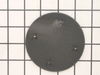
Burner cap replacement
I got really great customer service on finally getting the right part. It came really fast it fit perfect but the cap is a high gloss black instead of a flat black. I will need to call customer service again to see if they can the correct color this time.
Otherwise everything was great!
Otherwise everything was great!
Parts Used:
-
Rita from ST AUGUSTINE, FL
-
Difficulty Level:Really Easy
-
Total Repair Time:Less than 15 mins
1 person
found this instruction helpful.
Was this instruction helpful to you?
Thank you for voting!
door gasket was soiled
-
Joseph from Murrells Inlet, SC
-
Difficulty Level:Really Easy
-
Total Repair Time:Less than 15 mins
1 person
found this instruction helpful.
Was this instruction helpful to you?
Thank you for voting!
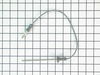
Temp probe was defective
Threw the old one out - plugged the new one in. Steak came out just as ordered - medium rare.
Parts Used:
-
Eric from SOUTHBURY, CT
-
Difficulty Level:Very Easy
-
Total Repair Time:Less than 15 mins
1 person
found this instruction helpful.
Was this instruction helpful to you?
Thank you for voting!
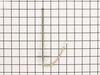
Bake and convection cycles quit working after a10 minutes
Unbolted temperature sensor from back of oven. Disconnect cable connector. Replaced and reconnected new sensor and bolted back in place. Haven’t had to replace bake element yet, but it’s a major job being this GE Profile oven has the bake element hidden. That’s a new one on me.
Parts Used:
-
Stephen from Zachary, LA
-
Difficulty Level:Very Easy
-
Total Repair Time:Less than 15 mins
-
Tools:Nutdriver
1 person
found this instruction helpful.
Was this instruction helpful to you?
Thank you for voting!
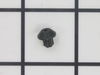
Rubber grate foot failed
-
Gary from HENDERSONVLLE, NC
-
Difficulty Level:Very Easy
-
Total Repair Time:Less than 15 mins
1 person
found this instruction helpful.
Was this instruction helpful to you?
Thank you for voting!
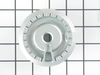
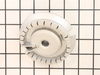
The old burners were damaged by the prior owners.
The repair was extremely easy. Just removed the old burners and dropped in the new ones. No tools needed.
Parts Used:
-
Mohammad from BARTLETT, IL
-
Difficulty Level:Very Easy
-
Total Repair Time:Less than 15 mins
1 person
found this instruction helpful.
Was this instruction helpful to you?
Thank you for voting!
Burners wouldn't light
Had two burners on the stove that would not light. Had tried cleaning them but they still did not ignite. Replaced both burner heads. Once replaced. they ignited right away and have worked ever since.
Parts Used:
-
Robert from SOUTH ELGIN, IL
-
Difficulty Level:Very Easy
-
Total Repair Time:Less than 15 mins
1 person
found this instruction helpful.
Was this instruction helpful to you?
Thank you for voting!
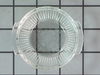
Oven lamp globe shattered . Needed a replacement
-
Joan from SOUTHINGTON, CT
-
Difficulty Level:Very Easy
-
Total Repair Time:15 - 30 mins
1 person
found this instruction helpful.
Was this instruction helpful to you?
Thank you for voting!
Remove back panel or access sensor, replace sensor and panel
-
Mike from Glencoe, NM
-
Difficulty Level:Very Easy
-
Total Repair Time:Less than 15 mins
-
Tools:Nutdriver
1 person
found this instruction helpful.
Was this instruction helpful to you?
Thank you for voting!
Followed a GE Video on installation
-
Sarah from MONTGOMERY, TX
-
Difficulty Level:Very Easy
-
Total Repair Time:15 - 30 mins
-
Tools:Screw drivers
1 person
found this instruction helpful.
Was this instruction helpful to you?
Thank you for voting!
Sparking at 2 different burners all by themselves

-
paul from las vegas, NV
-
Difficulty Level:Easy
-
Total Repair Time:30 - 60 mins
-
Tools:Nutdriver, Screw drivers
3 of 7 people
found this instruction helpful.
Was this instruction helpful to you?
Thank you for voting!
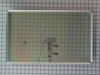
Broke the glass on our oven door due to cold water spilled while it was hot
First of all, there are FOUR panes of glass on the oven door and two different sizes. Make sure you're ordering the right pane. We initially got the wrong one and had to return/reorder.
Took door off hinges and set on table. Removed almost all screws. Two at the top are very long and almost spring loaded -- this was helpful when putting it back together.
When removing the layers, keep track of what/where screws are placed. Some are star-hole-head, some are hex-head (socket). Work slowly and carefully so as not to break additional panes of glass. Leave plenty of room in your workspace to set items aside while you get to the innermost part of the door.
For this part #, it's deep in the door layers and surrounded by fiberglass. Wear gloves so you're not itchy later. This part acts as a double-pane with a narrow aluminum frame around the two pieces of glass. Be careful not to bend the frame when removing the broken piece. One corner of the frame also has a hook-n-hole closure. Take care to not bend the hook too much.
We wiped all the glass pieces off to get all fingerprints, smudges, and baked-on foods removed. Then we put the pieces/parts back -- a lot like a puzzle. Had the oven back up and running with no problems. It may take two people to get the door back on the hinges just because of the weight and awkward position they need to clamp back together.
Took door off hinges and set on table. Removed almost all screws. Two at the top are very long and almost spring loaded -- this was helpful when putting it back together.
When removing the layers, keep track of what/where screws are placed. Some are star-hole-head, some are hex-head (socket). Work slowly and carefully so as not to break additional panes of glass. Leave plenty of room in your workspace to set items aside while you get to the innermost part of the door.
For this part #, it's deep in the door layers and surrounded by fiberglass. Wear gloves so you're not itchy later. This part acts as a double-pane with a narrow aluminum frame around the two pieces of glass. Be careful not to bend the frame when removing the broken piece. One corner of the frame also has a hook-n-hole closure. Take care to not bend the hook too much.
We wiped all the glass pieces off to get all fingerprints, smudges, and baked-on foods removed. Then we put the pieces/parts back -- a lot like a puzzle. Had the oven back up and running with no problems. It may take two people to get the door back on the hinges just because of the weight and awkward position they need to clamp back together.
Parts Used:
-
Dagmar from WESTMINSTER, CO
-
Difficulty Level:Easy
-
Total Repair Time:30 - 60 mins
-
Tools:Screw drivers, Socket set
1 person
found this instruction helpful.
Was this instruction helpful to you?
Thank you for voting!
Failed ignighter
Repair is easy. The keeper ring installation while holding the spring down was tricky. An extra set of hands is helpful in holding and replacing the keeper ring.
Parts Used:

-
Connie from WESTFIELD, IN
-
Difficulty Level:Easy
-
Total Repair Time:15 - 30 mins
-
Tools:Pliers
1 person
found this instruction helpful.
Was this instruction helpful to you?
Thank you for voting!
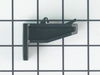
Plastic guide Broken
-
NICK from Vernon, CA
-
Difficulty Level:Easy
-
Total Repair Time:15 - 30 mins
-
Tools:Pliers, Screw drivers
9 of 25 people
found this instruction helpful.
Was this instruction helpful to you?
Thank you for voting!