




















NT23L82 Refrigerator - Instructions
Keep searches simple. Use keywords, e.g. "leaking", "pump", "broken" or "fit".
Location of the run capacitor was not as the video described.
It was easy after it was apparent that the run capacitor was plugged into the compressor. This was determined from a parts diagram of the actual model refrigerator. The part was the same but the location on the video was wrong. A large screwdriver was used to unplug the capacitor from the compressor. The temperature range of the refrigerator is still too wide but it's colder.
Parts Used:

-
Robert from Webbers Falls, OK
-
Difficulty Level:Easy
-
Total Repair Time:30 - 60 mins
-
Tools:Screw drivers, Socket set
1 person
found this instruction helpful.
Was this instruction helpful to you?
Thank you for voting!
broken hinge bearing on ice maker
Disconncted power, pulled plug on disconnect, loosened 3 ice maker attach screws, removed ice maker. carefully removed old broken part, to understand reasembly. Reinstalled new water fill & bearing part.. hung icemaker and tightened attach screws. Reattached electrical plug.. turned on power, it all worked. .took about 45 min to remove, 15 min to reinstall. Right tools needed re disassembly AND ASSEMBLY
Parts Used:

-
ROBERT from WESTFIELD, IN
-
Difficulty Level:Easy
-
Total Repair Time:30 - 60 mins
-
Tools:Nutdriver, Pliers, Screw drivers
3 of 7 people
found this instruction helpful.
Was this instruction helpful to you?
Thank you for voting!
ice maker kept on dripping water causing ice in the icee containergood compression to freeze in a block
ordered a new shut-off valve. arrived in 5 days. installation had to wait a couple more day for i had to order a new compression nut. the reason i had to order a new nut was because the original nut was made of teflon and stripped easily when i tightened it to make a leak proof.joint. the new nut arrived in two days and was installed readily being that it was made of brass and consequently did not strip when i tightened to make a drip proof joint. finished in approximately twenty minutes' the video that this site has on the internet was of great value.
Parts Used:

-
Fernand from SOMERSET, MA
-
Difficulty Level:Really Easy
-
Total Repair Time:30 - 60 mins
-
Tools:Nutdriver, Screw drivers
1 person
found this instruction helpful.
Was this instruction helpful to you?
Thank you for voting!
Ice maker broken. Quick fix
The plastic fill cup part is also used to hold one end of the wire “one/off” switch that is manually activated or activated when the ice tray is full. This wire piece fell out because one end, that is part of the plastic fill cup, broke off. The wire switch was fine.
The video demos show you exactly what to do. The repair man showed me a trick to speed up the testing process. The trick is to insert a wire jumper cable to actuate the ice maker and make it rotate. But this isn’t necessary.
Hardest part of this fix is emptying the freezer (bottom with a slide out door) and removing the door.
Why this part is so expensive is beyond me. But I’m happy it was available for a 24yo fridge that still works!!
The video demos show you exactly what to do. The repair man showed me a trick to speed up the testing process. The trick is to insert a wire jumper cable to actuate the ice maker and make it rotate. But this isn’t necessary.
Hardest part of this fix is emptying the freezer (bottom with a slide out door) and removing the door.
Why this part is so expensive is beyond me. But I’m happy it was available for a 24yo fridge that still works!!
Parts Used:
-
Tim from Berkeley, CA
-
Difficulty Level:Easy
-
Total Repair Time:1- 2 hours
-
Tools:Nutdriver, Screw drivers
1 person
found this instruction helpful.
Was this instruction helpful to you?
Thank you for voting!
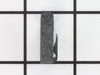
Kickplate clip broke off
Reattaching the kickplate clip was easy, but the tab that holds in place was broken. It would slide back when the kickplate was installed. I fashioned a replacement tab out of a piece of 3/32 aluminum bent into a U with the hammer. To hold it in place I drilled and tapped one hole and used a 6-32 machine screw.
Parts Used:
-
Paul from Fort Wayne, IN
-
Difficulty Level:A Bit Difficult
-
Total Repair Time:15 - 30 mins
-
Tools:Pliers, Screw drivers, Socket set
2 of 4 people
found this instruction helpful.
Was this instruction helpful to you?
Thank you for voting!
Ice maker ejector arm broke into.

-
Mary L. from Millsboro,, DE
-
Difficulty Level:Really Easy
-
Total Repair Time:Less than 15 mins
-
Tools:Screw drivers
16 of 46 people
found this instruction helpful.
Was this instruction helpful to you?
Thank you for voting!
Light rocker switch broke and refrigerator light couldn't go on.
I just popped out the old switch with a flat head screwdriver. Removed the connections and then installed new switch by reversing steps. Popped in back in and the light went on.
Parts Used:

-
Cathy from HOPATCONG, NJ
-
Difficulty Level:Very Easy
-
Total Repair Time:Less than 15 mins
2 of 4 people
found this instruction helpful.
Was this instruction helpful to you?
Thank you for voting!
Light switch broke
Pried out old part with screwdriver. Unplugged. When new part came, just plugged it in and pushed the part into place.
Parts Used:
-
Carolee from Spokane Valley, WA
-
Difficulty Level:Really Easy
-
Total Repair Time:Less than 15 mins
-
Tools:Screw drivers
2 of 4 people
found this instruction helpful.
Was this instruction helpful to you?
Thank you for voting!
Renters removed leveling legs from refrigerator. I don't know why!
I tilted the unit back enough to scew the new legs into the threaded holes.
Parts Used:

-
Don from Frankfort, KY
-
Difficulty Level:Really Easy
-
Total Repair Time:Less than 15 mins
2 of 4 people
found this instruction helpful.
Was this instruction helpful to you?
Thank you for voting!
light did not work on the refrigerator side
bulbs were not burnt out. received the new switch in a few days. watch the short video, was good to see how it comes out. used a putty knife to release the defective switch, removed wires put them on the new one and posed the new switch back in. Not bad Part cost $11.00 7 dollars shipping so for 17 bucks it works great. nice to see what is inside the refer!
Parts Used:
-
David from GROVESPRING, MO
-
Difficulty Level:Easy
-
Total Repair Time:Less than 15 mins
1 of 2 people
found this instruction helpful.
Was this instruction helpful to you?
Thank you for voting!
Rocker on switch broke off
Eased the putty knife under the edge of the switch housing and pried it off. Pulled two wires off the old terminals and hooked them onto the new one and reinstalled into the refrigerator body.
Parts Used:
-
David Barnes from ROSWELL, NM
-
Difficulty Level:Very Easy
-
Total Repair Time:Less than 15 mins
1 of 2 people
found this instruction helpful.
Was this instruction helpful to you?
Thank you for voting!
Light switch broke off
We looked up the problem online with the model number of the refrigerator. We ordered the part and followed the video installation that was sent with the order and was found online prior to purchasing
Parts Used:
-
Kathy from TEMECULA, CA
-
Difficulty Level:Very Easy
-
Total Repair Time:Less than 15 mins
-
Tools:Pliers
1 of 2 people
found this instruction helpful.
Was this instruction helpful to you?
Thank you for voting!
The ice stripper cracked from freezing.
There was three screws to remove to unmout the ice maker, and unplug the wire harness,then two to remove to slip in new stripper. All took about 20 mins.
Parts Used:

-
David from Discovery Bay, CA
-
Difficulty Level:Really Easy
-
Total Repair Time:15 - 30 mins
-
Tools:Nutdriver
3 of 8 people
found this instruction helpful.
Was this instruction helpful to you?
Thank you for voting!
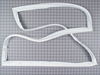
Fresh food door gasket needed to be replaced
I took several screws out at one time because the new gasket had holes in the gasket. The screw had to go through the holes in the gasket. The old gasket just popped behind the grove on the door panel. After the gasket was installed I used a hair dryer to relax the gasket and it contoured to the door and refrigerator opening. The repair was successful.
Parts Used:
-
William from Madison Heights, VA
-
Difficulty Level:Easy
-
Total Repair Time:1- 2 hours
-
Tools:Nutdriver, Screw drivers
1 of 2 people
found this instruction helpful.
Was this instruction helpful to you?
Thank you for voting!
missing clips
I had to find a couple screws that would match the clips and kickplate. I screwed on the clips. The kickplate snapped on perfectly.
Parts Used:
-
Gaylon from Auburndale, FL
-
Difficulty Level:Really Easy
-
Total Repair Time:Less than 15 mins
-
Tools:Screw drivers
2 of 6 people
found this instruction helpful.
Was this instruction helpful to you?
Thank you for voting!