




















MRT118FFFZ10 Maytag Refrigerator - Instructions
Keep searches simple. Use keywords, e.g. "leaking", "pump", "broken" or "fit".
Raise side of fridge and slide 2x4 under side with broken wheel.
Remove back side cardboard access cover. About 6 dcrews need to be removed. Remove 9/16” bolt and lower compressor tray frame down to slide out wheel axel. Place wheel in slot and replace axel. Lift compressor tray and replace 9/16” bolt. Replace cardboard cover. Remove 2x4.
Parts Used:

-
Hans from OGDEN, UT
-
Difficulty Level:Really Easy
-
Total Repair Time:Less than 15 mins
-
Tools:Socket set
5 of 6 people
found this instruction helpful.
Was this instruction helpful to you?
Thank you for voting!
Broken tracks on the Meat/Cheese drawer.
The broken tracks popped off with a little effort, and the new tracks snapped in place. No tools required, except a screw driver helped to pop the broken tracks out, and snap the new ones in place.
Parts Used:


-
Pamela from PARADISE, TX
-
Difficulty Level:Really Easy
-
Total Repair Time:15 - 30 mins
-
Tools:Screw drivers
4 of 4 people
found this instruction helpful.
Was this instruction helpful to you?
Thank you for voting!
Fan motor died
First, made sure new fan worked then Placed back in bracket with bushings-only goes in one way, pushed fan back on. screwed bracket to back of freezer and ran the wires to their original place, plugged in the two plugs, put the back piece up attaching ground and pulling ice maker plug thru, screwed back on. Plugged in ice maker, mounted ice maker on freezer wall. Plugged it in. Exact reversal of how it was removed. Not a lot parts to get confused.
Parts Used:

-
Michael from TROY, IL
-
Difficulty Level:Very Easy
-
Total Repair Time:15 - 30 mins
-
Tools:Screw drivers, Socket set
3 of 3 people
found this instruction helpful.
Was this instruction helpful to you?
Thank you for voting!
Not getting cold
-
John from PHILADELPHIA, PA
-
Difficulty Level:Really Easy
-
Total Repair Time:15 - 30 mins
-
Tools:Nutdriver, Pliers, Screw drivers
3 of 4 people
found this instruction helpful.
Was this instruction helpful to you?
Thank you for voting!
My fridge was very warm Temperature was 56 and my son did the work on it for me
My son said it was easy to put in the motor I didn’t need the fan my fan was in good shape yet thank you so much for everything
Parts Used:
-
Rosemary from ALBION, NY
-
Difficulty Level:Really Easy
-
Total Repair Time:15 - 30 mins
-
Tools:Screw drivers, Wrench (Adjustable)
2 of 2 people
found this instruction helpful.
Was this instruction helpful to you?
Thank you for voting!
Broken Refrigerator door retainer

-
Leroy from IRVINGTON, AL
-
Difficulty Level:Very Easy
-
Total Repair Time:Less than 15 mins
2 of 2 people
found this instruction helpful.
Was this instruction helpful to you?
Thank you for voting!
Refrigerator suddenly not staying cold. Freezer icing up about 1 month before.
Noticed the evaporator fan not spinning but would spin with a finger jump start. After looking up the part on the PartSelect liner parts diagram I found the installation video that really helped. After installing the fan it tested out fantastic. The fan was blowing air 10 times more than the old one. Refrigerator works great on the original econo setting.
Parts Used:

-
PAUL from SANTA MARIA, CA
-
Difficulty Level:Really Easy
-
Total Repair Time:30 - 60 mins
-
Tools:Nutdriver, Pliers, Screw drivers
2 of 2 people
found this instruction helpful.
Was this instruction helpful to you?
Thank you for voting!
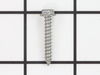
Screws are a bit small and short for the job

-
Sheryll Lawrence from BRONX, NY
-
Difficulty Level:Really Easy
-
Total Repair Time:30 - 60 mins
-
Tools:Screw drivers
2 of 3 people
found this instruction helpful.
Was this instruction helpful to you?
Thank you for voting!
replaced cracked compartment door

-
john from NORWOOD, MA
-
Difficulty Level:Really Easy
-
Total Repair Time:Less than 15 mins
2 of 3 people
found this instruction helpful.
Was this instruction helpful to you?
Thank you for voting!
Track on pull out door cracked
Sent model #..all of maytag parts have part # printed on them..snaps off and new part snaps on!!! Great!! They do have assistance to help you repair,but wasn't needed..i know who to order from now for any appliance!!
Parts Used:
-
Linda from MONTESANO, WA
-
Difficulty Level:Very Easy
-
Total Repair Time:Less than 15 mins
1 person
found this instruction helpful.
Was this instruction helpful to you?
Thank you for voting!
Fan was not spinning make it not cold in bottom part
Take screws out pull panel out unconnect the part connect new one and your done
Parts Used:
-
Dylan from WHEELING, WV
-
Difficulty Level:Very Easy
-
Total Repair Time:Less than 15 mins
-
Tools:Screw drivers
1 person
found this instruction helpful.
Was this instruction helpful to you?
Thank you for voting!
drawer guide for drawer in refrigerator broke
empty top shelf in refrigerator, remove glass shelf. Wash and dry. Turn shelf over and line up notches and snap in place. Cost of guide plus 7.99 shipment fee and local ta was $18. Local dealer wanted $24 to order same part. Easy do-it-yourself project.
Parts Used:
-
Betty from MONROE, MI
-
Difficulty Level:Really Easy
-
Total Repair Time:15 - 30 mins
1 person
found this instruction helpful.
Was this instruction helpful to you?
Thank you for voting!
Warm fridge and freezer but compressor was running. No air distribution inside fridge
I turned breaker off to fridge, it was easier than pulling fridge out in camper. I took 4 screws out of back panel that revealed the evap fan, took 2 more screws out to take fan bracket off. Unplugged fan plug. Took fan blade off the non working evap motor and put it on the new evap motor. Put all the screws back in the reverse order and flipped the breaker and air started circulating.
Parts Used:
-
Brian from BURTON, MI
-
Difficulty Level:Really Easy
-
Total Repair Time:15 - 30 mins
-
Tools:Nutdriver
1 person
found this instruction helpful.
Was this instruction helpful to you?
Thank you for voting!
door hinge broke.

-
Bernard from DONALDSONVLLE, LA
-
Difficulty Level:Really Easy
-
Total Repair Time:15 - 30 mins
-
Tools:Nutdriver, Screw drivers
2 of 4 people
found this instruction helpful.
Was this instruction helpful to you?
Thank you for voting!
Very easy installation
The cover just popped in, no problem
Parts Used:

-
David from Woodstock, IL
-
Difficulty Level:Really Easy
-
Total Repair Time:15 - 30 mins
-
Tools:Screw drivers
1 person
found this instruction helpful.
Was this instruction helpful to you?
Thank you for voting!