




















MLG20PDCWW0 - Instructions
Keep searches simple. Use keywords, e.g. "leaking", "pump", "broken" or "fit".
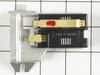
no heat was being produced
Remove back panel n u can see the sensor and easy to replace thanks to the print out i was provided love this website
Parts Used:
-
reinaldo from guttenberg, NJ
-
Difficulty Level:Easy
-
Total Repair Time:15 - 30 mins
-
Tools:Nutdriver, Screw drivers
9 of 14 people
found this instruction helpful.
Was this instruction helpful to you?
Thank you for voting!
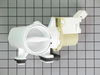
water would not drain
-
William from Wauseon, OH
-
Difficulty Level:Really Easy
-
Total Repair Time:15 - 30 mins
-
Tools:Nutdriver, Pliers, Screw drivers
9 of 14 people
found this instruction helpful.
Was this instruction helpful to you?
Thank you for voting!
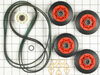
My dryer made squeaking noise when rotating.
I followed directions found on several similar YouTube videos since the instructions included in the Whirlpool parts kit were not for my model dryer. I found that the original idler pulley was not rotating and the belt had worn a groove through it. I replaced all 4 roller wheels, idler pulley and the belt. Problem solved.
Parts Used:
-
James from KENNESAW, GA
-
Difficulty Level:Easy
-
Total Repair Time:1- 2 hours
-
Tools:Nutdriver, Screw drivers
7 of 8 people
found this instruction helpful.
Was this instruction helpful to you?
Thank you for voting!
Needed to repair and replace dryer motor pulley and pully
this was very was very easy. But I deviated from the You Tube instructions. One to release the motor pulley. I needed to use 2 adjustable wrenches for a longer lever. I needed to use a hammer to help release pulley. Second to remove the dryer cable I needed to use a small screw driver to aid in the release. ---- the part from the company was a perfect fit.
Parts Used:
-
Rob from GAITHERSBURG, MD
-
Difficulty Level:Really Easy
-
Total Repair Time:30 - 60 mins
-
Tools:Wrench (Adjustable)
6 of 6 people
found this instruction helpful.
Was this instruction helpful to you?
Thank you for voting!
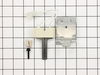
No Heat
Thermal fuse was blown so I replaced it. Still no heat. Hi-Limit thermostat and Cycling Thermo. had continuity as did flame sensor. Igniter tested 66ohms. I placed a wire jumper across the Hi-Limit and the igniter glowed, solenoids opened and gas came on. I orderd the Hi-Limit and since both "overheating" limiters were defective I decided to order the cycling thermo just in case. The Hi-Limit was received in 2 days but the Cycling Thermo was backordered. In the meantime my wife got antsy so I went ahead and installed the Hi-Limit and put her back in service... ...for one load. I wasn't certain if I had fried the "limiters" again but since they had continuity and I could measure continuity all the way to the Igniter I decided that it HAD to be the cause. I ignored the flame sensor since it never came into play without the igniter glowing... The igniter arrived and measured 56ohms. Hmmm... After installing the problem was solved. Word of advice: If the thermal fuse is blown and even if all else in the circuit SEEMS ok, go ahead and order the Fuse, Hi-Limit and Cycling Thermos, and the Igniter. It will take you about 30 minutes to install and you'll reduce your out-of-service time! Good luck!
Parts Used:
-
Ken from Bixby, OK
-
Difficulty Level:Easy
-
Total Repair Time:More than 2 hours
-
Tools:Nutdriver, Screw drivers, Socket set
7 of 9 people
found this instruction helpful.
Was this instruction helpful to you?
Thank you for voting!
My washer wouldn't drain
My husband and son removed the old pump and replaced it with the new pump assembly. The whole process took about 30 minutes max.
Parts Used:
-
Melanie from McKenzie, TN
-
Difficulty Level:Really Easy
-
Total Repair Time:15 - 30 mins
-
Tools:Pliers, Socket set
9 of 15 people
found this instruction helpful.
Was this instruction helpful to you?
Thank you for voting!
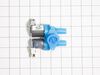
Washer would fill extremely slowly when on cold water wash resulting in long fill(LF) error code.
The washing machine would only run on the hot water cycle. When trying to use the warm or cold setting, the water would dribble into the drum and result in an LF error code(long fill). I watched a brief video on replacing the water inlet valve which made it really easy to repair. I first turned off the water, disconnected the hoses from the machine, and opened the top to access the valves. I then disconnected the wires from the valve, removed the water tubes, swapped out the valves and put everything back together. I am not experienced in repair but this was a very easy fix! We decided to replace the single hot water valve and the dual cold water valve since it's an older machine and it works like new again!
Parts Used:

-
Laura from ENGLEWOOD, CO
-
Difficulty Level:Really Easy
-
Total Repair Time:15 - 30 mins
-
Tools:Pliers, Screw drivers
6 of 6 people
found this instruction helpful.
Was this instruction helpful to you?
Thank you for voting!
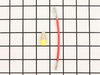
couldn't get the wire connection anywhere after we bought the heating element.
we received the two heating element wires in 3 days and connected the heating element with no problem works great.
Parts Used:
-
Betty from Erie, PA
-
Difficulty Level:Really Easy
-
Total Repair Time:15 - 30 mins
-
Tools:Socket set
6 of 6 people
found this instruction helpful.
Was this instruction helpful to you?
Thank you for voting!
water would not pump (drain) out of machine
My husband removed the bottom panel of the washer and removed the old pump with two screws, then removed the water hose coming into the pump and unplugged the electrical push in type plug from the side of the pump. Simple reversed the process to instal the new one and replaced the front panel. Simple really...far more so than calling a repair man.
Parts Used:
-
Pamela from Greenville, OK
-
Difficulty Level:Easy
-
Total Repair Time:15 - 30 mins
-
Tools:Nutdriver, Wrench (Adjustable)
9 of 15 people
found this instruction helpful.
Was this instruction helpful to you?
Thank you for voting!
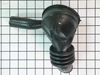
no drain, and pin hole in hose causing slight leak
The most time consuming part was fitting the hose back on because of the confined space. Once on the rest was a snap. The drain pump installed just the same as the video, so watch the video! I think in total it took about 30 minutes to complete.
Parts Used:
-
Debbie from MOUNT VERNON, KY
-
Difficulty Level:Easy
-
Total Repair Time:30 - 60 mins
-
Tools:Nutdriver, Pliers
6 of 6 people
found this instruction helpful.
Was this instruction helpful to you?
Thank you for voting!
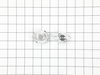
Dryer does not heat but blows only cold air
Pulled the lower front panel located thermal switch pulled 2 wires removed 2 small bolts pulled switch out set meter to ohms scale and tested between the 2 terminals it hailed the test I reversed for installation of new switch
Parts Used:
-
kevin from RENTON, WA
-
Difficulty Level:Easy
-
Total Repair Time:30 - 60 mins
-
Tools:Screw drivers, Socket set
6 of 6 people
found this instruction helpful.
Was this instruction helpful to you?
Thank you for voting!
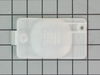
Lens melted because paper got behind the lens and was heated by the lamp.
-
Chris from Valley Stream, NY
-
Difficulty Level:Really Easy
-
Total Repair Time:Less than 15 mins
-
Tools:Screw drivers
6 of 6 people
found this instruction helpful.
Was this instruction helpful to you?
Thank you for voting!
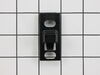
Broken striker
Remove two star screws. Remove broken striker. Installed new striker. Took two mins.
Parts Used:
-
KERRY from CLYDE, TX
-
Difficulty Level:Very Easy
-
Total Repair Time:Less than 15 mins
-
Tools:Screw drivers
6 of 6 people
found this instruction helpful.
Was this instruction helpful to you?
Thank you for voting!
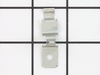
The door will not latch tightly.
I replaced both the door strike and the female portion. The door still does not close tightly. Heavy, wet items also knock the door open.
Parts Used:
-
John from Syracuse, NY
-
Difficulty Level:Really Easy
-
Total Repair Time:Less than 15 mins
-
Tools:Screw drivers
9 of 16 people
found this instruction helpful.
Was this instruction helpful to you?
Thank you for voting!
not heat
For the Ignitor - As involved as taking the dryer completely apart sounded, it was super easy. 1-take out the lint trap and remove the two screws there. 2-Pop open the top with a screw driver and swing the top completely over/back. 3- remove the two screws holding in the front panel and remove the panel. 4- loosen the belt by pushing on the tension roller under the drum on the right and remove the drum (its super light) use the belt as a handle. 5- remove the screw holding in the ignitor and replace it with the new one. Be careful to not touch the new ignitor. Then go backwards putting it back together.
Parts Used:
-
Sarah from Merrimac, MA
-
Difficulty Level:Really Easy
-
Total Repair Time:15 - 30 mins
-
Tools:Screw drivers, Socket set
7 of 10 people
found this instruction helpful.
Was this instruction helpful to you?
Thank you for voting!