




















MGR6751BDS18 Maytag Range - Instructions
Keep searches simple. Use keywords, e.g. "leaking", "pump", "broken" or "fit".
Temp out of wack
-
Peter from Montello, WI
-
Difficulty Level:Really Easy
-
Total Repair Time:More than 2 hours
-
Tools:Nutdriver
3 of 4 people
found this instruction helpful.
Was this instruction helpful to you?
Thank you for voting!
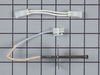
The inside glass was broken on oven door.
I was pleased with how the job went.
It took longer than expected because I am not really a "do it yourselfer", but I studied the door and reread how others managed the repair several times.
There were more screws than mentioned here.
Someone said 10 screws but there were 12.
In the end I was pleased and surprised how simple the job was, but recommend others read carefully what others have written. I didn't but learned one must.
It took longer than expected because I am not really a "do it yourselfer", but I studied the door and reread how others managed the repair several times.
There were more screws than mentioned here.
Someone said 10 screws but there were 12.
In the end I was pleased and surprised how simple the job was, but recommend others read carefully what others have written. I didn't but learned one must.
Parts Used:
-
Jacob from Cotton, MN
-
Difficulty Level:A Bit Difficult
-
Total Repair Time:30 - 60 mins
-
Tools:Screw drivers
3 of 4 people
found this instruction helpful.
Was this instruction helpful to you?
Thank you for voting!
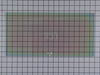
Lower oven would not ignite, upper oven heat was inconsistent
To replace the igniter, I removed the oven door, all racks, the cover for the burner element and the shield over the burner element. I also removed the back panel to access the wiring. Removal of these elements was easy and took only a couple of minutes. When I tried to remove the old igniter from the bracket supporting it, one of the screws was stripped. Unfortunately I had to drill this screw out and replace it. If I didn't have to do this, both jobs would have taken about 20 minutes combined. After removing the igniter from the bracket, I replaced it, ran the electrical to the back where the wiring harness was and reassembled the components.
As for the upper oven temperature sensor, it took 5 minutes. I removed the two screws holding the sensor in place and pulled it out which exposed the electrical connection. I simply unplugged it, and screwed the new one in its place. I then connected the wiring harness.
As for the upper oven temperature sensor, it took 5 minutes. I removed the two screws holding the sensor in place and pulled it out which exposed the electrical connection. I simply unplugged it, and screwed the new one in its place. I then connected the wiring harness.
Parts Used:
-
Richard from ORTONVILLE, MI
-
Difficulty Level:Really Easy
-
Total Repair Time:30 - 60 mins
-
Tools:Nutdriver, Screw drivers
2 of 2 people
found this instruction helpful.
Was this instruction helpful to you?
Thank you for voting!
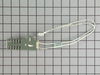
f1&f3 error> continuous beeping,oven stopped working after using the self cleaning mode
I located the temp sensor (top left). Removed the 2x Phillips screws and slide the wire out until the plug is thru the opening taking care not to pull to hard as to damage the end that you not going to replace. To install plug it in and push the wire thru and secure with 2x Phillip screws.
Parts Used:
-
Robert from FITCHBURG, MA
-
Difficulty Level:Easy
-
Total Repair Time:30 - 60 mins
-
Tools:Nutdriver
2 of 2 people
found this instruction helpful.
Was this instruction helpful to you?
Thank you for voting!
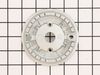
Head burner had something spilled on it which stained it and left a large dark brown spot
Simply remove two screws take old one off and line up and put new one on and replace the two screws. Couldn't have been easier.
Parts Used:
-
Donald from Hudsonville, MI
-
Difficulty Level:Really Easy
-
Total Repair Time:Less than 15 mins
-
Tools:Screw drivers
6 of 14 people
found this instruction helpful.
Was this instruction helpful to you?
Thank you for voting!
Old hinge spring broke
• Removed the oven door (pulled right off old hinges)
• Removed two screws
• Removed broken hinge
• Placed new hinge in place
• Replaced screws
• Replaced oven door.
• Removed two screws
• Removed broken hinge
• Placed new hinge in place
• Replaced screws
• Replaced oven door.
Parts Used:
-
Steve from LONGVIEW, WA
-
Difficulty Level:Really Easy
-
Total Repair Time:15 - 30 mins
-
Tools:Screw drivers
2 of 2 people
found this instruction helpful.
Was this instruction helpful to you?
Thank you for voting!
Oven door wouldn’t close all the way.
Bought new hinges as that was the obvious problem.
Below is the removal, installation process for new hinges. Turns out in my case there was nothing wrong with the hinges. Problem was still there after installing new ones. I found that the metal in the door that butted against the hinges was fatigued causing looseness. I ended up compressing the metal back into shape with a hammer. Problem solved but money wasted on hinges.
If you replace hinges. Here is what I did.
1. Open door slightly to where it stops in broiler position.
2. Remove the door by pulling up.
3. Remove two screws in front of hinges that hold them in.
4. Pull range out a few inches for access the remove the side fillers that trim out the stove.
5. Reach in from the side and work hinges out.
5. Pop in new hinges and reattach the 2 front holding screws and the side trim screws.
You are done.
Below is the removal, installation process for new hinges. Turns out in my case there was nothing wrong with the hinges. Problem was still there after installing new ones. I found that the metal in the door that butted against the hinges was fatigued causing looseness. I ended up compressing the metal back into shape with a hammer. Problem solved but money wasted on hinges.
If you replace hinges. Here is what I did.
1. Open door slightly to where it stops in broiler position.
2. Remove the door by pulling up.
3. Remove two screws in front of hinges that hold them in.
4. Pull range out a few inches for access the remove the side fillers that trim out the stove.
5. Reach in from the side and work hinges out.
5. Pop in new hinges and reattach the 2 front holding screws and the side trim screws.
You are done.
Parts Used:
-
Michael from BOISE, ID
-
Difficulty Level:Easy
-
Total Repair Time:15 - 30 mins
-
Tools:Nutdriver, Screw drivers
2 of 2 people
found this instruction helpful.
Was this instruction helpful to you?
Thank you for voting!
Gas Oven would not light .
After reading from a Google search, why won't me maytag genius double oven light? I read that my oven will not open its gas valve until the igniter is hot, glowing red. Mine didn't glow red bad igniters. After ordering the new parts install was easy and under 15 mins. My advice is to be careful pulling the oven out to access the back panels, be careful not to scratch your flooring. 5 screws for the big panel, and 3 for the small panel. All Phillips head screws. 5 inside the oven to pull the old igniter. Easy job anyone can do it. I did both upper and lower ovens and the broiler igniters.
Parts Used:
-
Mark from VINTON, IA
-
Difficulty Level:Really Easy
-
Total Repair Time:Less than 15 mins
-
Tools:Screw drivers
2 of 2 people
found this instruction helpful.
Was this instruction helpful to you?
Thank you for voting!
Had an F2 message go off then F3 when I tried to turn the stove on
Unplugged the old temp sensor at the back of the stove. From the inside I removed the 2 retaining screws. I taped a string to the old wire and pulled it through so I could pull the new harness through on the new sensor. When the new sensor arrived I installed it in reverse order. Easy peasy. Works great!!!!
Parts Used:
-
Daniel from MOUNT HEALTHY, OH
-
Difficulty Level:Very Easy
-
Total Repair Time:Less than 15 mins
-
Tools:Screw drivers
2 of 3 people
found this instruction helpful.
Was this instruction helpful to you?
Thank you for voting!
The oven glass shattered when I dropped water in the heated Glass
I Lifted the oven door from the hinges and removed all the screws to get to the broken glass pane, since the oven door is in layers I taped the screws close to where they belonged, so that I could screw everything together again in the right order..
The last time this happened to me(!!) I brought the door to a repair man and hadto pay 200 dollars , I saved 150 Dollars doing it myself!
The last time this happened to me(!!) I brought the door to a repair man and hadto pay 200 dollars , I saved 150 Dollars doing it myself!
Parts Used:
-
Franziska from Salt Lake City, UT
-
Difficulty Level:A Bit Difficult
-
Total Repair Time:30 - 60 mins
-
Tools:Screw drivers
2 of 3 people
found this instruction helpful.
Was this instruction helpful to you?
Thank you for voting!
Broken glass in oven door
Disassembled the oven door, removed broken glass, replaced with new glass and reassembled oven door. Took very little time. Online diagram on this site helped to keep everything in order and easily know what part was needed. Thanks!!!!
Parts Used:
-
Jamie from Hoover, AL
-
Difficulty Level:Easy
-
Total Repair Time:30 - 60 mins
-
Tools:Screw drivers
3 of 6 people
found this instruction helpful.
Was this instruction helpful to you?
Thank you for voting!
Oven did not heat up in bake mode.
The ignitor heated up and the broiler worked but not the bake mode. Repaired per instructions
Parts Used:
-
Peter from Westcliffe, CO
-
Difficulty Level:Easy
-
Total Repair Time:30 - 60 mins
-
Tools:Screw drivers
2 of 3 people
found this instruction helpful.
Was this instruction helpful to you?
Thank you for voting!
F 3 signal on display pad every time oven warmed up
Removed all the racks from inside the oven, unscrewed the 6 screws that held it into the cabinet, pulled it out and sat it on the floor in front of the cabinet. Removed the oven sensor from the inside of the oven after disconnecting the wire harness from the rear right exterior of the oven. Installed new sensor from inside (2screws), plugged it into the harness in the back and reinstalled oven in the cabinet.
Parts Used:
-
jeff from haskell, NJ
-
Difficulty Level:Easy
-
Total Repair Time:15 - 30 mins
-
Tools:Screw drivers
2 of 3 people
found this instruction helpful.
Was this instruction helpful to you?
Thank you for voting!
Oven shutting off, getting an F1 error on ECM
Remove rear sheet metal cover. Disconnect the temp sensor wiring connector (on the left side as viewed from front).
Open oven, take out the 2 screws attaching sensor and remove. Reverse for installation.
Included wiring adapters are not needed for this model oven.
Open oven, take out the 2 screws attaching sensor and remove. Reverse for installation.
Included wiring adapters are not needed for this model oven.
Parts Used:
-
Ben from Belen, NM
-
Difficulty Level:Really Easy
-
Total Repair Time:15 - 30 mins
-
Tools:Screw drivers
2 of 4 people
found this instruction helpful.
Was this instruction helpful to you?
Thank you for voting!
Inner most oven door was broken.
-
William from WASHINGTON, DC
-
Difficulty Level:A Bit Difficult
-
Total Repair Time:1- 2 hours
-
Tools:Screw drivers
1 person
found this instruction helpful.
Was this instruction helpful to you?
Thank you for voting!