




















MER5880BAW Maytag Range - Instructions
Keep searches simple. Use keywords, e.g. "leaking", "pump", "broken" or "fit".
Needed to replace the oven door gasket/seal
Removed door from oven by pulling up at the first stop point after opening the door. Removed the outer shell by removing 5 screws. Disassembled the inner door by removing 6 screws. Be careful with the insulation blanket (fits in a molded portion of the inner door). Glass windows can be removed (for cleaning) via a couple screws. Old gasket/seal is held in-place via spring-clips; just squeezed each clip, pushed each thru their respective holes, and pulled off the worn-out gasket. New gasket snapped in-place by pushing the clips thru the respective holes. Reverse the process to reassemble the door. You can do this job in 15-20 minutes. Took us longer because it took some elbow-grease (and patience) to clean the crud off the glass windows.
Parts Used:

-
Daniel from Katy, TX
-
Difficulty Level:Easy
-
Total Repair Time:30 - 60 mins
-
Tools:Pliers, Screw drivers
4 of 5 people
found this instruction helpful.
Was this instruction helpful to you?
Thank you for voting!
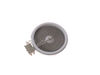
One of the electric stove top elements had burnt out
The repair was very easy. There were 3 screws under the front lip which had to be removed. This allowed the smooth glass top to be removed, tilt and pull forward. This exposed the burners and the unit I purchased was a direct replacemt for the burnt unit. All I had to do was remove the electrical clips from the old unit and put them on the new unit. There were 3 spring elements, each with 2 screws, which held the unit in place.
Parts Used:
-
Anthony from Palmyra, VA
-
Difficulty Level:Really Easy
-
Total Repair Time:30 - 60 mins
-
Tools:Screw drivers
4 of 5 people
found this instruction helpful.
Was this instruction helpful to you?
Thank you for voting!
baking element was out
I actually had to hire someone to fix the problem. My stove happened to be one of those they describe on the internet where the wires were not long enough to pull out. Had I tried it would have become a major repair job. The repairman had to use needle nose pliers to grab ahold of the wires and get them out far enough. All went well though and he only charged $25.00.
Parts Used:

-
(Mrs.) Jimmie from Hillsboro, TX
-
Difficulty Level:Really Easy
-
Total Repair Time:15 - 30 mins
-
Tools:Pliers, Screw drivers
4 of 5 people
found this instruction helpful.
Was this instruction helpful to you?
Thank you for voting!
Broken Door Handle
Pretty straightforward repair.
Remove the storage drawer under the door.
Remove the top trim piece that holds the plastic trim to the door.
Remove the 6 screws that hold the front panel glass trim in place and slide the panel out from under the door trim.
Remove the door trim from the door by removing the side screws (1 each side) and the 2 on the front.
Remove the handle from the trim by removing the 4 retaining screws.
To re-assemble, reverse the process.
Total time: 15 to 30 minutes.
Remove the storage drawer under the door.
Remove the top trim piece that holds the plastic trim to the door.
Remove the 6 screws that hold the front panel glass trim in place and slide the panel out from under the door trim.
Remove the door trim from the door by removing the side screws (1 each side) and the 2 on the front.
Remove the handle from the trim by removing the 4 retaining screws.
To re-assemble, reverse the process.
Total time: 15 to 30 minutes.
Parts Used:
-
Leonard from Canton, OH
-
Difficulty Level:Easy
-
Total Repair Time:15 - 30 mins
-
Tools:Screw drivers
3 of 3 people
found this instruction helpful.
Was this instruction helpful to you?
Thank you for voting!
Bottom trim section was rusting
To better access the bottom screws, I removed the door by opening it to the first open position and lifting it up off the hinges. No tools are needed for this but careful, the door IS heavy! Place on table or counter top. Remove the Phillips screws, old trim, and clean the outside of door. Position new trim and replace with the new screws provided. By securing the new trim, I did not have to worry about the glass sliding out when flipping the door to clean the inside. Finish by sliding the door back on the hinges. Looks like brand new!
Side Notes: One of the side pieces of the trim was fairly bent when received. Since the misshapen piece was nicely painted i.e. parted when bent, this was a Maytag (Whirlpool) supplier issue and NOT a PartSelect issue. Rather then damaging the paint bending this piece back to fit the door, I reused the old side piece which was in great shape.
Thanks PartSelect , you're the best!
Side Notes: One of the side pieces of the trim was fairly bent when received. Since the misshapen piece was nicely painted i.e. parted when bent, this was a Maytag (Whirlpool) supplier issue and NOT a PartSelect issue. Rather then damaging the paint bending this piece back to fit the door, I reused the old side piece which was in great shape.
Thanks PartSelect , you're the best!
Parts Used:

-
Edward from MONTAGUE, MI
-
Difficulty Level:Easy
-
Total Repair Time:15 - 30 mins
-
Tools:Screw drivers
3 of 3 people
found this instruction helpful.
Was this instruction helpful to you?
Thank you for voting!
broken oven door inner glass pane.
Remove the door, remove screws from all sides
Remove sides and face of oven door by sliding down from under the oven handle trim.
Remove screws on 2nd light of glass and set aside.
Now you are at the inner door panes. their should be two in an insulated type unit.
Remove the remaining screws from the handle pracket and the permiter frame for the glass/insulation. Remove permiter frame and set aside.
Pull out inner door glass frame. get a pair of pliers and bend tab on frame up so you can pull the frame sightly apart, replace the glass, secure frame tightly around glass slide tab back into reciever slot and bend down ( you may need another person to assist in keeping both lights in the frame while trying to ben tab back in to place)
reassemble door as it came apart carefull not to over tighten the screws, they strip easy.
Remove sides and face of oven door by sliding down from under the oven handle trim.
Remove screws on 2nd light of glass and set aside.
Now you are at the inner door panes. their should be two in an insulated type unit.
Remove the remaining screws from the handle pracket and the permiter frame for the glass/insulation. Remove permiter frame and set aside.
Pull out inner door glass frame. get a pair of pliers and bend tab on frame up so you can pull the frame sightly apart, replace the glass, secure frame tightly around glass slide tab back into reciever slot and bend down ( you may need another person to assist in keeping both lights in the frame while trying to ben tab back in to place)
reassemble door as it came apart carefull not to over tighten the screws, they strip easy.
Parts Used:

-
Adam from modesto, CA
-
Difficulty Level:Easy
-
Total Repair Time:30 - 60 mins
-
Tools:Pliers, Screw drivers
4 of 6 people
found this instruction helpful.
Was this instruction helpful to you?
Thank you for voting!
Oven erratic, not heating correctly, timer beeper sounding
The video indicating •unscrew old sensor, •pull wiring, •unplug old sensor, and •plug in replacement was good until I pulled the old one and saw wire nuts behind the small square hole! After some research, I learned that the nuts COULD come through that small hole with use of needle nose pliers. One of the wire nuts had the edges pinched off (chipped) in the process. Then I learned about ceramic wire nuts, which I'd never previously encountered. Very important if you don't want to melt your nuts! I cut and stripped the end of a disconnect plug to the stove wiring and now I have a plug in place; which, hopefully, I'll never need to use.
Parts Used:

-
Dave from SANTA BARBARA, CA
-
Difficulty Level:A Bit Difficult
-
Total Repair Time:30 - 60 mins
-
Tools:Pliers, Screw drivers
3 of 3 people
found this instruction helpful.
Was this instruction helpful to you?
Thank you for voting!
Oven was not heating
Bought bottom element as suggested. Instruction video seemed straight forward. Not exactly.When I unscrewed the element and gently pulled it out to access the connector, one came out an inch or two, however the left side would not slide out. Tugged a little and it released the connector which jumped back inside the oven. Had to slide the oven out from counter, remove a rear covering plate (2 screws and no problem) and found the new element connectors protruded through the rear of the stove for connection. They were covered by the large rear plate I had removed. Screwed the plate back on and, slid the stove back into position, restored power and all was good. Stove heats properly. Happy.
Parts Used:
-
Jared from NEPTUNE BEACH, FL
-
Difficulty Level:Really Easy
-
Total Repair Time:30 - 60 mins
-
Tools:Screw drivers
3 of 3 people
found this instruction helpful.
Was this instruction helpful to you?
Thank you for voting!
Baking Element cracked and needed to be replaced.
Very easy repair. Turn the power off to the oven, take out two screws and unhook electrical connections. Replace with the new baking element and you are done. Takes only about 10 minutes and the oven works like new.
Parts Used:
-
MARQUEAST from VIRGINIA BEACH, VA
-
Difficulty Level:Really Easy
-
Total Repair Time:Less than 15 mins
-
Tools:Screw drivers
4 of 6 people
found this instruction helpful.
Was this instruction helpful to you?
Thank you for voting!
door seal contaminated by a boil-over, not flexible
From reading other reviews i thought I would have to dis-assemble the door but when I saw the new part I realized I would not have to, simply pop the beveled clips w/pocket knife and pop in the new seal clips. the ends tucked very nicely, an 80+ yr. old would have no trouble if they had their wits.
Parts Used:
-
Rob from Yakima, WA
-
Difficulty Level:Really Easy
-
Total Repair Time:Less than 15 mins
3 of 3 people
found this instruction helpful.
Was this instruction helpful to you?
Thank you for voting!
Old heating element exploded a bit
After watching the instructional video (and flipping the breaker to my range) it was straight forward and simple. The heating element was a little bent so didn’t originally sit square/flat to the bottom of the oven so I uninstalled, bent it gently a little and reinstalled and it set down flat. It still didn’t take 15 minutes.
Parts Used:
-
Carolyn from SEATTLE, WA
-
Difficulty Level:Very Easy
-
Total Repair Time:Less than 15 mins
-
Tools:Screw drivers
3 of 3 people
found this instruction helpful.
Was this instruction helpful to you?
Thank you for voting!
Gasket was worn out.
-
Michael from VALLEJO, CA
-
Difficulty Level:Really Easy
-
Total Repair Time:Less than 15 mins
-
Tools:Pliers
3 of 3 people
found this instruction helpful.
Was this instruction helpful to you?
Thank you for voting!
Plugs in easily
-
Laurie from DEWITT, MI
-
Difficulty Level:Very Easy
-
Total Repair Time:Less than 15 mins
-
Tools:Screw drivers
3 of 3 people
found this instruction helpful.
Was this instruction helpful to you?
Thank you for voting!
Indicator Lens melted and fell back into the control panel
I took the back panel off, removed the old lens, installed the new lens. How easy to order from home, receive the part, do the repair and pay less than it costs to simply drive to the parts house. Cool....
Parts Used:

-
Philip from Houston, TX
-
Difficulty Level:Really Easy
-
Total Repair Time:Less than 15 mins
-
Tools:Screw drivers
3 of 4 people
found this instruction helpful.
Was this instruction helpful to you?
Thank you for voting!
Bake element burned out. Actually it broke in half.
When ordering the replacement part, read the posts on how to replace the bake element. Just follwed their lead. The only difficulty is getting a hold of the wire at the back of the range that the bake element plugs into. There wasen't much play in the wire.
PS Be sure and remove the range door or have very long arms.
PS Be sure and remove the range door or have very long arms.
Parts Used:
-
Vincent from Big Arm, MT
-
Difficulty Level:Easy
-
Total Repair Time:Less than 15 mins
-
Tools:Screw drivers
3 of 4 people
found this instruction helpful.
Was this instruction helpful to you?
Thank you for voting!