




















MER5775QAF Maytag Range - Instructions
Keep searches simple. Use keywords, e.g. "leaking", "pump", "broken" or "fit".
Oven Temperature was 50 degrees low
Took screws out of the back on the side the sensor was on, unplugged it & took out the two screws on the inside of the oven to release the sensor. Put new sensor in place with the two screws & used one of the adapters to plug in the new sensor. Put screws back in the back panel & turned on the oven which unfortunately is still 50 degrees low. Need a new clock with computer which is out of stock & unavailable. I was an electrician for 25 years so didn't experience any problems. It was a cheap thing to try.
Parts Used:

-
Eugene from Clinton, IA
-
Difficulty Level:Really Easy
-
Total Repair Time:15 - 30 mins
-
Tools:Screw drivers
2 of 3 people
found this instruction helpful.
Was this instruction helpful to you?
Thank you for voting!
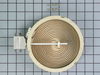
Elements burned wouldn't heat
First I cut electric power off removed the two screws that hold glass top lifted up and removed two screws that hold element in place. I disonnected the wires and then pulled the element out
Parts Used:
-
Jaime from Deltona, FL
-
Difficulty Level:Really Easy
-
Total Repair Time:15 - 30 mins
-
Tools:Nutdriver, Screw drivers
3 of 7 people
found this instruction helpful.
Was this instruction helpful to you?
Thank you for voting!
Oven would not hold temperature, not turn on, and would shut off during use.
Extremely simple repair to make. Move stove away from wall and disconnect power. Remove the oven racks. Remove the rear sheet metal panel covering the wiring harnesses. Caution: Sharp edges and corners on sheet metal.Sensor is located in upper left corner on rear oven wall. Using a long-shafted #2 Philips screwdriver, remove the two Philips head screws and gently pull the sensor 1" away from the oven wall. At this point, it will help to have an assist from someone while you are behind the range. Have the assistant gently tug on the sensor while you watch for wires moving on the rear of the range. After locating the sensor wires, gently disconnect the plastic connector clip. Note: plastic connectors become brittle with age and exposure to heat Move to front of range and gently remove sensor from rear wall by pulling the wiring through the oven wall. Before inserting the new sensor wire through the oven wall, "dry fit" the wiring connectors to see that the new sensor is a correct connection. Make connection, and secure the sensor to the rear oven wall with the two screws. Install racks, reinstall rear sheet metal panel, and connect the power. Set the oven baking temperature to a moderately low temp, 300 - 350 deg. to test the new sensor.
Parts Used:
-
John from Arvada, CO
-
Difficulty Level:Very Easy
-
Total Repair Time:Less than 15 mins
-
Tools:Nutdriver, Screw drivers
1 person
found this instruction helpful.
Was this instruction helpful to you?
Thank you for voting!
No problem installing the sensor
I removed the two mounting screws and pulled the harness through the opening unsnapped the sensor from the harness and installed the new sensor i didn't have to used the adapters the new sensor fitted
Parts Used:
-
tommy from FAYETTEVILLE, NC
-
Difficulty Level:Very Easy
-
Total Repair Time:Less than 15 mins
-
Tools:Screw drivers
1 person
found this instruction helpful.
Was this instruction helpful to you?
Thank you for voting!
My original back leg broke because the floor is uneven. Had to pull it out several times.
Put the back of stove on blocks of wood to get high enough to screw the new leg in.
Parts Used:

-
Phyllis from BROWNVILLE, NY
-
Difficulty Level:Really Easy
-
Total Repair Time:Less than 15 mins
-
Tools:Wrench (Adjustable)
1 person
found this instruction helpful.
Was this instruction helpful to you?
Thank you for voting!
"F3" error message and no oven heat
Unplugged the range, removed screws holding the old sensor. When I pulled it out, the wire connecting to the sensor was completely broken through,therefore I could not just pull the wire to get to the connector. Unscrewed one side of back panel to access the connector. Pushed the connector and wire of the new sensor through the hole ( and behind the insulation), disconnected the old sensor and connected the new one. Re screwed the new connector in place plus rescrewed the back panel. Plugged the range in and - Viola! Everything now works like a charm and I have my oven back. Easy-Peasy. Oh - I am an older female with very limited DYI experience. I just saved myself $650.00!
Parts Used:
-
Pat from PAYSON, AZ
-
Difficulty Level:Very Easy
-
Total Repair Time:15 - 30 mins
-
Tools:Screw drivers
1 person
found this instruction helpful.
Was this instruction helpful to you?
Thank you for voting!
Oven Glass Door Front Shattered
A friend helped me to fix it. First I removed the door from the oven itself. Next, we unscrewed the four screws from the glass holder at the bottom of the door and removed it. Next, we straightened out the glass holder, as it was slightly bent up from the front glass shattering. Next, we slid the glass into the door. Finally, we reinstalled the door to the oven. Voila! It was like brand new again.
Parts Used:

-
Jamin from Inverness, FL
-
Difficulty Level:Easy
-
Total Repair Time:Less than 15 mins
-
Tools:Screw drivers
2 of 4 people
found this instruction helpful.
Was this instruction helpful to you?
Thank you for voting!
oven not heating to set temp. 100 degrees too cold
installed part,turned unit on-temp still cold. reset digital control, up 35 degrees, still cold. un-plugged unit,re-connect after 10 min. still cold.
Parts Used:
-
Robert from Funston, GA
-
Difficulty Level:Really Easy
-
Total Repair Time:Less than 15 mins
-
Tools:Screw drivers
2 of 4 people
found this instruction helpful.
Was this instruction helpful to you?
Thank you for voting!
Oven door was locked, couldn't set oven temps
Got a bent metal coathook to temporarily release the oven door, removed the screws from the old probe, inserted the new one, and hooked it up, using the one of the plug adapters provided. Problem solved! The oven door latch was now disengaged, the oven would now accept temperature inputs, and the rear cooling fan (which wouldn't shut off) now turned off. That's a lot of things working better for less than $50!
Parts Used:
-
William from Nashville, TN
-
Difficulty Level:Easy
-
Total Repair Time:15 - 30 mins
-
Tools:Screw drivers
1 person
found this instruction helpful.
Was this instruction helpful to you?
Thank you for voting!
Replaced the Handle on the Range Door
After the repair I determined that the door did not need to be removed from the stove. The top 3 screws needed to be taken out, the front clase needed to be slid out by pushing it right to left or left to right. Then the bracket that held the inside screw assembly needed to be removed. The new handle needed to be installed and the bracets put back into place. The front glass needed to be reinstalled right to left or left to right. The hardest part of my install was putting door back on the range, the hinges kept popping out of place before setting into the range. The best way to replace the hangle would be to not remove the door from the range.
Parts Used:
-
Nathan from Oak Creek, WI
-
Difficulty Level:A Bit Difficult
-
Total Repair Time:30 - 60 mins
-
Tools:Pliers, Screw drivers
2 of 4 people
found this instruction helpful.
Was this instruction helpful to you?
Thank you for voting!
Coil shorted out.
Removed cooktop, wiring and coil. Marked where wires went on limiter
tabs. Ordered coil 1200 Watt, received a 1500 one. Sent back to PS with prepaid shipping label {great}. New one had a different limiter tab arrangement. The instructions included warned this but doesn't tell you where to put the wiring. Instructions say to remove the old limiter and put it on the new coil but this can not be physically be done plus who would want an old limiter on a new coil.
Found a YOU TUBE video on how to test and place wires on limiter switches which shows the number letter sequence on the ceramic part. Maybe PS will put that info in their instructions. Coil works great !!
tabs. Ordered coil 1200 Watt, received a 1500 one. Sent back to PS with prepaid shipping label {great}. New one had a different limiter tab arrangement. The instructions included warned this but doesn't tell you where to put the wiring. Instructions say to remove the old limiter and put it on the new coil but this can not be physically be done plus who would want an old limiter on a new coil.
Found a YOU TUBE video on how to test and place wires on limiter switches which shows the number letter sequence on the ceramic part. Maybe PS will put that info in their instructions. Coil works great !!
Parts Used:
-
James from HILTON, NY
-
Difficulty Level:A Bit Difficult
-
Total Repair Time:15 - 30 mins
-
Tools:Nutdriver, Pliers
1 person
found this instruction helpful.
Was this instruction helpful to you?
Thank you for voting!
the oven door would not shut all the way, so heat was leaking
The part fit perfectly.Ther repair was logic. The door was of course heavy . I needed an extra hand.
I would have appreciated of instructions were included with the part. Also a web link on how to do it would alos have helped greatly
I would have appreciated of instructions were included with the part. Also a web link on how to do it would alos have helped greatly
Parts Used:
-
mohaemd from pittsburgh, PA
-
Difficulty Level:A Bit Difficult
-
Total Repair Time:15 - 30 mins
-
Tools:Screw drivers
4 of 10 people
found this instruction helpful.
Was this instruction helpful to you?
Thank you for voting!
Oven temperature fluctuates
Replaced the thermostat according to existing videos and had to adjust the thermostat using instuctions in the user manual for model CWE4800ACB.
Parts Used:
-
Larry from SOLON, IA
-
Difficulty Level:Easy
-
Total Repair Time:30 - 60 mins
-
Tools:Screw drivers
1 person
found this instruction helpful.
Was this instruction helpful to you?
Thank you for voting!
broken outer door glass
after i recieved the parts with the glass still laying on the foam pads it was packed in i put some soap on the bottom so the new bracket would slide on easier. i centered the bottom bracket on the bottom of glass and pushed in place. i then picked up glass and slid it up in place on oven door attached the screws on bottom done
Parts Used:
-
judy from springfield, IL
-
Difficulty Level:Easy
-
Total Repair Time:30 - 60 mins
-
Tools:Screw drivers
5 of 13 people
found this instruction helpful.
Was this instruction helpful to you?
Thank you for voting!
Replace old Element
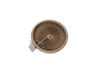
The new element wiring placements were totally different from the old element. Lucky for me the lettering printed on the terminals for each pole was the same as on the old one. It was just a matter of matching up each terminal pole lettering. The instructions that came with the new element were of no help at all. Youtube was my best helper.
Parts Used:
-
Patricia Josephine from N RICHLND HLS, TX
-
Difficulty Level:A Bit Difficult
-
Total Repair Time:30 - 60 mins
-
Tools:Pliers, Screw drivers
1 person
found this instruction helpful.
Was this instruction helpful to you?
Thank you for voting!