




















MEDC300BW0 Maytag Dryer - Instructions
Keep searches simple. Use keywords, e.g. "leaking", "pump", "broken" or "fit".
Push button wouldn't work
Still wouldn't work! Push switch returned to you but have not received a refund yet. The repair was very easy. Tracking # 1Z 2R5 3A2 03 0025 9453 for returned switch.
3
3
Parts Used:
-
Carolyn from STIGLER, OK
-
Difficulty Level:Very Easy
-
Total Repair Time:Less than 15 mins
-
Tools:Pliers, Screw drivers
4 of 4 people
found this instruction helpful.
Was this instruction helpful to you?
Thank you for voting!
Dryer was not heating and sometimes would not start at all
Unplugged dryer
Removed back
Removed knob and screw from front and 2 screws from the timer in the back unplugged one wire at a time and replaced one at a time.
Dryer working great.
Removed back
Removed knob and screw from front and 2 screws from the timer in the back unplugged one wire at a time and replaced one at a time.
Dryer working great.
Parts Used:
-
Cindy from GATES, TN
-
Difficulty Level:Very Easy
-
Total Repair Time:15 - 30 mins
-
Tools:Pliers
4 of 4 people
found this instruction helpful.
Was this instruction helpful to you?
Thank you for voting!
Timer stopped working
-
Gordon from PALATKA, FL
-
Difficulty Level:Very Easy
-
Total Repair Time:15 - 30 mins
-
Tools:Socket set
4 of 4 people
found this instruction helpful.
Was this instruction helpful to you?
Thank you for voting!
Dryer was getting too hot, metallic burning smell
To replace the thermostat and heating element, I followed the video from PartSelect.
Before buying the parts, I had already taken my machine apart to clean it and check for lint build up, but there was only a bit of dust, no major blockages. Because the burning smell was metallic, I just had my fingers crossed that replacing the heating element and thermostat would do the trick. It worked!
There is an odd ceramic sort of smell in the first 5 minutes of using the new element but that went away and all is working well at this point.
My components looked slightly different from those on the video; I had fewer wires so I just took photos of everything before I started to make sure I put it all back in the correct place.
I had to watch another video on how to easily remove the thermostat, mine was stuck. I just used a flat head screw driver behind it like a lever and gently pried it off.
It took me about 30 minutes total only because I had to watch a couple of extra YouTube videos due to the differences of my machine. I don’t usually do repairs like this one and wanted to be completely sure I was doing it correctly, but the work/repair itself was super easy.
The lint trap seal was just because mine got damaged when I took it apart to clean it. I just pulled the old one off, made sure the old adhesive was completely removed, (it peeled off like scotch tape), I cleaned it, then I slowly went around the edge of the vent/housing and stuck the new foam seal down. No video required, just common sense.
Before buying the parts, I had already taken my machine apart to clean it and check for lint build up, but there was only a bit of dust, no major blockages. Because the burning smell was metallic, I just had my fingers crossed that replacing the heating element and thermostat would do the trick. It worked!
There is an odd ceramic sort of smell in the first 5 minutes of using the new element but that went away and all is working well at this point.
My components looked slightly different from those on the video; I had fewer wires so I just took photos of everything before I started to make sure I put it all back in the correct place.
I had to watch another video on how to easily remove the thermostat, mine was stuck. I just used a flat head screw driver behind it like a lever and gently pried it off.
It took me about 30 minutes total only because I had to watch a couple of extra YouTube videos due to the differences of my machine. I don’t usually do repairs like this one and wanted to be completely sure I was doing it correctly, but the work/repair itself was super easy.
The lint trap seal was just because mine got damaged when I took it apart to clean it. I just pulled the old one off, made sure the old adhesive was completely removed, (it peeled off like scotch tape), I cleaned it, then I slowly went around the edge of the vent/housing and stuck the new foam seal down. No video required, just common sense.
Parts Used:

-
Hayley from ALEXANDRIA, LA
-
Difficulty Level:Really Easy
-
Total Repair Time:30 - 60 mins
-
Tools:Screw drivers
4 of 5 people
found this instruction helpful.
Was this instruction helpful to you?
Thank you for voting!
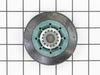
Roller Berings were worn out - replaced both
Watched Video - very helpful in repair Maytag Dryer working like new now Thanks for your guidance in my repair
Parts Used:
-
Gregory from COCOA, FL
-
Difficulty Level:Easy
-
Total Repair Time:30 - 60 mins
-
Tools:Pliers, Screw drivers, Socket set
4 of 5 people
found this instruction helpful.
Was this instruction helpful to you?
Thank you for voting!
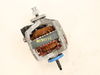
Dryer makes squealing noise, finally the motor seized up.
My dryer started squeaking and I thought it was the drum rollers, so I bought a set. When I attempted the repair and got as far as removing the dryer drum and I decided to spin the shaft on the motor and that was where the squealing was coming from. I put the rollers on and reassembled the dryer. One day later the motor seized up. Ordered a new motor and installed it with no problems. The nut on the back of the motor ended up being a 20mm wrench. Motor cost me $105.56 and the maintenance kit (ps37308) (2 rollers,4 clips, button clip, new idler pulley and belt) cost $32.08. It cost a total of $137.64 in repairs with no labor costs and I accomplished it in under an hour. Minor handyman skills needed or find a friend who is handy. My dryer is 14 years old and now is running like new again. I used the 50% rule, if a repair exceeds 50% of the cost of a new machine, replace it, if the repair can be done for less than 50% of the cost of a new on, fix it.
Parts Used:
-
Anthony from PITTSTON, PA
-
Difficulty Level:Really Easy
-
Total Repair Time:30 - 60 mins
-
Tools:Nutdriver, Screw drivers
4 of 5 people
found this instruction helpful.
Was this instruction helpful to you?
Thank you for voting!
broken handle
1) removed the old broken filter
2) deposited it in nearby wastebasket (with lint attached)
3) used scissors (see above) to remove plastic cover from new lint filter
4) inserted new lint filter
5) marveled at my handiwork!
2) deposited it in nearby wastebasket (with lint attached)
3) used scissors (see above) to remove plastic cover from new lint filter
4) inserted new lint filter
5) marveled at my handiwork!
Parts Used:

-
John from New Bedford, MA
-
Difficulty Level:Really Easy
-
Total Repair Time:Less than 15 mins
4 of 5 people
found this instruction helpful.
Was this instruction helpful to you?
Thank you for voting!
Lint Filter wore out had to be replace
-
Don from Dayton, TX
-
Difficulty Level:Really Easy
-
Total Repair Time:Less than 15 mins
4 of 5 people
found this instruction helpful.
Was this instruction helpful to you?
Thank you for voting!
No Heat
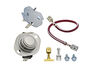
The dryer stopped heating, it would only blow cold air. I removed the back panel and tested the thermal fuse with a dmm. The fuse was open, so it was bad and I needed a new one. I tested the thermostat and the dmm measured continuity across the terminals, so I thought it was good, bad assumption. I ordered a thermal fuse from partsselect and it came with a thermostat. Like a dummy, I only installed the fuse. The 1st time I ran the dryer the fuse blew again, because the thermostat was bad. So, moral of the story, install both parts.
Parts Used:
-
Richard from Eaton, OH
-
Difficulty Level:A Bit Difficult
-
Total Repair Time:15 - 30 mins
-
Tools:Nutdriver, Pliers
4 of 5 people
found this instruction helpful.
Was this instruction helpful to you?
Thank you for voting!
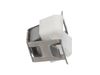
Broken door catch
The original door catch had broken and would no longer stay shut. Ordered the part from this site with ease. Very easy to replace the broken door catch on my Amana dryer. Tool needed was a flat head screwdriver to loosen the cover, remove broken piece and easily replace with new part. Followed the video and it was back to normal operation within minutes.
Parts Used:
-
Christine from Virginia Beach, VA
-
Difficulty Level:Very Easy
-
Total Repair Time:Less than 15 mins
-
Tools:Screw drivers
3 of 3 people
found this instruction helpful.
Was this instruction helpful to you?
Thank you for voting!
Needed a new lint filter
-
Evelyn from JACKSONVILLE, FL
-
Difficulty Level:Very Easy
-
Total Repair Time:Less than 15 mins
3 of 3 people
found this instruction helpful.
Was this instruction helpful to you?
Thank you for voting!
Mother was frozen up
-
Dan from SYRACUSE, UT
-
Difficulty Level:Really Easy
-
Total Repair Time:30 - 60 mins
-
Tools:Nutdriver, Screw drivers, Socket set, Wrench (Adjustable)
3 of 3 people
found this instruction helpful.
Was this instruction helpful to you?
Thank you for voting!
Belt broke
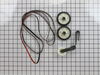
-
Thomas from Okemos, MI
-
Difficulty Level:Very Easy
-
Total Repair Time:30 - 60 mins
-
Tools:Nutdriver, Screw drivers
4 of 6 people
found this instruction helpful.
Was this instruction helpful to you?
Thank you for voting!
Dryer would squeal when the drum was turning
I followed the very informative video and wrote down step-by-step notes for myself. The repair went very smoothly. The only thing I didn't realize, was that the dryer has 4 rollers, not just 2 shown in the video. All are easy to access once you disassemble. I had to do it twice since I had to order 2 more rollers in order to replace them all. Also, the triangle plastic washers come with the roller, so you won't need to order them separately like I did. I also changed the idler pulley roller while I was in there since that has bearings too. Just as easy. I'm very happy with my quiet dryer! One last note: The new rollers are a bit louder than normal at first, but they quiet down very quickly as you use the dryer. It must be because they are brand new.
Parts Used:
-
Clinton from MINOOKA, IL
-
Difficulty Level:Really Easy
-
Total Repair Time:30 - 60 mins
-
Tools:Nutdriver, Pliers, Screw drivers
3 of 3 people
found this instruction helpful.
Was this instruction helpful to you?
Thank you for voting!
dryer making noise. order parts
YOU NEVER SENT ME THE PARTS!!!
I had to drive to a parts store to find them. On January 17, 2024, I tried to call you when the parts did not arrive and your recording said there were no reps available and you hung up. WE CANNOT GET HELP TO CANCEL THIS ORDER. We have been going in circles with PartSelect and shipping. SO, how do I get my refund of the $107.26 for the parts that I never received!!
I had to drive to a parts store to find them. On January 17, 2024, I tried to call you when the parts did not arrive and your recording said there were no reps available and you hung up. WE CANNOT GET HELP TO CANCEL THIS ORDER. We have been going in circles with PartSelect and shipping. SO, how do I get my refund of the $107.26 for the parts that I never received!!
Parts Used:
-
Thomas from TULELAKE, CA
-
Difficulty Level:Very Difficult
-
Total Repair Time:30 - 60 mins
4 of 6 people
found this instruction helpful.
Was this instruction helpful to you?
Thank you for voting!