




















MDG17CSBGW2 Maytag Dryer - Instructions
Keep searches simple. Use keywords, e.g. "leaking", "pump", "broken" or "fit".
No heat, would not light because igniter burnt out
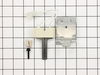
Unplug dryer. Remove the front bottom panel of dryer 2 screws, then unplug wire connector to the old igniter then unscrew one screw holding ignitor then wiggle out. Open new igniter wiggle back in place insert screw tighten, (getting this screw back in is a little hard) replug wire connector to new igniter replace front panel with two screws. Plug in dryer and there you go drying clothes again. Wife all happy again.
Parts Used:
-
anthony from Port Arthur, TX
-
Difficulty Level:A Bit Difficult
-
Total Repair Time:15 - 30 mins
-
Tools:Nutdriver, Screw drivers
6 of 8 people
found this instruction helpful.
Was this instruction helpful to you?
Thank you for voting!
Drum support roller making very loud noise
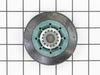
had to take front off of Dryer then was able to replace drum roller
Parts Used:

-
William from TROY, AL
-
Difficulty Level:Really Easy
-
Total Repair Time:1- 2 hours
-
Tools:Screw drivers, Socket set
5 of 5 people
found this instruction helpful.
Was this instruction helpful to you?
Thank you for voting!
Lint filter seal worn out
The part wasn’t for my machine. Unfortunaly I was not able to repair it. I was sent stripe of foam with an adhesive strip on the back. I needed a felt strip.
Parts Used:

-
Dennis from PALM BCH GDNS, FL
-
Difficulty Level:Very Easy
-
Total Repair Time:Less than 15 mins
5 of 5 people
found this instruction helpful.
Was this instruction helpful to you?
Thank you for voting!
Dryer had no heat at all. This is an older gas dryer.
Cleaned out years of fuzz behind lower access panel and noticed where the igniter sits there is a metal tube about 1 inch in diameter. It had rust on the end and was starting to flake away. Found some helpful hints about how to test the igniter. Very easy, just used an ohmeter. Unplugged the 2 pin wire connector and checked for continuity. 1 lead on 1 pin and the other on the other pin., igniter side not the harness side from the dryer. A good igniter should read less than 5 ohms. I don't know the spec. exacttly, but it should not read open or infinite resistance. My meter read an open circuit. Removed the tube and igniter assembly, mine only 2 small bolts. I found the igniter element cracked. Ordered and installed igniter and tube assembly. This was a very easy install. 20 year old dryer works great and it's better than spending $500.00+ on a new one.
Parts Used:

-
todd from MILFORD, PA
-
Difficulty Level:Really Easy
-
Total Repair Time:Less than 15 mins
-
Tools:Wrench set
5 of 5 people
found this instruction helpful.
Was this instruction helpful to you?
Thank you for voting!
Old lint filter was broken

-
Earl from Santa Ana, CA
-
Difficulty Level:Really Easy
-
Total Repair Time:Less than 15 mins
8 of 14 people
found this instruction helpful.
Was this instruction helpful to you?
Thank you for voting!
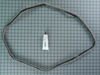
Broken Drum Belt
-
Garry from Garland, TX
-
Difficulty Level:Easy
-
Total Repair Time:15 - 30 mins
-
Tools:Nutdriver, Screw drivers, Socket set
4 of 4 people
found this instruction helpful.
Was this instruction helpful to you?
Thank you for voting!
No heat...
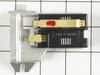
Removed and replaced both the thermostat sensor and the ignitor. Tested thej dryer and it worked. Replaced the front panel and it was good to go.
Parts Used:
-
Charles from Long Beach, CA
-
Difficulty Level:Easy
-
Total Repair Time:30 - 60 mins
-
Tools:Socket set
5 of 7 people
found this instruction helpful.
Was this instruction helpful to you?
Thank you for voting!
My dryer was squeaking with an occasional thump
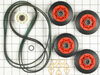
Watched videos on line on how to repair. Replaced all four Drum Rollers, Belt and Idler Pulley, cleaned out inside of unit.
Parts Used:
-
Michael from BOILING SPGS, PA
-
Difficulty Level:Easy
-
Total Repair Time:30 - 60 mins
-
Tools:Nutdriver, Pliers, Wrench set
4 of 4 people
found this instruction helpful.
Was this instruction helpful to you?
Thank you for voting!
Dryer drum turned hard because rollers were worn
Remove top, front and drum. Top is removed by sliding a putty knife under the front corners and pushing the tabs back. Front is held with screws. Disconnect two electrical connectors. Rollers are easily accessible and changed.
Parts Used:
-
Paul from STONE CREEK, OH
-
Difficulty Level:Easy
-
Total Repair Time:30 - 60 mins
-
Tools:Nutdriver, Pliers
4 of 4 people
found this instruction helpful.
Was this instruction helpful to you?
Thank you for voting!
Sqeeking noise fron old worn belt and rollers
Watched instructions, Ordered the kit and repair was fairly easy until the time to line up the cover over the fan wheel. That was difficult part. Would be best to have two people at this point to hold it and align the screw holes. Otherwise its was a fairly easy operation.
Parts Used:
-
Randy from HUNTSVILLE, AL
-
Difficulty Level:A Bit Difficult
-
Total Repair Time:30 - 60 mins
-
Tools:Pliers, Screw drivers, Socket set
4 of 4 people
found this instruction helpful.
Was this instruction helpful to you?
Thank you for voting!
The dryer would not heat up
After opening the bottom access panel, I found a lot of lint build up which is very flammable. I took my leaf blower and cleaned it all out. Then I just followed the instructions that came with the part. But be careful as the igniter is fragile. I broke the first one...
Parts Used:
-
William from Canyon Country, CA
-
Difficulty Level:Really Easy
-
Total Repair Time:15 - 30 mins
-
Tools:Screw drivers, Wrench set
4 of 5 people
found this instruction helpful.
Was this instruction helpful to you?
Thank you for voting!
Roller Berings were worn out - replaced both
Watched Video - very helpful in repair Maytag Dryer working like new now Thanks for your guidance in my repair
Parts Used:
-
Gregory from COCOA, FL
-
Difficulty Level:Easy
-
Total Repair Time:30 - 60 mins
-
Tools:Pliers, Screw drivers, Socket set
4 of 5 people
found this instruction helpful.
Was this instruction helpful to you?
Thank you for voting!
Old. Original heat seal was deteriorated and peeling off. Streaks were getting on the clothes.
Removed the front panel, removed the tub and removed the old seal. Tub seal area was scraped, sanded and wiped with acetone to ensure a clean. Bonding surface. Applied adhesive with and acid brush to get a consistent adhesive layer without getting too much in any one place. Seal was a bit smaller than the tub circumference so it had to be stretch to fit. While the adhesive was curing , I took the time to clean the contact surfaces and vacuum the lint from inside the cabinet. Reinstalled the tub, drive belt and front panel.
Parts Used:
-
Lawrence from ARITON, AL
-
Difficulty Level:A Bit Difficult
-
Total Repair Time:More than 2 hours
-
Tools:Screw drivers, Socket set
3 of 3 people
found this instruction helpful.
Was this instruction helpful to you?
Thank you for voting!
Making a racket.
Took the top off and then front off and drum out . Replaced Drum roller and shaft support bolts.
Parts Used:
-
Carl from MARION, KY
-
Difficulty Level:Really Easy
-
Total Repair Time:More than 2 hours
-
Tools:Nutdriver, Pliers, Screw drivers, Socket set
3 of 3 people
found this instruction helpful.
Was this instruction helpful to you?
Thank you for voting!
dryer making noise. order parts
YOU NEVER SENT ME THE PARTS!!!
I had to drive to a parts store to find them. On January 17, 2024, I tried to call you when the parts did not arrive and your recording said there were no reps available and you hung up. WE CANNOT GET HELP TO CANCEL THIS ORDER. We have been going in circles with PartSelect and shipping. SO, how do I get my refund of the $107.26 for the parts that I never received!!
I had to drive to a parts store to find them. On January 17, 2024, I tried to call you when the parts did not arrive and your recording said there were no reps available and you hung up. WE CANNOT GET HELP TO CANCEL THIS ORDER. We have been going in circles with PartSelect and shipping. SO, how do I get my refund of the $107.26 for the parts that I never received!!
Parts Used:
-
Thomas from TULELAKE, CA
-
Difficulty Level:Very Difficult
-
Total Repair Time:30 - 60 mins
4 of 6 people
found this instruction helpful.
Was this instruction helpful to you?
Thank you for voting!