




















MB2227PEHB Maytag Refrigerator - Instructions
Keep searches simple. Use keywords, e.g. "leaking", "pump", "broken" or "fit".
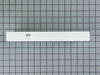
center rail to hold drawers straight was broken
Took drawers out, inserted the rail and put the drawers back in and voila. Fixed.
Parts Used:
-
Georgette from Webster, MA
-
Difficulty Level:Really Easy
-
Total Repair Time:Less than 15 mins
17 of 19 people
found this instruction helpful.
Was this instruction helpful to you?
Thank you for voting!
Water began to leak under the refrigerator. Source looked like it was coming from control valve suppling water to ice maker and water dispenser.
Followed instructions supplied. It was relatively easy and the parts fit exactly right. Sears wanted twice as much for the part and service would have charged me another $100 to come to my home. I saved over $100 doing the project myself.
Parts Used:

-
jesse from hacienda heights, CA
-
Difficulty Level:Really Easy
-
Total Repair Time:30 - 60 mins
-
Tools:Nutdriver, Pliers, Screw drivers
21 of 32 people
found this instruction helpful.
Was this instruction helpful to you?
Thank you for voting!
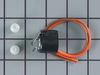
Freezer too cold with frost along the back wall and fridge warm.
Removed the ice maker. Removed the screws holding the back panel in place. Unplugged the fridge, cut the wires for the defrost thermostat and installed the new thermostat with the connectors provided. For anyone with a similar problem, I would recommend getting a multi-tester and testing the Defrost timer, defrost thermostat, and defrost heater all the same time according to the directions on this site. Then order the parts that are bad and be up and running in no time.
Parts Used:
-
Thomas from Marietta, GA
-
Difficulty Level:Easy
-
Total Repair Time:Less than 15 mins
-
Tools:Nutdriver
16 of 19 people
found this instruction helpful.
Was this instruction helpful to you?
Thank you for voting!
Ice stripper broken on ice maker
I unplugged the fridge. Loosened the 2 top screws on the ice maker and removed the lower screw. I disconnected the wiring harness and removed the Ice maker. I removed the plastic timer cover in front. I then loosened the screws on the face of the ice maker and removed the broken ice stripper and replaced it with a new one. Re-tightened the screws on the face, installed the timer cover, plugged in the wiring harness, re-attached the ice maker. Plugged the fridge back in and walla, it was making ice in 30 minutes!
Parts Used:

-
Kenneth from New Braunfels, TX
-
Difficulty Level:Really Easy
-
Total Repair Time:Less than 15 mins
-
Tools:Screw drivers
17 of 24 people
found this instruction helpful.
Was this instruction helpful to you?
Thank you for voting!
Freezer didn't defrost
I removed the back panel. I used my hair dryer to remove the build up ice. Then I removed the old thermostat, spliced the wires to install the new thermostat, and crimped the wires. I saved $150 doing it myself. If you know how to splice and crimp wires, you can do this; even a caveman can do it.
Parts Used:
-
Charlene from Baltimore, MD
-
Difficulty Level:Really Easy
-
Total Repair Time:15 - 30 mins
15 of 19 people
found this instruction helpful.
Was this instruction helpful to you?
Thank you for voting!
light inside fridge was flickering and clicking
tested bulb good ,replaced door switch first(least expensive)then ordered light socket and circuitboard.If clicking sound is heard replace circuitboard first to save on return shipping because the switch and socket where ok
Parts Used:

-
bill from escondido, CA
-
Difficulty Level:Easy
-
Total Repair Time:15 - 30 mins
-
Tools:Nutdriver
20 of 35 people
found this instruction helpful.
Was this instruction helpful to you?
Thank you for voting!
center bar to hold crispers was broken
I was easily able to find the part using the online search. I order the part and it arrived in about two days. Installing the part meant pulling out the two crisper drawers, emptying the shelf above the crispers, removing two glass shelf plates, inserting the new part, replacing the glass plates, replacing the food on the shelf and sliding in the two crisper drawers. All in all, about 3 minutes.
Parts Used:
-
Robert from Evanston, IL
-
Difficulty Level:Really Easy
-
Total Repair Time:Less than 15 mins
13 of 14 people
found this instruction helpful.
Was this instruction helpful to you?
Thank you for voting!
Broken cup water fill on ice maker
I called the local Amana repair man, wanted $150 for a new ice maker because they could not get the part I needed. Found Partsselect.com and the part cost $17 with shipping. They saved me over $100. The repair was very easy too, just removed a couple of screws.
Thanks,
Matt
Thanks,
Matt
Parts Used:

-
Matthew from Aurora, CO
-
Difficulty Level:Easy
-
Total Repair Time:15 - 30 mins
-
Tools:Nutdriver, Screw drivers
13 of 15 people
found this instruction helpful.
Was this instruction helpful to you?
Thank you for voting!
Replace freezer door gasket
Removed door from slide bars with small nutdriver, pulled old gasket out of retaining slot, cleaned slot & area around it, pressed new gasket into place with fingers, relatively easy. Used hair dryer to make sure gasket was formed properly and contacted fridge unit eavenly.
Parts Used:
-
Thaddeus from PHILA, PA
-
Difficulty Level:Easy
-
Total Repair Time:30 - 60 mins
-
Tools:Nutdriver
12 of 13 people
found this instruction helpful.
Was this instruction helpful to you?
Thank you for voting!
didn't shut crisper pan and cracked pan with refrig door

-
Karen from Ontario, NY
-
Difficulty Level:Really Easy
-
Total Repair Time:Less than 15 mins
13 of 16 people
found this instruction helpful.
Was this instruction helpful to you?
Thank you for voting!
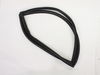
split gasket leading to condensation
This gasket is just friction fit into a molded groove. Easy to pull out and replace.
When I googled looking for how to.. all sites described unscrewing a keeper. None described that this (and maybe others) simply has the push-in design.
When I googled looking for how to.. all sites described unscrewing a keeper. None described that this (and maybe others) simply has the push-in design.
Parts Used:
-
Dan from Freeland, WA
-
Difficulty Level:Easy
-
Total Repair Time:Less than 15 mins
12 of 16 people
found this instruction helpful.
Was this instruction helpful to you?
Thank you for voting!
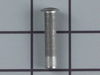
Left front plastic wheel was broken
Pop loose the plastic grate at the bottom.
Locate and remove the wheel leveling screw from the front bottom corner.
Remove cotter pin from the pin that mounts the wheel assembly to the refrigerator. Tap out the mounting pin.
Lift out the wheel assembly.
Remove the Roller pin from the wheel assembly. I used a Dremel tool with a cutting disk. A hack saw will also probably work.
Install the new roller pin and wheel into the wheel assembly. Use a hammer or vice to peen over the end of the roller pin.
Reinstall and adjust wheel assembly.
Locate and remove the wheel leveling screw from the front bottom corner.
Remove cotter pin from the pin that mounts the wheel assembly to the refrigerator. Tap out the mounting pin.
Lift out the wheel assembly.
Remove the Roller pin from the wheel assembly. I used a Dremel tool with a cutting disk. A hack saw will also probably work.
Install the new roller pin and wheel into the wheel assembly. Use a hammer or vice to peen over the end of the roller pin.
Reinstall and adjust wheel assembly.
Parts Used:

-
mike from holly springs, NC
-
Difficulty Level:Really Easy
-
Total Repair Time:30 - 60 mins
-
Tools:Nutdriver, Pliers, Screw drivers
12 of 16 people
found this instruction helpful.
Was this instruction helpful to you?
Thank you for voting!
Light switch in freezer side got broken
Took a putty knife and
Removed the old switch removed the spade terminals from the old switch and replaced them on the new switch and just pushed the new switch back in place
Removed the old switch removed the spade terminals from the old switch and replaced them on the new switch and just pushed the new switch back in place
Parts Used:

-
Doug from PLEASANT VIEW, TN
-
Difficulty Level:Really Easy
-
Total Repair Time:Less than 15 mins
10 of 10 people
found this instruction helpful.
Was this instruction helpful to you?
Thank you for voting!
Defrost not working
There were three parts in question, the defrost timer (inside the casing near the control dial at the top of the refridgerator), the defrost thermostat (behind the back wall of the freezer), and the heater coil (ditto). We tested the defrost timer by opening it up, advancing it to the defrost cycle, and waiting for the compressor to start up again, showing that the timer was working. Then we replaced the defrost thermostat and found that the heater coil worked.
The hardest part was figuring out how to open the casing and get to the timer. If I do it over again I will replace the $20 thermostat first and then deal with the timer if necessary. To get to the thermostat you can easily take the freezer door off by removing two screws in the door tracks. There was even an arrow pointing to one of the screws! Take out the food trays and then unscrew the back wall with a nut driver. The thermostat was clipped to one of the copper freezer tubes. I unplugged one end of the thermostat circuit at the lead to the heater coil and then cut the thermostat out of the circuit and used wire nuts to connect the new thermostat.
The hardest part was figuring out how to open the casing and get to the timer. If I do it over again I will replace the $20 thermostat first and then deal with the timer if necessary. To get to the thermostat you can easily take the freezer door off by removing two screws in the door tracks. There was even an arrow pointing to one of the screws! Take out the food trays and then unscrew the back wall with a nut driver. The thermostat was clipped to one of the copper freezer tubes. I unplugged one end of the thermostat circuit at the lead to the heater coil and then cut the thermostat out of the circuit and used wire nuts to connect the new thermostat.
Parts Used:
-
Glenn from Santa Rosa, CA
-
Difficulty Level:Easy
-
Total Repair Time:30 - 60 mins
-
Tools:Nutdriver, Screw drivers
11 of 15 people
found this instruction helpful.
Was this instruction helpful to you?
Thank you for voting!
Defrost thermostat failed causing ice build up
Once I figured out where the part was located it was quite simple. I thawed out the freezer first. Using a nut driver, I removed all the screws to the back panel of freezer. Squeezed the clips on the ice maker attachment to release the panel. Once I opened the panel the thermostat was visible and accessible. The failed thermostat was obvious by its bulging appearance. By following the instructions found on Partselect.com, I cut the two connecting wires and removed the failed part. I then striped some insulator from the wires to connect the new part. I used electrical tape to ensure connection and insulation as the white wire connectors did not work well (too big) for my application. Closed everything back up, plugged in refer and all was good. A little time and a $20 part saved me $150. Thanks Part Select!
Parts Used:
-
Gwen from Vista, CA
-
Difficulty Level:Really Easy
-
Total Repair Time:15 - 30 mins
-
Tools:Nutdriver
11 of 15 people
found this instruction helpful.
Was this instruction helpful to you?
Thank you for voting!