




















MAH3000AKW Maytag Washer - Instructions
Keep searches simple. Use keywords, e.g. "leaking", "pump", "broken" or "fit".
loud noise during spin cycle
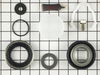
got instructions off internet from others who did same repair; after taking inner basket out, used drift to remove outer bearing; seal was difficult to remove but used drift to force innner bearing into seal and seal popped out. had help reinstalling inner basket into outer basket.
Parts Used:
-
Brian from Louisville, KY
-
Difficulty Level:A Bit Difficult
-
Total Repair Time:More than 2 hours
-
Tools:Nutdriver, Pliers, Screw drivers, Socket set, Wrench set
7 of 12 people
found this instruction helpful.
Was this instruction helpful to you?
Thank you for voting!
seal went out bearings also had to be replaced
Had to remove the tub. Tha bearings had to be removed from the drum. After installing the new bearings(which are available @ O'rReilly's) the seal was't bad
Parts Used:
-
Robin from Wagoner, AL
-
Difficulty Level:A Bit Difficult
-
Total Repair Time:30 - 60 mins
-
Tools:Nutdriver, Screw drivers, Wrench set
8 of 15 people
found this instruction helpful.
Was this instruction helpful to you?
Thank you for voting!
water leaking around washer
First ya have to find the problem that takes time.
Pulled the front off via the four screws, two on the door and two on the opp side. Removed the two top hold down brackets that hold the top on (on the front), popped out the four screws for the detergent and the top hinged up, The hose was right there. Removed the two hose clamps, found the crack ordered if from you guys.(very fast) slapped it in and put a load in.
Pulled the front off via the four screws, two on the door and two on the opp side. Removed the two top hold down brackets that hold the top on (on the front), popped out the four screws for the detergent and the top hinged up, The hose was right there. Removed the two hose clamps, found the crack ordered if from you guys.(very fast) slapped it in and put a load in.
Parts Used:
-
Dennis from Bethel, CT
-
Difficulty Level:Really Easy
-
Total Repair Time:30 - 60 mins
-
Tools:Nutdriver, Screw drivers
5 of 6 people
found this instruction helpful.
Was this instruction helpful to you?
Thank you for voting!
leaking water at the seal between the drum and door assembly
I took the door off, front panel, soap dispenser(to lift the top out of the way)and took off the cross braces on the front of the machine. I pealed the door bellows off and took the drain hose apart; there was much gunk and debris to clean out...maybe something here was clogged? Removed all the snap clips and took the front of the tub off;the tub seal seemed good, but lots of grime/gunk build up.I cleaned all surfaces, put the new tub seal on,and put it all back togther. The hardest part was working the snap clips back on; I worked a few on both sides, top and bottom, and then filled in the rest. The machine has been working fine for a month now, no leaks:)
Parts Used:
-
max from antioch, IL
-
Difficulty Level:Easy
-
Total Repair Time:1- 2 hours
-
Tools:Pliers, Screw drivers, Socket set
7 of 13 people
found this instruction helpful.
Was this instruction helpful to you?
Thank you for voting!
Washer would not pump out water
I removed the pump and found several coins had damaged the prop blade. I ordered a new one and installed it easily. The intake on the new pump was slightly smaller than the original so the original quick clamp produced a leak. A simple manual hose clamp corrected that problem.
Parts Used:
-
Joella from Parkville, MO
-
Difficulty Level:Really Easy
-
Total Repair Time:15 - 30 mins
-
Tools:Screw drivers, Wrench set
4 of 5 people
found this instruction helpful.
Was this instruction helpful to you?
Thank you for voting!
Nickel stuck in the drain pump and broke all the blades off.
Had to replace the whole pump as they did not sell just the propeller. Had to use just the motor and propeller and had to use all the housing from the original pump to bolt in correctly, which fortunately it worked.
Parts Used:
-
Wes from Pensacola, FL
-
Difficulty Level:A Bit Difficult
-
Total Repair Time:15 - 30 mins
-
Tools:Nutdriver, Pliers, Screw drivers
3 of 3 people
found this instruction helpful.
Was this instruction helpful to you?
Thank you for voting!
When ordered it said instructions included which it did not.
Received 2 seals with seal kit and didn't know which seal went where and online it was stated in a video the kit included a "revised" seal but couldn't find anymore information than that. Installed what I thought was the seal to be installed on the inner seal. Did not have any information on the depth of the bearings installation on outer or inner bearing set depth. Tried to call help line but never got through. I think it is installed right? Guess I will wait and see how the drum holds up and hope the bearings and seal are installed correctly.
Parts Used:
-
Merv from RIVERTON, WY
-
Difficulty Level:A Bit Difficult
-
Total Repair Time:More than 2 hours
-
Tools:Nutdriver, Pliers, Screw drivers, Socket set
3 of 3 people
found this instruction helpful.
Was this instruction helpful to you?
Thank you for voting!
Bulb worked for a couple days and has now burned out, filaments dangling
To replace the light bulb, I removed the screw and the cover, unscrewed the old bulb, replaced with the new bulb and replaced the cover, securing it with the small screw. It worked appropriately with normal use for a few days and then I noticed the light was not coming on when I opened the door.
I removed the cover and pulled out the bulb to find that the filaments inside are dangling and burned through. I need them replaced, please.
I removed the cover and pulled out the bulb to find that the filaments inside are dangling and burned through. I need them replaced, please.
Parts Used:

-
Amy from JUNCTION, TX
-
Difficulty Level:Easy
-
Total Repair Time:Less than 15 mins
-
Tools:Screw drivers
3 of 4 people
found this instruction helpful.
Was this instruction helpful to you?
Thank you for voting!
Moldy Bellow seal
Repair went just as video on this website indicated. Reinstalling the cable clamp was the hardest part.
Parts Used:
-
Matthew from STATE COLLEGE, PA
-
Difficulty Level:Easy
-
Total Repair Time:30 - 60 mins
-
Tools:Nutdriver, Pliers, Screw drivers
2 of 2 people
found this instruction helpful.
Was this instruction helpful to you?
Thank you for voting!
Washer leaking water - bellows had a hole in it.
Using the video tape (YouTube URL) provided, I went step by step and replaced the bellows with no problem. No water leaking..the toughest part was putting the spring back on, it takes some coordination and muscle.
Parts Used:
-
Kirk from CHARDON, OH
-
Difficulty Level:Really Easy
-
Total Repair Time:30 - 60 mins
-
Tools:Nutdriver, Pliers, Screw drivers, Wrench (Adjustable)
2 of 2 people
found this instruction helpful.
Was this instruction helpful to you?
Thank you for voting!
Burn smell during spin cycle.
I followed the instruction of using a tie strap to secure belt to drive pulley and turn pulley to place belt on pulley. Worked great. Done in no time.
Parts Used:
-
David from FOLSOM, CA
-
Difficulty Level:Very Easy
-
Total Repair Time:15 - 30 mins
-
Tools:Screw drivers, Wrench (Adjustable)
2 of 2 people
found this instruction helpful.
Was this instruction helpful to you?
Thank you for voting!
Old seal had torn in several places
I followed the steps on the first post which are very good. I had trouble, however, putting the seal over the drum. I finally removed the plastic rim to the drum by removing the clips. I was then able to lay the rim on the floor and put the new seal over it more easily. It is a lot like putting a bicycle tire on a rim. I had no helpers so I used a vice grip pliers on one end of the cable-spring and another pliers on the other. I was then able to pull both ends together enough to get them to hook up. I recommend removing the plastic rim as I mention above. Had I done this first, I would have done the job in less than 30 minutes.
Parts Used:
-
John from Belen, NM
-
Difficulty Level:A Bit Difficult
-
Total Repair Time:30 - 60 mins
-
Tools:Pliers, Screw drivers
2 of 2 people
found this instruction helpful.
Was this instruction helpful to you?
Thank you for voting!
Torn and moldy boot seal
We followed the directions in other people's repair stories here. Removing the spring was a challenge, as was getting it back on! The rest of the repair was simple. Be patient with removing the soap dispenser. Ours had some plastic cords connecting it to the frame which we didn't anticipate, and we broke them because we didn't see them.
We're going to try that new Affresh product in the hopes of avoiding this repair again in the future. We never washed anything harmful in the washer. This seal becomes moldy and deteriorates with time. Using bleach to kill the mold only speeds the process.
We're going to try that new Affresh product in the hopes of avoiding this repair again in the future. We never washed anything harmful in the washer. This seal becomes moldy and deteriorates with time. Using bleach to kill the mold only speeds the process.
Parts Used:
-
Brenda from EL Paso, TX
-
Difficulty Level:A Bit Difficult
-
Total Repair Time:1- 2 hours
-
Tools:Nutdriver, Pliers, Screw drivers, Wrench set
2 of 2 people
found this instruction helpful.
Was this instruction helpful to you?
Thank you for voting!
Loud noise
Beat on spline shaft until I gave up and trashed the washer. Bought new washer.
Parts Used:
-
Robert from NEW WILMNGTN, PA
-
Difficulty Level:Very Difficult
-
Total Repair Time:More than 2 hours
2 of 2 people
found this instruction helpful.
Was this instruction helpful to you?
Thank you for voting!
Tight fit
Working from back of machine, slip old belt off drum pulley. Loosen 1/2" nut to remove drive motor from outer drum assembly. Work motor toward front of machine, while holding carefully, to slip out of old isolators. Remove worn isolators. Replace with new isolators (lip towards front of machine). Re-install motor with the nut/washer all the way up against the stop for the least amount of pressure possible on belt tension..tighten bolt. (Believe me.. when you try to install the belt, it will still seem like the belt is not the right size and way too tight.).. It is, however, the correct belt.
Have a zip-tie ready.
Engage the new belt on the motor shaft pulley. The belt grooves should line up with the motor shaft grooves towards the end of the shaft. Grip the drum pulley and rotate counterclockwise while guiding the belt onto the pulley. At about 12 O'Clock, zip-tie the belt to the pulley.. then rotate ccw until installed.. (about 6 O'Clock). Snip off the zip-tie and your ready to go.
Have a zip-tie ready.
Engage the new belt on the motor shaft pulley. The belt grooves should line up with the motor shaft grooves towards the end of the shaft. Grip the drum pulley and rotate counterclockwise while guiding the belt onto the pulley. At about 12 O'Clock, zip-tie the belt to the pulley.. then rotate ccw until installed.. (about 6 O'Clock). Snip off the zip-tie and your ready to go.
Parts Used:
-
William from SAINT CHARLES, IL
-
Difficulty Level:Easy
-
Total Repair Time:30 - 60 mins
-
Tools:Socket set
2 of 2 people
found this instruction helpful.
Was this instruction helpful to you?
Thank you for voting!