




















MA2120B LG - Instructions
Keep searches simple. Use keywords, e.g. "leaking", "pump", "broken" or "fit".
Motor Burned Out On Turntable
My 8 year old daughter cleaned the inside of the microwave with enough water to rival a tsunami. Resulted in a clean microwave with a fried out motor that no longer revolved. Part came quickly. Took cover and bottom off to get to the part. One screw held it on and a plug. Removed those, put on new part and she was good to go. No trip to home depot today.
Parts Used:

-
Steven from Oak Forest, IL
-
Difficulty Level:Really Easy
-
Total Repair Time:15 - 30 mins
-
Tools:Screw drivers
37 of 49 people
found this instruction helpful.
Was this instruction helpful to you?
Thank you for voting!
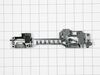
One of the switches in a component that door activates when shut.
I replaced the whole component with all three switches in it even though only one switch was bad . Taking out one switch out of the holder unit would probably have damaged the unit that was holding the switches. Easy install and it works great again .
Parts Used:
-
Jimmy from OZARK, MO
-
Difficulty Level:Easy
-
Total Repair Time:30 - 60 mins
-
Tools:Pliers, Screw drivers
9 of 11 people
found this instruction helpful.
Was this instruction helpful to you?
Thank you for voting!
would not start.
diagnosed defective 'door-shut switch' in the switch holder assembly. rather than replace switch, replaced entire locker holder assembly which made for a very simple and easy repair...not to mention very inexpensive.
Parts Used:
-
James from VIRGINIA BCH, VA
-
Difficulty Level:Really Easy
-
Total Repair Time:30 - 60 mins
-
Tools:Screw drivers
8 of 10 people
found this instruction helpful.
Was this instruction helpful to you?
Thank you for voting!
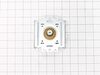
Magnitron failed
Over the stove microwave installed in top cabinet row.
1. Unplug device.
2. Two people to remove from wall/cabinet (remove two, large, top mounting screws and rotate entire microwave down and off the wall mount). Should be some wood spacers between top of device and bottom of cabinet.
3. Remove screws from sheet metal cover.
4. Remove one screw holding blowers in place and rotate out of the way, in order to gain access to 2 of 5 screws that hold the magnetron in place.
5. Unplug magnetron and remove the 5 screws.
6. Drop in new magnetron and re-assemble microwave in reverse order (steps 5-3).
7. Two people restore micro to wall/cabinet. Replace wood spacers, re-install two, large mounting screws (finger-tight). Test device. Secure the two large screws.
1. Unplug device.
2. Two people to remove from wall/cabinet (remove two, large, top mounting screws and rotate entire microwave down and off the wall mount). Should be some wood spacers between top of device and bottom of cabinet.
3. Remove screws from sheet metal cover.
4. Remove one screw holding blowers in place and rotate out of the way, in order to gain access to 2 of 5 screws that hold the magnetron in place.
5. Unplug magnetron and remove the 5 screws.
6. Drop in new magnetron and re-assemble microwave in reverse order (steps 5-3).
7. Two people restore micro to wall/cabinet. Replace wood spacers, re-install two, large mounting screws (finger-tight). Test device. Secure the two large screws.
Parts Used:
-
Joseph from WILTON, NH
-
Difficulty Level:A Bit Difficult
-
Total Repair Time:1- 2 hours
-
Tools:Screw drivers
8 of 13 people
found this instruction helpful.
Was this instruction helpful to you?
Thank you for voting!
Microwave not heating, everything else works
Not knowing which of the switches to replace I ordered all three in the assembly. Replacing the full assembly was easy, first unplug the microwave. Then remove the top cover to access the screws that hold the control panel in place and let the control panel hang. There are two screws that hold the assembly in place - remove those. I used needle nose pliers to pull the wires off of the switches and immediately put the wires on to the new assembly so there was no confusion on what wire went where. Place the assembly back in position, replace the two screws to hold it in, put control panel in place and secure screws. Replace top cover and plug in.
Parts Used:
-
Barbara from Philadelphia, PA
-
Difficulty Level:Really Easy
-
Total Repair Time:15 - 30 mins
-
Tools:Screw drivers
5 of 5 people
found this instruction helpful.
Was this instruction helpful to you?
Thank you for voting!
Arcing had caused burned turntable and melted connection to sec. motor.
Note: also had to replace turntable. Removed top cover using secure driver set. Placed microwave on it's front, using a soft towel. Removed edge screws from bottom plate (leaving 4 screws in center attached to heavy transformer). Separated bottom plate from body of microwave (leaving transformer wires still attached) exposing Synchronous motor. Removed two screws holding motor and electrical plug. Swapped new motor in its place. Re-attached bottom plate with its screws. Placed microwave onto it normal position. Re-attached top cover with its secure screws. Installed new turntable inside.
Parts Used:
-
John from MOUNTAIN VIEW, CA
-
Difficulty Level:Easy
-
Total Repair Time:15 - 30 mins
-
Tools:Screw drivers
5 of 6 people
found this instruction helpful.
Was this instruction helpful to you?
Thank you for voting!
Turntable stopped turning
Removed micro bottom - 5 screws. One screw on the motor and a clip. Reversed the sequence, turned it on and watched it turn.
Parts Used:
-
Ed from MILLS RIVER, NC
-
Difficulty Level:Very Easy
-
Total Repair Time:15 - 30 mins
-
Tools:Screw drivers
4 of 4 people
found this instruction helpful.
Was this instruction helpful to you?
Thank you for voting!
Door locker snapped off
Unplugged the microwave. I opened the door. I used a butter knife to pop the bezel off the inside of the door. I pushed the locker up and to the left and used the butter knife to pry it loose. Disconnected the locker from the spring, and reversed for the installation.
Parts Used:

-
Dave from FOREST, VA
-
Difficulty Level:Easy
-
Total Repair Time:15 - 30 mins
4 of 4 people
found this instruction helpful.
Was this instruction helpful to you?
Thank you for voting!
Plate stopped rotating - discovered plastic piece that spinner fit into was broken
Remove 2 Philips Head screws on left side of microwave. Remove 3 Philips Head screws from bottom rear of microwave. Remove 4 security screws from back of microwave (holding the cover to frame). These are the security type tips that are like a Torx bit, but need to be hollow in middle to accommodate pin in center of screw. Then back plate of microwave with heavy transformer still attached slides up and away. The wires aren't long enough to allow it to rest flat on the bench, but weight is low so it's easy to hold it upright while removing the motor unit. Separate connector from motor (simple) Remove motor by unscrewing 1 phillips head screw and rotating counter-clockwise a tiny bit. Remove Motor. Reverse steps to re-assemble. Note that there are a series of tabs at the bottom of the back cover that fit into holes in the baseplate of microwave. It can be a little tricky to line them up with the weight of the transformer, but it's not too bad. Once lined up, it drops in nicely and all the various screw holes line up. The microwave is a bad cooker when the plate doesn't spin. This simple and inexpensive fix saved me from having to buy a whole new oven.
Parts Used:
-
Charles from STAMFORD, CT
-
Difficulty Level:Easy
-
Total Repair Time:15 - 30 mins
-
Tools:Screw drivers
5 of 8 people
found this instruction helpful.
Was this instruction helpful to you?
Thank you for voting!
food does not get hot, carousel did not turn, all other indicators worked
Read the troubleshooting section on this site. Figured it was an interlock problem because the food was not getting hot (magentron not turning on) and the carousel was not turning. Did not think both the carousel motor and magnetron failed at same time, thus indicated an interlock problem. The interlock switches are actuated by the door latch. Replaced the assembly locker piece with all three switches (only a $20 dollar part) and microwave was fully operational again. Wife and kids think I am a hero.
Parts Used:
-
John from SEVERN, MD
-
Difficulty Level:Really Easy
-
Total Repair Time:30 - 60 mins
-
Tools:Screw drivers
3 of 3 people
found this instruction helpful.
Was this instruction helpful to you?
Thank you for voting!
Would not heat and made a buzzing or popping sound
Unplug the microwave. Remove the Philips head and safety Torx head screws along the bottom of the sides and rear of the microwave which hold the black cover on. Lift the cover up at the rear and slide it backwards to disengage the tabs on the front top. Remove the cover. Discharge the capacitor by shorting the terminals to each other and then ground. Do this with a well insulated object and be aware there may be a pop when you do this. Keep hands, etc. on the insulated part of the object (screwdriver handle, etc). There's a lot of stored energy in that capacitor. I'd advise first checking the diode to make sure its not bad. Replace it if it is. The Magnatron is held in with a couple of screws on the top and sides. Unplug the connector and remove the screws. Remove the Magnatron. Installation is the reverse of removal.
Parts Used:
-
Thomas from NEWARK, DE
-
Difficulty Level:Easy
-
Total Repair Time:15 - 30 mins
-
Tools:Screw drivers
4 of 7 people
found this instruction helpful.
Was this instruction helpful to you?
Thank you for voting!
No rotation on the glass plate
Turned the microwave on its side. (Recommend turning it on its top. i had to fish the wire connection back to the center after it dropped away from the motor.) There is a spot under the rotation motor where an access port was stamped in the tin but not cut out. Used the small side cutter to complete the cut where tin had been left between holes. I unplugged the wires, removed the old motor by removing one screw, and installed the new one by reusing the same screw. The motor must have a reduction gear inside the case. The motor coil tested good, about 128 ohms, but it acted like there was a stripped gear inside. I wasn't interested enough to try to open the motor and confirm.
Had to go to the garage and get a small sheet metal screw to close the new trap door.
The "new" motor had scratches on it, made me wonder if it was really new, but it works fine and will probably outlast me.
Had to go to the garage and get a small sheet metal screw to close the new trap door.
The "new" motor had scratches on it, made me wonder if it was really new, but it works fine and will probably outlast me.
Parts Used:
-
Mark from DES MOINES, IA
-
Difficulty Level:Very Easy
-
Total Repair Time:Less than 15 mins
-
Tools:Screw drivers
2 of 2 people
found this instruction helpful.
Was this instruction helpful to you?
Thank you for voting!
Micro Wave no heat all else fine. Also at times door would not shut properly.
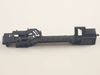
Replace (after testing w/ohm meter) diode and locker holder. My door often would not close properly. Microwave let know by saying not shut properly. When disassembled found the top screw mount was hollowed out resulting in it moving on occasion when you close door. First remove casing (special safety torx head) needed for rear screws. Onc e removed all parts available to view or work on. Diode is on the capacitor so caution is needed when removing. Serious shock hazard if touched. Use insulated pliers to remove from capacitor and a phillips on the ground. Test with ohm meter Should have resistance on way and non the opposite. Replaced mine bad. Next the holder 2 phillips screws and its yours. Unplug each switch and remove. Take note to what wires go to what switch and what switch mounts where. Mine had 3 switches. Removed from old holder and put in new. Screwed holder back in place and left scrws loose till re wired. Once wired set the holder by lightly tighting the screws. Try the door till it seats properly ensuring that all 3 switches are working properly. If so thighten screws. If all seems to work as advertised, safely plug in and test unit if heats up un plug and put cover back on micro. Your all set. Happy heating.
Parts Used:
-
Roy from MILLINGTON, TN
-
Difficulty Level:Really Easy
-
Total Repair Time:1- 2 hours
-
Tools:Pliers, Screw drivers
2 of 2 people
found this instruction helpful.
Was this instruction helpful to you?
Thank you for voting!
blew fuse
tested cap. with ohm meter which showed a short. A new HV cap., a fuse and it is working fine again.
Parts Used:

-
larry from LUCERNE, CA
-
Difficulty Level:Really Easy
-
Total Repair Time:30 - 60 mins
-
Tools:Pliers, Screw drivers
2 of 4 people
found this instruction helpful.
Was this instruction helpful to you?
Thank you for voting!
Unit would not heat
Used a Motor cycle Jack to remove both unites combined. Removed side panels exposing internal working parts. Removed nonworking Magnetron and replaced it with new Magnetron. The process was completed in about 1 hour.
Parts Used:
-
william from LA VERNE, CA
-
Difficulty Level:Easy
-
Total Repair Time:30 - 60 mins
-
Tools:Pliers, Socket set, Wrench (Adjustable)
1 person
found this instruction helpful.
Was this instruction helpful to you?
Thank you for voting!