




















LSWF388HVS (ASSEEUS) LG Washer - Instructions
Keep searches simple. Use keywords, e.g. "leaking", "pump", "broken" or "fit".
water & soap leaked into / on the tub bearings causing Bearing failure

-
Michael from SUGAR GROVE, OH
-
Difficulty Level:A Bit Difficult
-
Total Repair Time:More than 2 hours
-
Tools:Nutdriver, Pliers, Screw drivers, Socket set
1 person
found this instruction helpful.
Was this instruction helpful to you?
Thank you for voting!
Drain water was not being fully pumped out, leaving foul water in the tub and wet clothes smelling like sewage.
I removed the top of the washer, pried the front control panel off (pull a couple of electrical connecters or just rest it on something), separated the tub sleeve from the front panel and then removed the front panel (two screws). To remove the pump - just remove a couple of hoses, two wires and slide it out of the clip below. Reverse the process to install. A little daunting if you haven't done something like this before, but easily do-able once you get past your fears. A service call would cost much more than the $60.00 it took to get the part to my front door. This worked out really great - my wash smells fresh once again and my wife has moved on to the next project on her honey-do list!
Parts Used:
-
Myles from Kingston, NH
-
Difficulty Level:Easy
-
Total Repair Time:1- 2 hours
-
Tools:Pliers, Screw drivers
1 person
found this instruction helpful.
Was this instruction helpful to you?
Thank you for voting!
My front load washer was making a loud roaring sound while spinning out the water
The repair went good but time consuming. I replaced both inner and outer tub bearings along with the tub seal. I removed top by removing two screws in back then pulling back slighty then lifting up. I removed soap tray by pressing down tab and pulling out. Loosened soap dispenser and folded back on top. I removed control panel then front door panel. Remove back panel. Remove motor and shocks and hanging springs which there are two. Disconnect the hoses attached to tub then pull the tub. Remove screws holding the tub halves together. Use punch to remove bearings. NOTE: If you put the bearings in the freezer prior to installing, they go in much easier. I used the old bearing, set it on the new bearing then I tapped the old bearing so not to damage new bearings. I replaced the seal then put everything back together. Not difficult but time consuming.
Parts Used:

-
Thomas from GREEN BAY, WI
-
Difficulty Level:A Bit Difficult
-
Total Repair Time:More than 2 hours
-
Tools:Pliers, Screw drivers, Socket set
1 person
found this instruction helpful.
Was this instruction helpful to you?
Thank you for voting!
Water was coming into washer tub over night.
Turn water off. Unhook cold water hose. Take screws out of top back plastic brackets holding top cover of washer. Top slides back with hand force and then left off. Inlet valve is located on top. Unhook hoses and a couple of screws and lift assembly out. Take pictures before removing wiring(each plug is color coded)and as you take hose off then put the hose on new assembly at the each time you take one off.
Parts Used:

-
Kenneth from JEFFERSON CTY, TN
-
Difficulty Level:Very Easy
-
Total Repair Time:30 - 60 mins
-
Tools:Pliers, Screw drivers
1 person
found this instruction helpful.
Was this instruction helpful to you?
Thank you for voting!
The tub-to-pump hose was leaking.
I tipped the right side of the washer up 9.5 inches using two 2x4s and I was able to remove and replace the old hose with the tools described.
Parts Used:
-
James from Castle Rock, CO
-
Difficulty Level:Really Easy
-
Total Repair Time:30 - 60 mins
-
Tools:Screw drivers, Socket set
1 person
found this instruction helpful.
Was this instruction helpful to you?
Thank you for voting!
Hot water inlet had leak, kept filling washer, when offw
-
Rudy from SAN DIEGO, CA
-
Difficulty Level:Really Easy
-
Total Repair Time:30 - 60 mins
1 person
found this instruction helpful.
Was this instruction helpful to you?
Thank you for voting!
Washer would not start, but if you disconnect it and plugged it in it started without pushing start button
It was easy to remove the rubber gasket to get at the door lock. Removing the door lock and replacing was simple enough, but getting the metal ring securing the gasket was cumbersome and challenging. This took most of the time.
However, after replacing the door lock it was obvious that this was not the problem. I had to remove the new part and replace the old one.
For future, it was the pob circuit board that was defective and had to replace it. Apparently this is not an uncommon problem as there are a number of UTube videos about this.This job was more involved and took me over an hour and resolved the issue.
However, after replacing the door lock it was obvious that this was not the problem. I had to remove the new part and replace the old one.
For future, it was the pob circuit board that was defective and had to replace it. Apparently this is not an uncommon problem as there are a number of UTube videos about this.This job was more involved and took me over an hour and resolved the issue.
Parts Used:
-
DENNIS from EAST MEADOW, NY
-
Difficulty Level:Easy
-
Total Repair Time:30 - 60 mins
-
Tools:Pliers, Screw drivers
1 person
found this instruction helpful.
Was this instruction helpful to you?
Thank you for voting!
Washer would not drain.
I followed the video and it was quite simple. There was an extra sheet metal screw at the bottom of the front panel which kept it from coming free of the three tabs. On the two pump wite connectors I made a mental note that the black wires were on top. The repair also fixed the lack of water flow through the degeterent dispenser. I was afraid of putting the tub seal back in place as a pro struggled with it when it was new and under warranty. It really was no problem at all. Take some phone pics along the way boosted my confidence.
Parts Used:
-
John from FENTON, MI
-
Difficulty Level:Easy
-
Total Repair Time:30 - 60 mins
-
Tools:Pliers, Screw drivers
1 person
found this instruction helpful.
Was this instruction helpful to you?
Thank you for voting!
Error code DE
Followed instruction from you tube. Removed gasket holder, then gasket by door switch assembly then replaced with new assembly!
I am a 63 woman and found this easy to do, with help from you tube guy.
I am a 63 woman and found this easy to do, with help from you tube guy.
Parts Used:
-
Mark from SOQUEL, CA
-
Difficulty Level:Easy
-
Total Repair Time:30 - 60 mins
-
Tools:Pliers, Screw drivers
1 person
found this instruction helpful.
Was this instruction helpful to you?
Thank you for voting!
Washer was not draining
It was giving me a code got on YouTube it gave the code after that bought a new pump and fix done
Parts Used:
-
ALEX from TULARE, CA
-
Difficulty Level:Very Easy
-
Total Repair Time:15 - 30 mins
-
Tools:Screw drivers, Wrench (Adjustable)
1 person
found this instruction helpful.
Was this instruction helpful to you?
Thank you for voting!
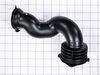
Our washer was leaking from the washer hose. Once taken off I could see it had a small tear in it. All it took was a screwdriver and a couple minutes and we were up and running. I love PartSelect.com for always having the parts I need and getting them to me in a timely manner!
Took off the old hose with a screwdriver and put the new one on. As simple as that. You don’t need a repair man to get this done, you can do it yourself and save money too.
Parts Used:
-
Tiffany from PUYALLUP, WA
-
Difficulty Level:Very Easy
-
Total Repair Time:15 - 30 mins
-
Tools:Screw drivers
1 person
found this instruction helpful.
Was this instruction helpful to you?
Thank you for voting!
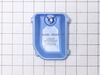
Soap dispenser
-
Robert from GOLD BAR, WA
-
Difficulty Level:Very Easy
-
Total Repair Time:Less than 15 mins
1 person
found this instruction helpful.
Was this instruction helpful to you?
Thank you for voting!
Bought used, realized did not have a detergent dispenser.
Found this part online. I just sets inside, did not click in like the bleach and fabric softener inserts. Think is ok, seems to work
Parts Used:
-
Lynly from Montrose, CO
-
Difficulty Level:Really Easy
-
Total Repair Time:Less than 15 mins
2 of 4 people
found this instruction helpful.
Was this instruction helpful to you?
Thank you for voting!
The hot water inlet valve started to leak.
To fix the problem, I simply removed the top cover of the washing machine by removing the two screws on the back of the machine which allowed me to slide the top back and then I lifted it off. Then I disconnected the hot water hose (after shutting off the valve). Next, I removed the electrical connectors on the old part as well as the hose attached to it and unscrewed the old part and removed it and put the new one on and reattached the hoses and the electrical. It worked like a charm. It took me perhaps 10 minutes total.
Parts Used:
-
Brian from CLEVELAND, TN
-
Difficulty Level:Really Easy
-
Total Repair Time:Less than 15 mins
-
Tools:Pliers, Screw drivers
1 person
found this instruction helpful.
Was this instruction helpful to you?
Thank you for voting!
Washer was making noise when filling with water
Pulled washer out and unplugged. Shut water off and unscrewed hoses. Took screws out of bracket holding top on washer. Slid top back 1 inch and removed. Unhooked electrical harness making a note of position. Squeezed the hose clamps and slid up hoses. Removed hoses and took valve inlet off after removing 2 screws on back of unit. Put new unit on and hooked everything back up and tightened with screws. put water hoses back on. Also replaced hot water inlet at same time. Put top back on and plugged in.
Parts Used:
-
Charlotte from WATFORD CITY, ND
-
Difficulty Level:Really Easy
-
Total Repair Time:15 - 30 mins
-
Tools:Pliers, Screw drivers
1 person
found this instruction helpful.
Was this instruction helpful to you?
Thank you for voting!