


LRE3085ST LG - Overview
Models starting with LRE3085ST
Click on the best match to narrow your results.
Keep searches simple, eg. "belt" or "pump".

Temperature Sensor
PartSelect #: PS11732697
Manufacturer #: EBG61305805
This temperature sensor, also referred to as a thermistor, is a genuine replacement component compatible with various appliance models. It works in coordination with the control board to monitor inter...
$59.35
In Stock


WINDOW,GLASS
PartSelect #: PS16661222
Manufacturer #: 4890W1N009H
This clear inner glass lets you see inside your LG oven while keeping the heat in. If your oven glass is cracked or chipped, replacing it helps restore energy efficiency and safe cooking. It’s made to...
$125.28
In Stock

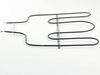
Bake Element
PartSelect #: PS12716127
Manufacturer #: MEE62306405
As an avid home cook, you know the importance of a properly working oven and how crucial the Bake Element is to your range cooker's heating process. That's where this LG Bake Element comes in. Located...
$146.83
In Stock


Range Radiation Heater
PartSelect #: PS7795472
Manufacturer #: MEE62385201
Is your LG range oven stove not heating quite like it used to? The Radiant Surface Element could be just what you need. This genuine LG part is specifically designed to provide heat directly to your r...
$451.97
Special Order

Display Power Control Board
PartSelect #: PS7792509
Manufacturer #: EBR64624906
Are you having trouble with your LG Range? If your settings for temperature and time are acting up, you may need this LG Display Power Control Board. This essential, original OEM part is specifically ...
$99.03
In Stock

HEATER,SHEATH
PartSelect #: PS12582156
Manufacturer #: MEE32902206
This sheathed heater provides controlled heat for appliance operation while protecting internal components. Its protective casing supports durability and consistent heating performance.
$65.95
In Stock


PCB ASSEMBLY
PartSelect #: PS7792813
Manufacturer #: EBR74164801
This printed circuit board assembly manages electronic signals and system communication. It plays a key role in coordinating appliance functions and supporting reliable, responsive performance.
$171.28
In Stock

Common Symptoms of models starting with LRE3085ST
[Viewing 8 of 8]Little to no heat when baking
Fixed by
these parts
these parts


Show All
Element will not heat
Fixed by
these parts
these parts

Show All
Oven not heating evenly
Fixed by
these parts
these parts

Show All
Oven is too hot
Fixed by
these parts
these parts
Show All
Door won’t open after self cleaning cycle
Fixed by
these parts
these parts
Show All
Won’t turn on
Fixed by
these parts
these parts
Show All
Will Not Start
Fixed by
these parts
these parts
Show All
Gas igniter glows, but will not light
Fixed by
these parts
these parts
Show All
Keep searches simple. Use keywords, e.g. "leaking", "pump", "broken" or "fit".
Replace Inner Oven glass because it shattered
Go onto youtube, such as https://www.youtube.com/watch?v=-ITkrwhDNMQ and watch similar videos for DYI. The process is very similar to other models.
Once the door is removed, place oven door on a towel or soft place so it does not scratch the door. Unscrew the screws and make sure you notice where each screw goes, so you know the process of where each screw goes when you re-assemble.
Once the inner cover is removed, remove the insulation, too so you don't damage it. Use Wet/Dry Shop Vac to clean the shattered glass. (WORD OF ADVICE: I did not remove the insulation and the suction of the Shop Vac removed part of the insulation, so now instead of a quick turn around repair turns into a few weeks repair, because the insulation is on back order 10-14 days from the supplier. DON"T MAKE THE SAME MISTAKE!)
Once the glass has been removed, the new inner glass is replaced, begin by re-assemble the oven door with the correct screws and attached the oven door to the range.
Hope this helps
Parts Used:

-
Jeffrey from CERRITOS, CA
-
Difficulty Level:Really Easy
-
Total Repair Time:30 - 60 mins
-
Tools:Screw drivers
18 of 40 people
found this instruction helpful.
Was this instruction helpful to you?
Thank you for voting!
Hammer 1, Glass range top and heating element 0
Dropped a hammer on the range while removing a ceiling light. Viewed a How-To video on Google. Ordered the needed parts. Followed the steps from the How-To video. Reinstall was a bit tricky by myself - could have used an extra set of hands. I have a few words of caution:
1) Put something between the range top and range - like a sheet or drop cloth - to prevent a dropped screw from falling into a crevice in the stove. I dropped a screw and was unable to retrieve it, even with a magnet.
2) Makes sure you remove all bumpers, screws, clips, etc. from the item being replaced and put them on the new item if the new item does not come with replacement bumpers, screws, etc.
Parts Used:
-
Richard from CHESAPEAKE, VA
-
Difficulty Level:Easy
-
Total Repair Time:30 - 60 mins
-
Tools:Screw drivers
22 of 52 people
found this instruction helpful.
Was this instruction helpful to you?
Thank you for voting!
Convection bake fan would not shut off
Looked at schematic to follow circuitry. Checked online for advice. Most online advice suggested replacing thermostat. Thermostat is not in controlling fan circuit!
PCB is only circuit controlling fan on and off. I unplugged fan so as to use rest of range until I received and installed PCB. Works fine now. Note: I have electronics background and can read most circuitry.
PCB is only circuit controlling fan on and off. I unplugged fan so as to use rest of range until I received and installed PCB. Works fine now. Note: I have electronics background and can read most circuitry.
Parts Used:
-
David from SOUTH HAVEN, MI
-
Difficulty Level:Really Easy
-
Total Repair Time:30 - 60 mins
-
Tools:Pliers, Screw drivers
2 of 2 people
found this instruction helpful.
Was this instruction helpful to you?
Thank you for voting!