




















LFX21976ST (04) LG Refrigerator - Instructions
Keep searches simple. Use keywords, e.g. "leaking", "pump", "broken" or "fit".
Front Plate Assembly Not Closing Properly
Found the part on Parts Select. Ordered the part, which came quickly. While waiting for delivery. I watched a short video on how to replace this part. I'm a 73 yr. old female, and no trouble at all. I really felt a sense of accomplishment. Thank you Parts Select.
Parts Used:
-
Brenda from WEATHERFORD, TX
-
Difficulty Level:Very Easy
-
Total Repair Time:Less than 15 mins
-
Tools:Screw drivers
2 of 2 people
found this instruction helpful.
Was this instruction helpful to you?
Thank you for voting!
Replaced hose and it was exactly what I needed.
Replaced old hose and installed the new one. Was very simple with the instructions in your email..... step by step, could not of been any similar.... you guys rock
Parts Used:

-
Donald from CLEBURNE, TX
-
Difficulty Level:Very Easy
-
Total Repair Time:30 - 60 mins
-
Tools:Screw drivers
3 of 5 people
found this instruction helpful.
Was this instruction helpful to you?
Thank you for voting!
Ice maker jamming, freezing up and water in the freezer
Pulled the old gaskets from the doors and then inserted the new gaskets into the slots. The gaskets are easy to remove. Just a firm pull and you're on your way to the repair.
Just make sure the gaskets are seated all the way around the doors. You'll be surprised how nice the doors close with the new gaskets in place.
Just make sure the gaskets are seated all the way around the doors. You'll be surprised how nice the doors close with the new gaskets in place.
Parts Used:
-
Ray from N CHESTERFLD, VA
-
Difficulty Level:Really Easy
-
Total Repair Time:30 - 60 mins
2 of 2 people
found this instruction helpful.
Was this instruction helpful to you?
Thank you for voting!
The hose that feeds the Ice Maker broke,right where it goes in the Fridge.
I actually didn't use what I got. Because there was all kinds of tubing coiled up in the door. We just fed the exsess all the way through the Fridge,and Bingo! It was done.
Parts Used:

-
William from BOWDOINHAM, ME
-
Difficulty Level:Easy
-
Total Repair Time:1- 2 hours
-
Tools:Screw drivers, Socket set
2 of 2 people
found this instruction helpful.
Was this instruction helpful to you?
Thank you for voting!
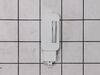
Light switch for refrigerator not functioning
-
shirley from ONALASKA, WI
-
Difficulty Level:Easy
-
Total Repair Time:30 - 60 mins
-
Tools:Screw drivers
2 of 3 people
found this instruction helpful.
Was this instruction helpful to you?
Thank you for voting!
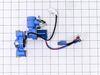
Leaking
Swapped old one with new one. New one had extra plug not needed.
Parts Used:
-
Johnny from MOUNT OLIVE, AL
-
Difficulty Level:Really Easy
-
Total Repair Time:30 - 60 mins
-
Tools:Screw drivers
2 of 3 people
found this instruction helpful.
Was this instruction helpful to you?
Thank you for voting!
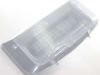
LED’s we’re not working only 2 we’re lit
Remove 2 screws swing light down a little bit and pull it to front unplug wires . The hard part of job was finding new replacement light, Partselect.com was only sight I could find that had new replacement number and had the light . Other sites including LG site would only tell me the part number on old lights was discontinued 2 of sites said try used appliance dealers
Parts Used:
-
Alan from MADISON, ME
-
Difficulty Level:Very Easy
-
Total Repair Time:Less than 15 mins
-
Tools:Screw drivers
2 of 3 people
found this instruction helpful.
Was this instruction helpful to you?
Thank you for voting!
Torn door gasket
Pulled old gasket off by hand. New gasket was easy to install by pushing it into molded cutout in refrigerator door.
Very satisfying to have no glitches in the seamless installation.
Very satisfying to have no glitches in the seamless installation.
Parts Used:
-
Tom from BLUFFTON, SC
-
Difficulty Level:Easy
-
Total Repair Time:15 - 30 mins
2 of 3 people
found this instruction helpful.
Was this instruction helpful to you?
Thank you for voting!
Spring broke on Mullion
Watched the video. Took the screws out, unplugged the connection and slid mullion off. Then plugged the new one in, slid it on and attached the two screws.
Parts Used:
-
Michael from MONTGOMERY, AL
-
Difficulty Level:Very Easy
-
Total Repair Time:Less than 15 mins
-
Tools:Screw drivers
2 of 3 people
found this instruction helpful.
Was this instruction helpful to you?
Thank you for voting!
Door light switch, 3rd one I have replaced in 6 years made in China.
Easy install, small screwdriver under back of old switch push out and pull out with small pliers. unsnap the old plug and install new. YOUR DONE
Parts Used:
-
Charles from CURWENSVILLE, PA
-
Difficulty Level:Really Easy
-
Total Repair Time:Less than 15 mins
-
Tools:Pliers, Screw drivers
1 person
found this instruction helpful.
Was this instruction helpful to you?
Thank you for voting!
Removed old part.
-
Steve from NORTH AURORA, IL
-
Difficulty Level:Very Easy
-
Total Repair Time:Less than 15 mins
-
Tools:Screw drivers
1 person
found this instruction helpful.
Was this instruction helpful to you?
Thank you for voting!
Old part did not seal properly
Read the reviews from other members and just did as they said. Needed a screw driver and the info from past persons review couldn’t have been easier.
Parts Used:
-
Donald from MERRITT IS, FL
-
Difficulty Level:Really Easy
-
Total Repair Time:Less than 15 mins
-
Tools:Screw drivers
1 person
found this instruction helpful.
Was this instruction helpful to you?
Thank you for voting!
The switch became intermittent - Possibly a poor designe
Used a small screw driver inserted into the front of the switch (facing the front) and pried until the switch was coming out. When out, I removed the connect harness and replace the switch with a new one.
Parts Used:
-
Sidney from ENDICOTT, NY
-
Difficulty Level:Very Easy
-
Total Repair Time:Less than 15 mins
-
Tools:Screw drivers
1 person
found this instruction helpful.
Was this instruction helpful to you?
Thank you for voting!
door slight switch failed
Covered the sidewall with tape to protect. Pried the switch out with knife blade and removed electric plug with needle nose pliers. placed plug in new switch and pushed switch into the hole in the side wall. Took about five minutes.
Parts Used:
-
Greg from CASA GRANDE, AZ
-
Difficulty Level:Really Easy
-
Total Repair Time:Less than 15 mins
-
Tools:Pliers
1 person
found this instruction helpful.
Was this instruction helpful to you?
Thank you for voting!
Replace switch
Read previous tips
Taped off area around switch to protect surface
Used putty knife to extract switch
Used screwdriver to separate connector from switch
Plugged in connector
Pushed switch assembly into opening
Removed tape
Taped off area around switch to protect surface
Used putty knife to extract switch
Used screwdriver to separate connector from switch
Plugged in connector
Pushed switch assembly into opening
Removed tape
Parts Used:
-
Dean from HILLSDALE, MI
-
Difficulty Level:Really Easy
-
Total Repair Time:Less than 15 mins
-
Tools:Screw drivers
1 person
found this instruction helpful.
Was this instruction helpful to you?
Thank you for voting!