




















KUIS15NRHT9 KitchenAid Ice Maker - Instructions
Keep searches simple. Use keywords, e.g. "leaking", "pump", "broken" or "fit".
refrigerator not cold. and keeps striping the circuit breaker and shutting off other appliances using the same circuit.
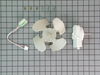
what I discovered is the condenser fan is still operating but not strong another word insufficient cooling for the condenser. therefore, it's getting too hot and shutting off and stripped the circuit breaker. After installing the new condenser fan, it gets back in business. it's quite simple. Just unplug the unit off, uncover the bottom back cover and there you see compressor, condenser fan and other good stuff. there you unscrew the nut in front of the condenser fan and remove the fan, then it expose the two screws that holding the fan motor, remove these screws and take out the motor. and just install the new fan motor kit in and there you have it. plug it back to the wall and there it goes
Parts Used:
-
kevin from Antelope, CA
-
Difficulty Level:Really Easy
-
Total Repair Time:15 - 30 mins
-
Tools:Pliers, Socket set
Was this instruction helpful to you?
Thank you for voting!
Very noisy when condensor fan came on
I've tried ordering the part from Sears and they told me it will take about 7 days for the part to arrive, some other place said it will overnite for extra money. So I've ordered the part from Part Select at a good price and prompt delivery. once the part arrive installing the part so so easy cause it had easy to follow instructions.
Parts Used:
-
manuel from wilmington, DE
-
Difficulty Level:Really Easy
-
Total Repair Time:15 - 30 mins
-
Tools:Nutdriver, Screw drivers
Was this instruction helpful to you?
Thank you for voting!
condenser fan motor making alot of noise, possibly going out.
A bit of a tight squeeze for my hands, but very basic as I followed the instructions and watched the installation video. I only had the fridge unplugged for about 20 min..The fridge is as quiet, as it was brand new. The only tool I needed was the 1/4 inch socket wrench. A portable lantern was very helpful as well. Runs very quiet now, like new! Thx!!!
Parts Used:
-
rex from folsom, CA
-
Difficulty Level:Easy
-
Total Repair Time:15 - 30 mins
-
Tools:Socket set
Was this instruction helpful to you?
Thank you for voting!
Compressor fan and motor was load,barring was wobbling .
-
William from Fox lake, IL
-
Difficulty Level:Easy
-
Total Repair Time:15 - 30 mins
-
Tools:Nutdriver, Pliers, Socket set
Was this instruction helpful to you?
Thank you for voting!
Loud condenser fan
Pretty much followed the how to video. Biggest pain was removing the screws to the bracket that houses the motor.
Parts Used:
-
Mike from Lake tapps, WA
-
Difficulty Level:Easy
-
Total Repair Time:15 - 30 mins
-
Tools:Screw drivers, Socket set
Was this instruction helpful to you?
Thank you for voting!
Loud fan motor
Removed lower plate on back of refridgerator and changed out fan. The video was great and made the repair a snap. Fan is quiet and no more overheating refridgerator.
Parts Used:
-
Brian from Saint Augustine, FL
-
Difficulty Level:Easy
-
Total Repair Time:15 - 30 mins
-
Tools:Nutdriver
Was this instruction helpful to you?
Thank you for voting!
fan motor
I watched the film on installing and taking out. Step by step. easy.
Parts Used:
-
James from Kennett, MO
-
Difficulty Level:Really Easy
-
Total Repair Time:15 - 30 mins
-
Tools:Nutdriver, Socket set
Was this instruction helpful to you?
Thank you for voting!
Recent move and movers broke the light switch on refrigerator side.
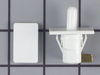
Unplugged the refrigerator then removed two vertical screws on the very back back of the control panel (the ones with the washers). Do not remove the four other vertical screws in the panel. The front plastic plate on control panel snaps off and there are two horizontal screws under the plate. Remove them and the control panel will drop down allowing access to the light switch. Unplug the two wires (one black and one white) from the old switch. Discard the old switch, snap the new one into place and reconnect the two wires. Snap the front plastic plate back into place, plug in the refrigerator and you are done! Problem solved with a new $16.00 switch and saved at least $75.00 or more from an appliance repair call. Thanks Part Select!
Parts Used:
-
Carl from Warsaw, MO
-
Difficulty Level:Easy
-
Total Repair Time:15 - 30 mins
-
Tools:Screw drivers
Was this instruction helpful to you?
Thank you for voting!
Wire in ice cutter assembly had broken
Removed old assembly by disconnecting 2 wiring harness connections and loosening 2 screws with nutdriver. Installed new assembly using same process. Had ice in about an hour. Very easy.
Parts Used:

-
Paul from Metairie, LA
-
Difficulty Level:Really Easy
-
Total Repair Time:15 - 30 mins
-
Tools:Nutdriver
Was this instruction helpful to you?
Thank you for voting!
No water running across the evaporate plate
Since no ice was forming on the evaporator plate, I first checked to see if I was getting water. Water to reservoir was fine, but it was not moving from the reservoir. Pretty logical that something was wrong with the pump. I pulled pump out. It was locked up, with a significant amount of calcium buildup. Replaced it and all works fine. Great ice again.
Parts Used:

-
Scott from Las Vegas, NV
-
Difficulty Level:Easy
-
Total Repair Time:15 - 30 mins
-
Tools:Nutdriver, Pliers
Was this instruction helpful to you?
Thank you for voting!
Inlet water valve restricted with debree.
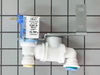
Open appliance door. Removed access plate at lower front (two screws). Removed two screws holding valve in place. Depressed water line retainers and removed water lines from valve. Inserted water lines in replacement valve, remounted valve, reinstalled access plate. Tested operation. (I did install a water filter during the repair to prevent reoccurrence.)
Parts Used:
-
Michael from Clanton, AL
-
Difficulty Level:Really Easy
-
Total Repair Time:15 - 30 mins
-
Tools:Nutdriver
Was this instruction helpful to you?
Thank you for voting!
macnine was producing ice but would not cut into cubes
remove the front cover by removing two screws. then remove two screws with a nut driver on each side. unplug the wireing harness from the top of the unit (may need pliers for this) the pull the unit out. then slide the new unit in, connect the wireing harness, install two side screws, and install the front cover and wham you will have ice in about 30 minutes. thanks parts select. you were very easy to deal with
Parts Used:
-
ALAN from KENNETT, MO
-
Difficulty Level:Really Easy
-
Total Repair Time:15 - 30 mins
-
Tools:Nutdriver, Pliers
Was this instruction helpful to you?
Thank you for voting!
Light switch inoperative
Remove inside door trim plate. Then removed three screws that held in the light assembly. The only difficult thing was reconnecting the temperature adjustment rod. After replacing this rod you must slide the temperature control slide to midway and this hold the rod in place while reinstalling the light assembly. If I were to do it again it would probably take me half as long.
Parts Used:
-
Timothy L from Middlebourne, WV
-
Difficulty Level:Easy
-
Total Repair Time:30 - 60 mins
-
Tools:Nutdriver, Screw drivers
Was this instruction helpful to you?
Thank you for voting!
Water was not circulating onto freezing plate
Simple, remove water reservoir (2 screws). Remove pump cover (1 screw). Remove 2 screws on bracket holding pump and unplug pump. My wiring was somewhat corroded and it took a bit of pulling to unplug. When you replace with new motor make sure to snap in new plug snug or it will not start up. Reassemble and away you go.Making ice no problem.
Parts Used:
-
doug from atlanta, GA
-
Difficulty Level:Easy
-
Total Repair Time:15 - 30 mins
-
Tools:Pliers, Socket set
Was this instruction helpful to you?
Thank you for voting!
non functioning light switch in fridge
This repair was super easy. there are only 5 screws to remove to get at the defective switch. 3 in the housing where the light bulbs are and 2 in the front trim piece where the cooling adjustment dials are. I never did unplug the fridge ,but probably should have although nothing bad happened. I removed all 5 screws using a 1/4" socket ( a nutdriver would work well also). there is also a small dia rod that comes down from the coolness adj. wheel that when you re-assemble goes though the middle of the wheel. The switch has only 2 wires that clip on with the push on flat type connectors. Very simple. I removed the wires and then the switch can be removed( it is only held in by 2 squeezable side clips). I put the new switch in and connected the wires , checked to see that the lights went on and off. which they did. then just put the screws back in.....done. also I would like to say that when I ordered my switch it came super fast. I ordered it online at 11:00am on a tuesday and it was on my doorstep in wisconsin by 10:00 am the next day...Thanks
Parts Used:
-
martin from grafton, WI
-
Difficulty Level:Really Easy
-
Total Repair Time:Less than 15 mins
-
Tools:Socket set
Was this instruction helpful to you?
Thank you for voting!