




















KUIS15NRHT9 KitchenAid Ice Maker - Instructions
Keep searches simple. Use keywords, e.g. "leaking", "pump", "broken" or "fit".
Failed to Run
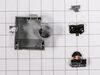
Checked Overload Start Relay With Volt Ohm Meter&Replaced Them Easy And Simple Repair
Parts Used:
-
Lonnie E. from Canton, MO
-
Difficulty Level:Really Easy
-
Total Repair Time:Less than 15 mins
-
Tools:Pliers, Screw drivers
Was this instruction helpful to you?
Thank you for voting!
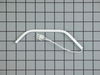
Ice maker would not make Ice.
Took out one strap support with a nut driver, unplugged the device and plugged in the new one. Reinstalled the support strap. Job complete.
Parts Used:
-
Paul from Paige, TX
-
Difficulty Level:Really Easy
-
Total Repair Time:Less than 15 mins
-
Tools:Nutdriver
Was this instruction helpful to you?
Thank you for voting!
Not making cubes
Wires in cutter grid were broken and wouldn't freeze/cut ice. Replaced with the new ice cutter grid that came completely assembled. Put it in with a screwdriver in less than 10 minutes. Ice cubes ready in 45 minutes. Repair guy told me it would be $455 for him to repair it. With shipping, mine was $133 and 10 minutes of my time. Well worth doing it myself.
Parts Used:

-
Missy from Naples, FL
-
Difficulty Level:Really Easy
-
Total Repair Time:Less than 15 mins
-
Tools:Screw drivers
Was this instruction helpful to you?
Thank you for voting!
My undercounter ice machine grid cutter wire broke
I removed the two screws that hold the shield in front of the grid and put them aside allowing access to the grid. I then removed the two screws that hold the grid in place. I unplugged the connector and then pulled it out. I reversed the process to reassemble and powered up the unit. I now have ice again. This whole process probably took me 15-20 minutes to do the install.
Parts Used:
-
Ronnie from Corpus Christi, TX
-
Difficulty Level:Really Easy
-
Total Repair Time:15 - 30 mins
-
Tools:Nutdriver
Was this instruction helpful to you?
Thank you for voting!
Noisy fan motor
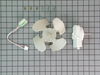
Before I began I unplugged the electrical at the wall outlet. 1. Unscrewed the 4 mounting screws. 2. disconnected electrical at the motor. 3. removed the assembly. 4. mounted the new motor on the assembly as described in the instructions. Installed the assembly and reconnected the electrical. Works great, easy job!
Parts Used:
-
eBooks4u from Wimberley, TX
-
Difficulty Level:Really Easy
-
Total Repair Time:15 - 30 mins
-
Tools:Screw drivers, Wrench (Adjustable)
Was this instruction helpful to you?
Thank you for voting!
Unit very noisy when running sometimes and then get quiet the noise would vary
Remove back panel on unit locate condenser fan and motor remove three small screws holding motor assembly to metal bracket disconnect electrical connection press new fan blade on new motor reverse directions
Parts Used:
-
william from glen gardner, NJ
-
Difficulty Level:Easy
-
Total Repair Time:15 - 30 mins
-
Tools:Socket set, Wrench set
Was this instruction helpful to you?
Thank you for voting!
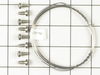
cutting grid wire broke
Bought new wire, strung it end to end and fastened it at each end.
Parts Used:
-
Dean from Anchorage, KY
-
Difficulty Level:Really Easy
-
Total Repair Time:30 - 60 mins
-
Tools:Nutdriver, Socket set
Was this instruction helpful to you?
Thank you for voting!
removing broken cutter grid
The thumbscrews that hold the cutter grid can only be removed by using a needle nose pliers , you cannot turn them by hand. The electrical connections for the grid and level sensor can be removed by pressing the front side of the connector while pulling down. Re-installing the cutter grid is in reverse to the removal, just follow the instructions. But be aware that all wiring remains outside the grid perimeter when reconnecting. One other thing: While you are at it, remove the lower outside panel to expose the evaporator coils which need to be vacuumed. Replacing these parts is tricky. I had to remove the door then loosely install the upper retainer bracket for the lower panel so I could slide the upper edge into that bracket before installing the lower screws. I used an ice pick to line up the holes while using a blade screwdriver to push the panel in its place to install the retaining screws. It took me about a half hour after I figured out what to do.
Parts Used:
-
Juergen from Belle Chasse, LA
-
Difficulty Level:Difficult
-
Total Repair Time:30 - 60 mins
-
Tools:Nutdriver, Pliers, Screw drivers
Was this instruction helpful to you?
Thank you for voting!
Water circulation pump not working
I determined the pump was not working by running the ice maker. After it started a cycle, I could fell the underside of the cold plate to insure it was indeed cold, but no water was flowing.
First, be sure the water pump electrical plug is in., it releases by pressing together the tabs at the ends, not sides.
To replace the pump, turn off the water supply and cover the drain hole at the bottom of the ice bin so you don’t drop parts down it. The screw-plug at the bottom of the water tank or a quarter will do.
Remove the water tank below the pump by taking out the thumbscrews at both ends. You can then see the hose at the bottom of the pump. If it is off, that may be the problem.
To remove the pump, pull the fill hose to the left out of the slot and bend it behind the pump to get it out of the way. Unplug the electrical connector and the pump hose. There are three ¼” hex head screws, teo on the side wall, one in back. The middle one is the hardest to access. I used both a nut driver and a socket wrench with a 4” extension.
When installing the new pump, be sure to plug in the electrical connector, the discharge hose at the bottom and position the fill tube as you found it. Forget any of these and nothing works. Re-install the water tank, replace the drain plug and turn on the water supply, in that order.
First, be sure the water pump electrical plug is in., it releases by pressing together the tabs at the ends, not sides.
To replace the pump, turn off the water supply and cover the drain hole at the bottom of the ice bin so you don’t drop parts down it. The screw-plug at the bottom of the water tank or a quarter will do.
Remove the water tank below the pump by taking out the thumbscrews at both ends. You can then see the hose at the bottom of the pump. If it is off, that may be the problem.
To remove the pump, pull the fill hose to the left out of the slot and bend it behind the pump to get it out of the way. Unplug the electrical connector and the pump hose. There are three ¼” hex head screws, teo on the side wall, one in back. The middle one is the hardest to access. I used both a nut driver and a socket wrench with a 4” extension.
When installing the new pump, be sure to plug in the electrical connector, the discharge hose at the bottom and position the fill tube as you found it. Forget any of these and nothing works. Re-install the water tank, replace the drain plug and turn on the water supply, in that order.
Parts Used:

-
Peter from Groton, CT
-
Difficulty Level:A Bit Difficult
-
Total Repair Time:30 - 60 mins
-
Tools:Nutdriver, Pliers, Screw drivers, Socket set, Wrench set
Was this instruction helpful to you?
Thank you for voting!
After 5 years the pump gave out, but much cheaper to replace than buy new ice maker
1 Turn off ice maker and drain water reseviour (cap at bottom of reseviour) 2. Remove internal ice storage door to give you more working room 3. Remove water resevious (two screws on either side of reseviour) and disconnect plastic tubing in reseviour 4. Remove cover shield at top that covers the ice cutting mechanism (two screws at bottom of cover 3. Remove cover shield covering pump (1 screw) 4. Remove small plastic tubing on side of pump (this part is a little tricky) 5. Remove the three screws holding pump to unit (one at back and two on the side (one in front of pump and one in back of pump) 6. Disconnect power supply to pump 7. Remove pump and replace
Parts Used:
-
Drew from Birmingham, AL
-
Difficulty Level:A Bit Difficult
-
Total Repair Time:30 - 60 mins
-
Tools:Pliers, Socket set
Was this instruction helpful to you?
Thank you for voting!
Refrigerator motor quit
Removed to old motor by removing screws and disconnecting power source and replaced with the new motor and plugged back in power source
Parts Used:
-
Wendi from Lubbock, TX
-
Difficulty Level:Really Easy
-
Total Repair Time:30 - 60 mins
-
Tools:Socket set
Was this instruction helpful to you?
Thank you for voting!
replacing condenser fan motor
Using a 1/4" ratchet removed the old motor, a bit difficult due to small space to get your hand and ratchet in position. Before installing the new motor I used one of the screws to tap the the 3 holes in the new motor so it would be easier to start the screws attaching motor to mounting bracket. Attached cable. plugged in the fridge. Great to hear a quit running refrigerator again.
Parts Used:
-
Norman from Azle, TX
-
Difficulty Level:A Bit Difficult
-
Total Repair Time:30 - 60 mins
-
Tools:Nutdriver, Socket set
Was this instruction helpful to you?
Thank you for voting!
Circulation Pump not working
Follow the instructions already submitted by others. As mentioned be sure to place towel inside to cover the drain. My 3-wire electrical connector also had some corrosion build-up so I had to remove the bracket holding the connecter cut the 3-wires and install a new connector. Not a big deal, you are just working in a small enclosed area. Pulling the entire unit out and either elevating or tilting back helps with the access. Be sure to check drain connection in the back of the unit when putting back in place. Having a headband light helps for entire repair.
Parts Used:
-
John from Cypress, TX
-
Difficulty Level:A Bit Difficult
-
Total Repair Time:1- 2 hours
-
Tools:Nutdriver, Screw drivers, Socket set
Was this instruction helpful to you?
Thank you for voting!
Our ice machine froze up when we were away and burnt out the motor.
We guessed what the problem was and we were extremely fortunate that we guessed correctly. The part was not technically difficult to install just a little awkward to get to. My husband had no trouble although he did take the machine out of it's space and lay it flat on the floor. One benefit of this process was being able to clean some of the areas that are almost impossible to get to when the motor is in place. It was well worth the extra shipping charge to get it before the weekend.
Parts Used:
-
Linda from Safety Harbor, FL
-
Difficulty Level:A Bit Difficult
-
Total Repair Time:1- 2 hours
-
Tools:Screw drivers
Was this instruction helpful to you?
Thank you for voting!
No ice, the cabinet was warm, but most annoying it broke every 6 mos since I got it
I replaced the thermometer first and it started working again. I was convinced that the reason that it continued to break every 6mos was because no one had ever replaced the fan. The difficult part was getting to it. After trying to get in from the front and from the back I finally figured out that I had to take the bottom off and tilt it on its side. I was then able to get out the pin in the condenser and move it to the side. I could then reach the screws that held in the fan. I then decided to put the fan on the motor and when I was tapping it on with a hammer the back cracked. I attempted to fix it by taking apart the old motor and salvaging the parts but that didn't work. I had to buy another $85 part and take the whole thing apart again. It was easier the second time because I knew which screws and pins I had to remove and how to get to them. I very, very carefully tapped the fan onto the motor and now it is working fine. I will let you know if it is still working at Easter. If it is I will have done a better job than the 7or 8 repairmen who have fixed it in the past
Parts Used:
-
Cynthia from Wilmington, DE
-
Difficulty Level:Very Difficult
-
Total Repair Time:1- 2 hours
-
Tools:Nutdriver, Screw drivers, Socket set
Was this instruction helpful to you?
Thank you for voting!