




















KUIS15NNZB0 KitchenAid Ice Maker - Instructions
Keep searches simple. Use keywords, e.g. "leaking", "pump", "broken" or "fit".
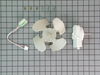
condenser fan motor worn out and making noise.
Instructions were really clear and easy to follow. Hardest part of the job was moving the refrigerator away from wall after it was filled with holiday groceries.
Parts Used:
-
Andrew from Albuquerque, NM
-
Difficulty Level:Really Easy
-
Total Repair Time:Less than 15 mins
-
Tools:Nutdriver
Was this instruction helpful to you?
Thank you for voting!
Light switch broke
Pulled out old switch with needle nose pliers, unplugged old switch and plugged in the new one and snapped back into place. Very easy to repair. Took less than 10 minutes
Parts Used:

-
Joanne from Bourbonnais, IL
-
Difficulty Level:Really Easy
-
Total Repair Time:Less than 15 mins
-
Tools:Pliers
Was this instruction helpful to you?
Thank you for voting!
Condenser Fan was making noise
Having read a few of the user reports like this one gave me the confidence to do this repair. The space was really tight, but one of the write ups suggested removing the frame and then replacing the motor on the frame. That was an excellent suggestion. The only difficulty I had was when I used the motor screws from the old motor to install the new motor. They were slightly longer and didn't tighten down all the way. So the first "test" resulted in still having a noisy fan motor because it was shaking around a bit. But, taking it back out and using the screws that came with the new motor did the trick. The refrigerator is now whisper quiet all the time. I also appreciated the conversion wiring harness in the kit that was simply plug and play for this new motor to my old refrigerator.
Parts Used:
-
Kerry from Franklin, TN
-
Difficulty Level:Easy
-
Total Repair Time:15 - 30 mins
-
Tools:Nutdriver, Socket set
Was this instruction helpful to you?
Thank you for voting!
Loud fan motor
Removed lower plate on back of refridgerator and changed out fan. The video was great and made the repair a snap. Fan is quiet and no more overheating refridgerator.
Parts Used:
-
Brian from Saint Augustine, FL
-
Difficulty Level:Easy
-
Total Repair Time:15 - 30 mins
-
Tools:Nutdriver
Was this instruction helpful to you?
Thank you for voting!
Unit very noisy when running sometimes and then get quiet the noise would vary
Remove back panel on unit locate condenser fan and motor remove three small screws holding motor assembly to metal bracket disconnect electrical connection press new fan blade on new motor reverse directions
Parts Used:
-
william from glen gardner, NJ
-
Difficulty Level:Easy
-
Total Repair Time:15 - 30 mins
-
Tools:Socket set, Wrench set
Was this instruction helpful to you?
Thank you for voting!
loud noise coming from back of fridg.
Unplug A C Cord . Simply unscrewed lower back cardboard cover panel and unscrewed condenser fan motor , removed wiring plug , pulled fan motor out removed fan blade and put it on new motor . then I Reinstalled motor. Noise is gone . EASY INSTALLATION .
Parts Used:
-
William from Fort Mohave, AZ
-
Difficulty Level:Easy
-
Total Repair Time:15 - 30 mins
-
Tools:Nutdriver
Was this instruction helpful to you?
Thank you for voting!
Old fan housing broke
Disconnected power cord, removed rear cover of refrigerator, disconnected pig tail, removed 4 housing screws, took three mount screws out and removed old fan. Reversed steps, plugged in and complete repair done.
Parts Used:
-
Michael from Pinedale, WY
-
Difficulty Level:Easy
-
Total Repair Time:15 - 30 mins
-
Tools:Nutdriver, Socket set
Was this instruction helpful to you?
Thank you for voting!
condenser fan motor making alot of noise, possibly going out.
A bit of a tight squeeze for my hands, but very basic as I followed the instructions and watched the installation video. I only had the fridge unplugged for about 20 min..The fridge is as quiet, as it was brand new. The only tool I needed was the 1/4 inch socket wrench. A portable lantern was very helpful as well. Runs very quiet now, like new! Thx!!!
Parts Used:
-
rex from folsom, CA
-
Difficulty Level:Easy
-
Total Repair Time:15 - 30 mins
-
Tools:Socket set
Was this instruction helpful to you?
Thank you for voting!
Compressor fan and motor was load,barring was wobbling .
-
William from Fox lake, IL
-
Difficulty Level:Easy
-
Total Repair Time:15 - 30 mins
-
Tools:Nutdriver, Pliers, Socket set
Was this instruction helpful to you?
Thank you for voting!
Loud condenser fan
Pretty much followed the how to video. Biggest pain was removing the screws to the bracket that houses the motor.
Parts Used:
-
Mike from Lake tapps, WA
-
Difficulty Level:Easy
-
Total Repair Time:15 - 30 mins
-
Tools:Screw drivers, Socket set
Was this instruction helpful to you?
Thank you for voting!
Light Switch Broke
Super simplet to fix. Popped out broken light switch and unplugged it and replaced with new switch. Received the part one day after ordering it from your company--AWESOME SERVICE AND TURNAROUND TIME!!! Saved at least $100 plus in repair costs/trip charge for something we were able to do. Great experience and would order from your company again. Thank you!
Parts Used:
-
Bonnie from Redwood City, CA
-
Difficulty Level:Really Easy
-
Total Repair Time:Less than 15 mins
-
Tools:Screw drivers
Was this instruction helpful to you?
Thank you for voting!
Wobble in fan made a ticking noise.
Pulled out the Fridge. Removed the plug. Removed the back panel screws with nut driver. Vacuumed the coils & fan area. Disconnected the fan cable. Used a socket and thumb ratchet to remove the 3 mounting screws from its sheet metal bracket. Slid the old fan assembly out. Assembled the new Fan blade onto the new motor shaft and attached the adapter cable to the fan connector. Slid the assembly into place and reattached with 3 screws using socket and thumb ratchet. Connected adapter cable to fridge harness and plugged in the power cord to test the fan. With it working Quietly and knowing the the problem was solved, the back panel was reattached.
Parts Used:
-
Andrew from Fairport, NY
-
Difficulty Level:Really Easy
-
Total Repair Time:Less than 15 mins
-
Tools:Nutdriver, Socket set
Was this instruction helpful to you?
Thank you for voting!
switch that turns light on in refridge broke
-
Edgar from Kokomo, IN
-
Difficulty Level:Easy
-
Total Repair Time:Less than 15 mins
-
Tools:Screw drivers
Was this instruction helpful to you?
Thank you for voting!
While closing the door, I somehow cracked off the light switch button.
Popped out the old one......plugged in the new one and popped it back into place. My wife was happy in have light again in the fridge!
Parts Used:
-
Bruce from Duluth, GA
-
Difficulty Level:Easy
-
Total Repair Time:Less than 15 mins
-
Tools:Screw drivers
Was this instruction helpful to you?
Thank you for voting!
broken spring in the light switch in refer
Initially thought I could repair switch, but then discovered spring was broken. Ordered the new switch (Parts Select is very efficient - received switch in 3 days). Was encouraged by the posts regarding the switch installation. I had some difficulty removing the old switch. Used a pocket knife to ease the switch out of the hole to reveal the clip/spring. After noting the clip/spring location I used a small flat-blade screwdriver to release the clip. Even though I released the "molded" clip/spring(be sure to note where the spring is on the new switch and release it on the switch it was tight in the hole and had to use pliers to carefully remove the old switch. After removing the old switch, used pliers to gently remove the wire leads. Then install the leads on the new switch. Note the orientation for replacing the switch and gently feed the connecting wires into the hole so they won't kink or prevent the switch from entering the hole. Install the switch noting the clip/spring location and the orientation of the lever that the door closes on to turn off the light. Be sure to put it in without binding at an angle. Thanks to Parts Select for this service! I'll definitely be back.
Parts Used:
-
Peter from Avila Beach, CA
-
Difficulty Level:Easy
-
Total Repair Time:Less than 15 mins
-
Tools:Pliers, Screw drivers
Was this instruction helpful to you?
Thank you for voting!