




















KUIA18PNLS3 KitchenAid Ice Maker - Instructions
Keep searches simple. Use keywords, e.g. "leaking", "pump", "broken" or "fit".
Circulation Pump not working
Follow the instructions already submitted by others. As mentioned be sure to place towel inside to cover the drain. My 3-wire electrical connector also had some corrosion build-up so I had to remove the bracket holding the connecter cut the 3-wires and install a new connector. Not a big deal, you are just working in a small enclosed area. Pulling the entire unit out and either elevating or tilting back helps with the access. Be sure to check drain connection in the back of the unit when putting back in place. Having a headband light helps for entire repair.
Parts Used:

-
John from Cypress, TX
-
Difficulty Level:A Bit Difficult
-
Total Repair Time:1- 2 hours
-
Tools:Nutdriver, Screw drivers, Socket set
Was this instruction helpful to you?
Thank you for voting!
Our ice machine froze up when we were away and burnt out the motor.
We guessed what the problem was and we were extremely fortunate that we guessed correctly. The part was not technically difficult to install just a little awkward to get to. My husband had no trouble although he did take the machine out of it's space and lay it flat on the floor. One benefit of this process was being able to clean some of the areas that are almost impossible to get to when the motor is in place. It was well worth the extra shipping charge to get it before the weekend.
Parts Used:
-
Linda from Safety Harbor, FL
-
Difficulty Level:A Bit Difficult
-
Total Repair Time:1- 2 hours
-
Tools:Screw drivers
Was this instruction helpful to you?
Thank you for voting!
Fan motor making awful noise, not turning very fast
Fan was barely rotating. So unplugged, removed back cover, removed fan and motor from frame work. Removed fan blade from motor shaft. Spun motor shaft which seemed fine. Pryed off back cover of motor to find a large but dry felt washer and a helical capillery slot formed into the motor shaft for carring oil from felt washer to the bearings. Added 30 wt motor oil and some 3in1 oil to felt and reassembled motor, fan and frame work. Plugged in power chord after getting rid of dust and dog hear on coils and is working like new.
Parts Used:
-
Andrew from Mission Viejo, CA
-
Difficulty Level:Easy
-
Total Repair Time:1- 2 hours
-
Tools:Nutdriver, Pliers, Screw drivers
Was this instruction helpful to you?
Thank you for voting!
condenser fan motor quit
Technically, the repair did not require specialized knowledge. However, replacement of the motor required some effort. Because the motor is located at the bottom of the unit in an area with copper tubing & wiring hindering access it was physically difficult to remove and then replace the motor. A problem arose because the shaft on the replacement motor was larger than the original motor's. Thus the fan would not fit on the new motor. Luckily, I found a fan locally that fit the motor. It would be very helpful if a fan was included in the motor kit. The ref. is now running smoothly
Parts Used:
-
Thomas from Rensselaer, NY
-
Difficulty Level:A Bit Difficult
-
Total Repair Time:More than 2 hours
-
Tools:Nutdriver, Socket set
Was this instruction helpful to you?
Thank you for voting!
had to replace Scotsman ice maker pump
didn't go well at first. Got it all hooked up relatively easily but it didn't work. Called customer service who suggested hooking pump up to other power source to be sure it worked. It still didn't work. After closer inspection a connection wasn't hooked up on pump. After connecting got it back in about 30 min. Working like a charm now.
Parts Used:
-
Raylene from Taylorsville, UT
-
Difficulty Level:A Bit Difficult
-
Total Repair Time:More than 2 hours
-
Tools:Screw drivers
Was this instruction helpful to you?
Thank you for voting!
macnine was producing ice but would not cut into cubes
remove the front cover by removing two screws. then remove two screws with a nut driver on each side. unplug the wireing harness from the top of the unit (may need pliers for this) the pull the unit out. then slide the new unit in, connect the wireing harness, install two side screws, and install the front cover and wham you will have ice in about 30 minutes. thanks parts select. you were very easy to deal with
Parts Used:

-
ALAN from KENNETT, MO
-
Difficulty Level:Really Easy
-
Total Repair Time:15 - 30 mins
-
Tools:Nutdriver, Pliers
Was this instruction helpful to you?
Thank you for voting!
our ice maker was not cutting the ice into squares.
I determined it was the cutter grid because there was a broken wire on the existing one. They have to heat up and cut the ice. I ordered it and the part was at my house in 1 day. The cutter grid part was easy to install. The ice maker is working great now.
Parts Used:
-
Scott from Phoenix, AZ
-
Difficulty Level:Easy
-
Total Repair Time:15 - 30 mins
-
Tools:Nutdriver
Was this instruction helpful to you?
Thank you for voting!
Ice maker would not make Ice.
Took out one strap support with a nut driver, unplugged the device and plugged in the new one. Reinstalled the support strap. Job complete.
Parts Used:
-
Paul from Paige, TX
-
Difficulty Level:Really Easy
-
Total Repair Time:Less than 15 mins
-
Tools:Nutdriver
Was this instruction helpful to you?
Thank you for voting!
Water reservoir not filling up...
I undid the bottom screws off the bottom front of the ice machine under the door... Knowing the water valve was at the front it made it super easy to get to and I didn't have to pull the machine out from under the counter etc. Turned off the water supply at the wall, disconnected that line at the valve, removed the line from the valve to the water reservoir. Unscrewed two screws that held it to the machine wall and put the new valve in, reconnected both lines and voila! Done! Running like its never run before. I filled up that reservoir for weeks by hand many times a day so the satisfaction is huge to have saved a fortune by fixing it myself! And I'm female which makes it even more satisfying. A monkey could put this part in. Anything a man can fix, I can fix too! Ha!
Parts Used:
-
Heather from Benbrook, TX
-
Difficulty Level:Really Easy
-
Total Repair Time:Less than 15 mins
-
Tools:Pliers, Screw drivers
Was this instruction helpful to you?
Thank you for voting!
Water reservoir was not filling up all the way.
This causes more than one problem. When the system does not get enough water it makes thin ice. When the ice is thin it does not have the mass to slide down on to the cutting grid and stops about half way down. When the pump starts running again, the water hits the ice sheet that did not make it to the grid and water goes all over the place thus emptying the reservoir then it makes no ice. Water was entering very slowly into the reservoir with very little pressure. Changed the water valve and now pressure is higher and fills the reservoir completely enough to flush the reservoir as it is supposed to do. Works great and makes plenty of ice now. Just take the front bottom cover off by the 4 screws holding it on and look to the left and you will see the water valve. Get the vacuum cleaner and clean the condenser coils while you have it open.
Parts Used:
-
Jerry from Denham Springs, LA
-
Difficulty Level:Really Easy
-
Total Repair Time:Less than 15 mins
-
Tools:Nutdriver, Wrench (Adjustable)
Was this instruction helpful to you?
Thank you for voting!
Not making cubes
Wires in cutter grid were broken and wouldn't freeze/cut ice. Replaced with the new ice cutter grid that came completely assembled. Put it in with a screwdriver in less than 10 minutes. Ice cubes ready in 45 minutes. Repair guy told me it would be $455 for him to repair it. With shipping, mine was $133 and 10 minutes of my time. Well worth doing it myself.
Parts Used:
-
Missy from Naples, FL
-
Difficulty Level:Really Easy
-
Total Repair Time:Less than 15 mins
-
Tools:Screw drivers
Was this instruction helpful to you?
Thank you for voting!
ice cutter grid was broken
It was easy to remove the old grid and replace it with a new one.
Parts Used:
-
harold from cleveland, TX
-
Difficulty Level:Really Easy
-
Total Repair Time:Less than 15 mins
-
Tools:Nutdriver
Was this instruction helpful to you?
Thank you for voting!
Failed to Run
Checked Overload Start Relay With Volt Ohm Meter&Replaced Them Easy And Simple Repair
Parts Used:
-
Lonnie E. from Canton, MO
-
Difficulty Level:Really Easy
-
Total Repair Time:Less than 15 mins
-
Tools:Pliers, Screw drivers
Was this instruction helpful to you?
Thank you for voting!
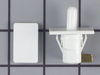
non functioning light switch in fridge
This repair was super easy. there are only 5 screws to remove to get at the defective switch. 3 in the housing where the light bulbs are and 2 in the front trim piece where the cooling adjustment dials are. I never did unplug the fridge ,but probably should have although nothing bad happened. I removed all 5 screws using a 1/4" socket ( a nutdriver would work well also). there is also a small dia rod that comes down from the coolness adj. wheel that when you re-assemble goes though the middle of the wheel. The switch has only 2 wires that clip on with the push on flat type connectors. Very simple. I removed the wires and then the switch can be removed( it is only held in by 2 squeezable side clips). I put the new switch in and connected the wires , checked to see that the lights went on and off. which they did. then just put the screws back in.....done. also I would like to say that when I ordered my switch it came super fast. I ordered it online at 11:00am on a tuesday and it was on my doorstep in wisconsin by 10:00 am the next day...Thanks
Parts Used:
-
martin from grafton, WI
-
Difficulty Level:Really Easy
-
Total Repair Time:Less than 15 mins
-
Tools:Socket set
Was this instruction helpful to you?
Thank you for voting!
Failed cooling fan
The repair was simple. Unplug the refrigerator, unplug the power connector from the fan and remove 3 screws. I removed the fan blade clip with the pliers and cleaned it off. Reversed the process, cleaned all the dust out with my shop vac and all works perfectly now. It took longer to pull the fridge out of it's normal position than to perform the repair. Every day it continues to work is one more day I don't spend $2000 or more on a replacement.
Parts Used:
-
Mike from Waterford, WI
-
Difficulty Level:Easy
-
Total Repair Time:Less than 15 mins
-
Tools:Nutdriver, Pliers
Was this instruction helpful to you?
Thank you for voting!