




















KSM180RBLD0 Whirlpool Mixer - Instructions
Keep searches simple. Use keywords, e.g. "leaking", "pump", "broken" or "fit".
Thumb screw
the plastic covering the thumb screw cracked almost half way and lost the piece....so the new one is being used to replace this old one...very easy to install
Parts Used:

-
Linda from Lynden, WA
-
Difficulty Level:Really Easy
-
Total Repair Time:Less than 15 mins
Was this instruction helpful to you?
Thank you for voting!
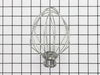
Wire Whip was coming apart
Replaced it with a new part. No installation or repair to maching was necessary
Parts Used:
-
Lois from Albuquerque, NM
-
Difficulty Level:Really Easy
-
Total Repair Time:Less than 15 mins
Was this instruction helpful to you?
Thank you for voting!
Pin fell out of neck
Placed pin in the hole...some wiggling had to be done for a tight fit. Installation complete!
Parts Used:

-
Tiffany from San Antonio, TX
-
Difficulty Level:Really Easy
-
Total Repair Time:Less than 15 mins
Was this instruction helpful to you?
Thank you for voting!
Mixer bowl was slipping off the base when in use
Replacing the base retaining bracket(what KitchenAid calls the screw cap) solved the problem immediately. The entire replacement effort took no more than a minute requiring removing 3 screws, discarding the old base, putting in the new one, and putting the screws back in. PartSelect was very easy to do business with. They shipped the part the day I ordered it and it arrived as scheduled. Can't be easier than that.
Parts Used:

-
Dean from Fairfax, VA
-
Difficulty Level:Really Easy
-
Total Repair Time:Less than 15 mins
-
Tools:Screw drivers
Was this instruction helpful to you?
Thank you for voting!
kitchen aid mixer wouldn't hold the bowl for kneading or mixing cookie dough
Unscrewed 3 Philips screws. Pried out the old screw cap. It had been there for 25 years and had flour, egg, etc. build up over the years. Did use a needle nose plier to lift it out. Put in the new one. Needed a rubber mallet to snug it down. Design has changed slightly over the years. Put the 3 screws back in and as they say in England, "you have an uncle named Bob."
Parts Used:
-
Roland from Newport, OH
-
Difficulty Level:Easy
-
Total Repair Time:15 - 30 mins
-
Tools:Screw drivers
Was this instruction helpful to you?
Thank you for voting!
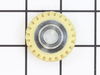
Plastic worm gear stripped
The plastic worm gear was stripped,I took it apart first then cleaned out all the old grease so when the new part came it together like a charm.
Parts Used:
-
Pete from Tracy, MN
-
Difficulty Level:Really Easy
-
Total Repair Time:Less than 15 mins
-
Tools:Screw drivers
Was this instruction helpful to you?
Thank you for voting!
Base lost grip
Put on a new base plate using fresh screws, all ordered on Parts Select in under a minute. Now my grandmas old Kitchen Aid Stand-up mixer is as good as new! This was way easier than I thought it would be and really a great experience!
Parts Used:
-
Miya from Seattle, WA
-
Difficulty Level:Really Easy
-
Total Repair Time:Less than 15 mins
-
Tools:Screw drivers
Was this instruction helpful to you?
Thank you for voting!
Broken Part to KitchenAid Mixer
Great experience. Reasonable cost. Quick delivery. Would certainly use PartSelect again
Parts Used:
-
PJ from Rome, GA
-
Difficulty Level:Really Easy
-
Total Repair Time:Less than 15 mins
Was this instruction helpful to you?
Thank you for voting!
The thumb screw plastic came off
Open the package with the new screw and it looked like the screw was wider. I tried it to see if it goes in and as long as you screw it straight in, there was no problem.
Parts Used:
-
Karen from Salem, IL
-
Difficulty Level:Really Easy
-
Total Repair Time:Less than 15 mins
Was this instruction helpful to you?
Thank you for voting!
Lost a rubber foot on my Kitchen Aid mixer. The remaining feet we're hard and mushroomed. I decided to replace all 5. That was the correct decision.
I griped each foot with a pliers and twisted it out of its setting. I then set a new foot in place and hammered it into place with a small hammer. The feet fit snugly and did not need to be glued. Job was easy and mixer sits like new. I was glad I spent the money to replace all of the feet at once.
Parts Used:

-
Dale from Manheim, PA
-
Difficulty Level:Really Easy
-
Total Repair Time:Less than 15 mins
-
Tools:Pliers
Was this instruction helpful to you?
Thank you for voting!
I had lost the thumb screw
I sent for a new thumb screw and screwed it in where it belongs and now I can use my other attachments.
Parts Used:
-
Jane from Crivitz, WI
-
Difficulty Level:Really Easy
-
Total Repair Time:Less than 15 mins
Was this instruction helpful to you?
Thank you for voting!
wire whip brokrn
-
Lawrence from Craryville, NY
-
Difficulty Level:Really Easy
-
Total Repair Time:Less than 15 mins
Was this instruction helpful to you?
Thank you for voting!
Brush's Wore

-
Gary from Scottsburg, IN
-
Difficulty Level:Really Easy
-
Total Repair Time:Less than 15 mins
-
Tools:Screw drivers
Was this instruction helpful to you?
Thank you for voting!
would not run
-
andrew from bridgeville, PA
-
Difficulty Level:Really Easy
-
Total Repair Time:Less than 15 mins
-
Tools:Screw drivers
Was this instruction helpful to you?
Thank you for voting!
Motor would not turn on
Initially removed carbon brushes then inserted the new carbon brushes. The motor still did not turn on. Then I removed the brushes again, used a flashlight to look in the hole where the carbon brushes are installed. I noticed that there was a square notch on one side of the hole. I then reinstalled the carbon brushes, ensuring that the beveled side of the carbon brush was installed so it lines up with the square notch. This allows the carbon brushes to touch the motor. I turned the unit on and it worked.
Parts Used:
-
Paul from Reno, NV
-
Difficulty Level:Easy
-
Total Repair Time:Less than 15 mins
-
Tools:Screw drivers
Was this instruction helpful to you?
Thank you for voting!