




















KSM150FGER5 KitchenAid Mixer - Instructions
Keep searches simple. Use keywords, e.g. "leaking", "pump", "broken" or "fit".
The mixer started getting weak like a gear was stripped and then quite working all together.
I removed the decorative band that covers the seam by removing 1 screw. I then removed the top portion of mixer by removing 4 square head screws. You will then see the gear housing in the front of the mixer. Remove the 4 screws holding that on. There are no spring that are going to pop out and you never know where they went, but be careful because there is a lot of grease and a gear that it just laying in there on the right side. You will see the stainless shaft with a couple on gear cogs on it. Remove the retaing spring from the shaft and pull the top gear off, it may be a little snug. You will then see the dowel pin, mine was sheared off but I could see where it was. Be sure to remove the broken pieces. Use the punch to knock out the remaining pin. Replace with new pin making sure it is evenly exposed on both side of the shaft. Replace the top gear, then the retaining spring, the the gear housing cover, then the mixer top cover and finally the decorative band. Be sure to unplug before you start. These mixers are expensive and expensive to have someone fix them. I ordered 2 pins because shipping is a little high and the pin is cheap. I fixed this for $17.00 total and have a spare pin.
Parts Used:

-
Lane from Warrior, AL
-
Difficulty Level:Easy
-
Total Repair Time:30 - 60 mins
-
Tools:Nutdriver
3 of 8 people
found this instruction helpful.
Was this instruction helpful to you?
Thank you for voting!
The mixer was given to my wife. Sometimes it would work or not.
When I took the back cover off I found two parts that "could" be the problem. The speed control plate was cracked which explained the spotty working. I ordered both parts and installed them very easily. The parts fit perfectly and resulted in the mixer working perfectly. I can't say enough about the excellent parts. They were perfect.
Parts Used:

-
James from SAINT PAUL, MN
-
Difficulty Level:Very Easy
-
Total Repair Time:15 - 30 mins
-
Tools:Pliers, Screw drivers
1 of 2 people
found this instruction helpful.
Was this instruction helpful to you?
Thank you for voting!
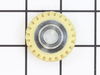
worn gear
-
Robert from Auburn, ME
-
Difficulty Level:Easy
-
Total Repair Time:15 - 30 mins
-
Tools:Screw drivers
2 of 5 people
found this instruction helpful.
Was this instruction helpful to you?
Thank you for voting!
missing thumb screw on my kitchen aide mixer
Dear Customer Service,
I just would like to express my gratitude for your wonderful service. I received my part for my Kitchen aide mixer on time as promised. The part fit perfectly. Thanks you PartSelect for being there.
What a Great Site!
A Happy Customer!
I just would like to express my gratitude for your wonderful service. I received my part for my Kitchen aide mixer on time as promised. The part fit perfectly. Thanks you PartSelect for being there.
What a Great Site!
A Happy Customer!
Parts Used:

-
Mary Ann from Gilbertsville, PA
-
Difficulty Level:Really Easy
-
Total Repair Time:Less than 15 mins
2 of 6 people
found this instruction helpful.
Was this instruction helpful to you?
Thank you for voting!
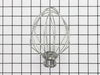
Broken whip, no local availability
No nstallation required, simply attach.
Your website was the only one that made sense. I am blind and follow the instructions with a screen reader. I had no difficulty. It was much easier than this questionaire.
Your website was the only one that made sense. I am blind and follow the instructions with a screen reader. I had no difficulty. It was much easier than this questionaire.
Parts Used:
-
Carl from Austin, TX
-
Difficulty Level:Really Easy
-
Total Repair Time:Less than 15 mins
1 of 3 people
found this instruction helpful.
Was this instruction helpful to you?
Thank you for voting!
thumb screw broke
-
Ethel from Crystal River, FL
-
Difficulty Level:Really Easy
-
Total Repair Time:Less than 15 mins
0 of 1 people
found this instruction helpful.
Was this instruction helpful to you?
Thank you for voting!
Replacement of digital window in oven unit
I did not do the repair myself, however, I contacted a suggested service company which in turn was a company I had used before when I had problems with my JenAir microwave. Excellent service, prompt and very professional. Thank you JenAir for your assistance in providing promptly the parts needed to complete this job.
Parts Used:
-
Bedalia from Rialto, CA
-
Difficulty Level:Really Easy
-
Total Repair Time:30 - 60 mins
-
Tools:Screw drivers, Wrench (Adjustable)
0 of 1 people
found this instruction helpful.
Was this instruction helpful to you?
Thank you for voting!
The worm gear was damaged
I how the video for replacing the worm gear on your website. It help me a lot. I followed step by step instruction display on video. It was great help.
Parts Used:
-
Ashok from Sterling, VA
-
Difficulty Level:Really Easy
-
Total Repair Time:30 - 60 mins
-
Tools:Screw drivers
Was this instruction helpful to you?
Thank you for voting!
kitchen aid mixer wouldn't hold the bowl for kneading or mixing cookie dough
Unscrewed 3 Philips screws. Pried out the old screw cap. It had been there for 25 years and had flour, egg, etc. build up over the years. Did use a needle nose plier to lift it out. Put in the new one. Needed a rubber mallet to snug it down. Design has changed slightly over the years. Put the 3 screws back in and as they say in England, "you have an uncle named Bob."
Parts Used:

-
Roland from Newport, OH
-
Difficulty Level:Easy
-
Total Repair Time:15 - 30 mins
-
Tools:Screw drivers
Was this instruction helpful to you?
Thank you for voting!
The worm gear driven by the motor stripped due to excessive load.
Remove the mixer head from the base by removing the 4 Phillips head screws. Pry off the ring around the rotating part with a flat head screwdriver. Punch out the pin holding the rotating part and remove. Remove the trim strip by removing the two Phillips screws at the rear of the unit. Remove the 4 screws at the bottom of the mixer head. Carefully separate the bottom of the head from the top using a flat screw driver. There will be the power wires connecting the top to the bottom of the unit. It is best to disconnect these wires to avoid breaking them during rest of the procedure. There will be a lot of grease in the gear box of the mixer. The assembly holding the damaged worm gear can now be removed by removing the three screws holding it to the bottom of the mixer head. At this point I removed the grease from the worm gear assembly to allow better inspection. Punch out the pin holding the worm gear to its shaft and remove the shaft. The worm gear is now free and can be replaced. Add some extra grease to the new gear and reassemble the mixer in the reverse order.
Parts Used:
-
James from Central City, IA
-
Difficulty Level:Easy
-
Total Repair Time:15 - 30 mins
-
Tools:Screw drivers
Was this instruction helpful to you?
Thank you for voting!
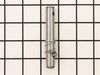
Worn spring would not allow atthing mixer attacments
Repair was easy. Remove the seal ring with a flat blade screwdriver and drive out retaining pin. Pry out lower unit using two screwdrivers, one on each side. Once apart, use spring clip pliers to remove snap ring. Pull out shaft and replace. Clean and lubricate as you reassemble in reverse. Google the model number to get detailed instructions.
Parts Used:
-
Randall from Ledyard, CT
-
Difficulty Level:Easy
-
Total Repair Time:15 - 30 mins
-
Tools:Screw drivers
Was this instruction helpful to you?
Thank you for voting!
Plastic knob on speed control lever was lost
The knob was attached to the new lever. I began to disassemble the mixer case so that I could replace the lever. However, it soon became apparent that this would be a major project involving many components and potential problems in getting the unit back together. Since all I wanted was to replace the knob, I simply knocked it off the new lever and forced it onto the old one. It is hard for me to understand why Kitchenaid would not make just the knob available.
Parts Used:

-
REID from BELLEVUE, WA
-
Difficulty Level:Really Easy
-
Total Repair Time:15 - 30 mins
-
Tools:Screw drivers
Was this instruction helpful to you?
Thank you for voting!
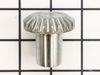
ground off the gears
-
Tom from Bay City, MI
-
Difficulty Level:Easy
-
Total Repair Time:30 - 60 mins
-
Tools:Screw drivers
Was this instruction helpful to you?
Thank you for voting!
The speed control lever was bent and broken from a fall
Per a video on this site, I removed the stand part, then removed the rear electrical cover and aluminum band which wraps around the mixer. Next, remove the drip ring and planetary gear (use a punch). Then remove the 4 screws securing the bottom housing and the 5 screws around the planetary gear housing. You should be able to pull the upper and bottom housings apart now. This exposes the control lever. Just unscrew it and replace it. Re-install all parts in reverse order.
Parts Used:

-
Jim from Longmont, CO
-
Difficulty Level:Easy
-
Total Repair Time:30 - 60 mins
-
Tools:Screw drivers
Was this instruction helpful to you?
Thank you for voting!
Worn out worm (nylon) gear.
Followed up by your précised video, and print copy's which helped me a lot. That's easy!
Parts Used:
-
Anthony from Altadena, CA
-
Difficulty Level:Really Easy
-
Total Repair Time:30 - 60 mins
-
Tools:Screw drivers
Was this instruction helpful to you?
Thank you for voting!