




















KPDI620T1 KitchenAid Dishwasher - Instructions
Keep searches simple. Use keywords, e.g. "leaking", "pump", "broken" or "fit".
A roller came off the bottom washer tray in the dishwasher because of broken axle
I removed the broken axle with the help of a small screwdriver and replaced it with a new one. Then I installed a new roller, which was easy because all I had to do was push it on with my fingers.
One of the easiest repairs I've ever made on anything and now I'm happy because my wife is happy!
One of the easiest repairs I've ever made on anything and now I'm happy because my wife is happy!
Parts Used:

-
Jimmie from Springport, IN
-
Difficulty Level:Really Easy
-
Total Repair Time:Less than 15 mins
-
Tools:Screw drivers
0 of 1 people
found this instruction helpful.
Was this instruction helpful to you?
Thank you for voting!
Dishes not getting clean.
I was trying to avoid having to buy a new dishwasher before the holidays. I went on YouTube and found the dirty dishes may mean bad water inlet valve. So, I used my meter to see if the valve was bad and sure enough it was. I ordered the part from Part Select. Once I received the part I removed the old one. Be sure to put a towel down to catch the excess water. The bracket that came with the new prt was a different configuration, but i swapped the new with old and it worked. I addition to the valve being bad the dishwasher upper and lower arms were somewhat clogged. I looked online again and followed YouTube instructions to clean. The dishwasher is cleaning like it is new. I would recommend to anyone doing work on their dishwasher to use part select and thoroughly clean the upper and lower arm.
Parts Used:

-
Brian from Davis, CA
-
Difficulty Level:Easy
-
Total Repair Time:1- 2 hours
-
Tools:Nutdriver, Pliers, Wrench (Adjustable), Wrench set
0 of 1 people
found this instruction helpful.
Was this instruction helpful to you?
Thank you for voting!
Dishwasher wouldn't drain.
After checking for blockages in the drain line and finding none, I disassembled the wash wand assembly and discovered a gasket that had really deteriorated. Since there was nothing else apparently wrong, I took a chance and went shopping for the gasket. None of my local stores could provided me one so I searched on line and found it at Partselect. It had to be special ordered and that took a while, but when it arrived, I put the new gasket in and had a perfect dishwasher again for less than 15 bucks. The schematic I was able to print from your website was invaluable.
Parts Used:

-
Robert from Ringle, WI
-
Difficulty Level:Really Easy
-
Total Repair Time:1- 2 hours
-
Tools:Screw drivers
1 of 4 people
found this instruction helpful.
Was this instruction helpful to you?
Thank you for voting!
Both outside door handles turned very beige
Everything worked perfectly---thanks to the suggestion of your call center agent. She suggested that since the replacement door handles were no longer available, I should consider repainting them--it worked like a charm. Please tell her she was a life saver. We rent that house in Fl and my returning tenants had complained about the discoloring refer handles. Thank you
Parts Used:
-
Howard from Boynton Beach, FL
-
Difficulty Level:Easy
-
Total Repair Time:30 - 60 mins
-
Tools:Nutdriver
23 of 73 people
found this instruction helpful.
Was this instruction helpful to you?
Thank you for voting!
water not going into dishwasher
While replacing the water valve I broke the float switch. Ordered the switch....it was here in 2 days. Great service! Will use this company again....I hope not all that much. lol
I am a retired Sears service tech, but not a dishwaher tech.
Love Parts Select!
Thanks guys,
Doug
I am a retired Sears service tech, but not a dishwaher tech.
Love Parts Select!
Thanks guys,
Doug
Parts Used:
-
douglas from stocholm, NJ
-
Difficulty Level:A Bit Difficult
-
Total Repair Time:30 - 60 mins
-
Tools:Pliers, Socket set, Wrench set
1 of 7 people
found this instruction helpful.
Was this instruction helpful to you?
Thank you for voting!
broken roller weels on bottom dish rack
I simply removed the broken wheel brackets and snapped new ones on. then the wheel just sliped on. It took some good hand strength.
Parts Used:
-
robert from coumbus, OH
-
Difficulty Level:Easy
-
Total Repair Time:Less than 15 mins
0 of 4 people
found this instruction helpful.
Was this instruction helpful to you?
Thank you for voting!
Detergent dispenser failed to open
-
Mark from Norman, OK
-
Difficulty Level:Easy
-
Total Repair Time:15 - 30 mins
-
Tools:Screw drivers
5 of 22 people
found this instruction helpful.
Was this instruction helpful to you?
Thank you for voting!
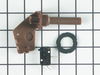
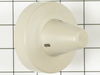
Old float stem had fine thread new one had corse and did not supply nut so had to use old one over.
put new switch and new gasket on old float stem with old nut. but it still overflows about 1/2 cup of water through stem
Parts Used:

-
Daniel from Duxbury, MA
-
Difficulty Level:Really Easy
-
Total Repair Time:Less than 15 mins
-
Tools:Screw drivers, Wrench (Adjustable)
10 of 39 people
found this instruction helpful.
Was this instruction helpful to you?
Thank you for voting!
4 pcs broken & would not hold wheel on Basket.
Push off - Push on new plastic Part. Very stiff. Used a wooden spoon handle!!! Job done!
Parts Used:
-
David from St. Marys, KS
-
Difficulty Level:A Bit Difficult
-
Total Repair Time:Less than 15 mins
Was this instruction helpful to you?
Thank you for voting!
No faucet adapter

-
Michael from Irons, MI
-
Difficulty Level:Easy
-
Total Repair Time:Less than 15 mins
Was this instruction helpful to you?
Thank you for voting!
Faucet adapter leaked
-
Ed from North East, MD
-
Difficulty Level:Really Easy
-
Total Repair Time:Less than 15 mins
Was this instruction helpful to you?
Thank you for voting!
Replaced black panels with stainless.
Just followed directions included.Am extremely pleased with the appearance of the new panels they matched my new appliances.Also I did not pay for express freight but received my order in only two days.Very pleased with Part Select.Thanks Al S
Parts Used:

-
Albert from Highland, TX
-
Difficulty Level:Really Easy
-
Total Repair Time:Less than 15 mins
-
Tools:Nutdriver, Screw drivers
Was this instruction helpful to you?
Thank you for voting!
Roller Wheel on lower dish rack broke- rack didn't sit or roll properly.
used screwdriver to remove roller axle. Snapped on new axle and wheel. I ordered two extra sets just in case future wheels brake. simple. 16 Year old dishwasher works fine!!
Parts Used:
-
Megan from Pacific Palisades, CA
-
Difficulty Level:Really Easy
-
Total Repair Time:Less than 15 mins
-
Tools:Screw drivers
Was this instruction helpful to you?
Thank you for voting!
Soap Cup Lid was not opening during main wash cycle
Very easy. Disconnect power to the dishwasher via a breaker or fuse. Open the door and remove just the 4 screws on the inside lip of the door. Do not remove the screws hoding the closing brackets. Remove the front glass and chrome panel between the control panel and the kick panel. This will give you access to the soap cup and bi-metal. Remove the one retaining screw and remove the bi-metal,taking note of the position of the wires. Remove the wires, by grasping the connectors (I used needle nose pliers for this), not the wires, and re-intsall them on the new bi-metal. Re-install bi-metal on soap cup assembly, "cock" the release lever by closing the soap cup cover and manually trip the bi-metal to make sure it will release the lever and open the cover. Re-install the front panel with screws. Restore power and test appliance.
Parts Used:
-
David from Carlisle, PA
-
Difficulty Level:Really Easy
-
Total Repair Time:Less than 15 mins
-
Tools:Pliers, Screw drivers
Was this instruction helpful to you?
Thank you for voting!
A few rollers and axels had gone missing
Easily one of the easiest repairs I have ever done. The new bits snapped into place and now the bottom rack rolls in and out like brand new.The ease and speed of finding the parts was really helpful. This is an old model and to be able to find the exact parts I needed so fast and so cheap was great. Oh and they arrived the day after I ordered them! Insanely fast!
Parts Used:
-
Sean from San Francisco, CA
-
Difficulty Level:Really Easy
-
Total Repair Time:Less than 15 mins
Was this instruction helpful to you?
Thank you for voting!