




















KP26M1XQCE5 KitchenAid Mixer - Instructions
Keep searches simple. Use keywords, e.g. "leaking", "pump", "broken" or "fit".
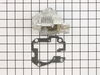
Plastic gear cover broken
Removed plastic cover, removed grease and put in new mixer and put new cover back on.
Parts Used:
-
CHRISTINA from NEW GLOUCESTER, ME
-
Difficulty Level:Easy
-
Total Repair Time:15 - 30 mins
-
Tools:Nutdriver, Screw drivers
0 of 1 people
found this instruction helpful.
Was this instruction helpful to you?
Thank you for voting!
Gears ground when roller attachment applied.
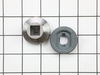
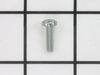
Took screw off band. This revealed 4 screws to upper housing. Removed 4 screws and lifted upper housing off . To my surprise I found no screws holding gear housing cover in place. You could tell they were there at one time. Should be 4. I removed cover disasembled what was left of gears. Cleaned old grease ordered parts. Thought since there was only 1 screw on diagram it would ship 4. No big deal. After recieving parts further inspection revealed no screws holding motor in place. This blows me away. Anyway off to local hardware store for more screws. Got home slapped it togethere in 10 minutes. Ordered this off TV about 6 years ago. They must have had it in for repair and forgot to put it back together. All that aside it runs better than ever. Thanks much Michael
Parts Used:
-
Michael from Tomahawk, WI
-
Difficulty Level:Really Easy
-
Total Repair Time:15 - 30 mins
-
Tools:Pliers, Screw drivers, Wrench (Adjustable)
0 of 2 people
found this instruction helpful.
Was this instruction helpful to you?
Thank you for voting!
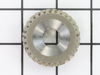
mixer beater quite
disassembled unit gear head and replaced broken part, then reassembled
Parts Used:
-
Kenneth from Brookings, OR
-
Difficulty Level:Really Easy
-
Total Repair Time:1- 2 hours
-
Tools:Screw drivers
0 of 3 people
found this instruction helpful.
Was this instruction helpful to you?
Thank you for voting!
Stripped worm follower gear.
Watched the video. Ordered the parts. Watched the video again. Replaced the worm follower gear and bearings on the worm gear. Added grease. Installed new gear housing. Put it all back together and tested. Works like new. Now I get cakes and goodies again and have a happy wife who thinks I'm super handyman. Thanks
Parts Used:
-
Johnna from Childress, TX
-
Difficulty Level:Really Easy
-
Total Repair Time:1- 2 hours
-
Tools:Screw drivers
Was this instruction helpful to you?
Thank you for voting!
Gears were slipping
Noticed worm gear was worn out, ordered the parts, it came very next day. On YouTube instructions were very easy to follow. Important point to remember,I washed the parts in water with chlorine in it. Retaking ring was tough to take out, as I did not have parrot beak plier, could not find it at Home Depot or Lows. Putting the retaining ring I used circular nut driver, to press it on the shaft to slide down by hammering it. While assembling follow the instruction step by step from the you tube. Machine works smoothly. Performing well. Thanks to part select, excellent web page, efficient delivery. I would recommend them to all.
Parts Used:


-
fatema from dublin, CA
-
Difficulty Level:Really Easy
-
Total Repair Time:1- 2 hours
-
Tools:Pliers, Screw drivers
Was this instruction helpful to you?
Thank you for voting!
Worm Gear teeth was stripped
Removed top cover, remove snap-ring on shaft, slide top gear and worm gear off. Clean all the grease out and clean parts. Installed new worm gear and parts. Repacked with new grease, careful not to much, leaving room for expansion.
Parts Used:

-
Ronny from Clearwater, KS
-
Difficulty Level:Easy
-
Total Repair Time:1- 2 hours
-
Tools:Screw drivers
Was this instruction helpful to you?
Thank you for voting!
planetary main shaft has loosened at the pressed spline in the cover. Also, had two gears that had gotten damaged.
Watched a repair video on the internet. This was actually an easy repair to make. Just make sure you replace all the food grade grease in the gear housing and coat all parts well.
Parts Used:

-
Bruce from Gig Harbour, WA
-
Difficulty Level:Easy
-
Total Repair Time:1- 2 hours
-
Tools:Screw drivers
Was this instruction helpful to you?
Thank you for voting!
2 mixers, one wouldn't run at all, the other would start but at about 3/4 turn of the beeter the whole process would stop. If the beeter was manually moved forward, it would resume the remainder of the cycle until it again reached the 3/4 point.
The appliances belong to my neighbor who had no papers/manuals so I was on my own to figure out how to even get the machine apart and to find the correct nomenclature for the parts I needed. The PartSelect diagrams on the web site told me everything I needed to know. The key to the dis-assembly was the band around the center of the machine. After I discovered that, the band came off easily followed by splitting of the casing. One the first machine it appeared that the circuit board/switch assembly was in bad shape looking like it had been over heated at one time. As a test, I took the electric component out of the machine that would run and put it on the dead mixer. Beauty, it worked. OK so much for the easy one. On the machine that would only turn part way, I split the transmission housing by removing four small bolts and found that the worm gear was partially stripped. So, I ordered a new gear, switch assembly and transmission gasket since the old one was torn during my dis-assembly process. I don't have any snap ring pliers, so the snap ring(retaining ring) was taken off using a large screw driver and a a pair of slip joint pliers. Worked well, but I was afraid that the old retaining ring may have been damaged, so I ordered a new one. Good idea, since I broke the old one trying to put it back on. When all of the parts were installed, I filled the voids with heavy grease and put it all back together. Both mixers now work perfectly which saved the owners several hundred dollars. They had planned on replacing them both for use at their restaurant. I am now a fan of PartSelect because of the ease at which I, a novice had been able to find and get the correct parts, and the speed at which they arrived. I am also very impressed with the Kitchen Aid mixers because it appears the they are very well made, and are easily repaired if they do break. I was surprised to find a small appliance that is repairable. Many are now just throw away quality. I am a hero to my neighbors (they don't know how easy this was) and will keep the refrigerator magnet that was included with my parts order, for future repairs.
Parts Used:

-
Joe from Palm Coast, FL
-
Difficulty Level:Easy
-
Total Repair Time:1- 2 hours
-
Tools:Nutdriver, Pliers, Screw drivers
Was this instruction helpful to you?
Thank you for voting!
worm gear was worn down
removed the cover, separated the gear casing, cleaned the gears, replaced the thrust bearing kit and worm gear, greased all and reassembled. Wish I would have known to order the grease, it would have saved a couple bucks in shipping.
Parts Used:

-
Susan from Manchester, IA
-
Difficulty Level:A Bit Difficult
-
Total Repair Time:1- 2 hours
-
Tools:Screw drivers
Was this instruction helpful to you?
Thank you for voting!
Stripped worm gear and broken lower gear housing
Worm gear strips usually after the lower gear housing breaks. Tore down cleaned grease and shrapnel out, replace stripped worm gear and lower housing. It's convenient that the lower housing plate comes assembled with new bushing and gear. This is now the third one of these expensive mixers I have repaired, word got out that I fix them, and this is a very common problem. Repairs have been for friends and Church, so I don't charge any labor, it's kind of fun, messy, but fun. Note to Kitchen Aid: Please strengthen lower gear case.
Parts Used:
-
Andrew from Odessa, FL
-
Difficulty Level:Easy
-
Total Repair Time:1- 2 hours
-
Tools:Nutdriver, Pliers, Screw drivers, Socket set, Wrench set
Was this instruction helpful to you?
Thank you for voting!
Stripped worm gear
Used the meat grinder attachment, with the retaining ring too tight for the motor to turn the augur, so a gear stripped and the mixer would not run. I opened the mixer top, removed the transmission cover, removed enough grease to diagnose the problem (6 teeth stripped off the steel worm gear). I ordered a replacement steel worm gear and, while I was at it, a new retaining ring, bevel gear, retaining pin and the large planetary gear, as I could not tell the condition of these until I disassembled the whole gear train. I then removed the gear train components (needed a snap ring pliers to remove the retaining ring -- I don't recommend trying to remove it with an y other tool), washed them in acetone, cleaned out the transmission case and went over it with a magnet to get stray gear tooth remnants, replaced the worm and bevel gears and reassembled, using the original planetary gear, retaining pin and retaining ring. Filled the bottom of the transmission with planetary grease first, then, once the gear train had been replaced, slathered a big pile of grease over it, replaced the transmission cover. The machine then ran perfectly, so I replaced the mixer's top cover and decorative band and was back in business mixing with it about 30 minutes after cleaning the last of the grease off my hands. I should mention, I used a LOT of paper towels for this job. This was a fun job and I was sorry that it was so easy to do, as I enjoy working with gears and grease.
Parts Used:

-
OLIVER from ANCHORAGE, AK
-
Difficulty Level:Really Easy
-
Total Repair Time:30 - 60 mins
-
Tools:Screw drivers
Was this instruction helpful to you?
Thank you for voting!
Clanking noise, motor strain/ ultimate burn out.
First of all, go to the web site and download the schematics of the model #. It will show all the parts and part #s. Secondly watch a u tube video of the actual strip down process of the professional 600 series stand mixer. With this knowledge, do one of two processes 1: strip down the machine, remove the gears and check for defects- order parts. Or 2: replace all the parts( little money) and have a totally refurbished , smooth running mixer. I kept the good used gears for spares. I replaced 90 % of the internals ( including motor) and have a smooth running machine. I initially burned out the mother 2 months after initial purchase, sent it back under warentee, and received it back . Wen I stripped it down 10 years later, there was very little grease in the gear housing. This is what probable ruined the gears. Use plenty of grease in the housing and gears. The grease is one of the most expensive items, but you can't find it anywhere, so order it, along with everything else, from Parts Select.
Parts Used:


-
Francis from Plymouth, MA
-
Difficulty Level:Really Easy
-
Total Repair Time:30 - 60 mins
-
Tools:Screw drivers
Was this instruction helpful to you?
Thank you for voting!
main shaft for beatter slipped way down
-
John from Kaukauna, WI
-
Difficulty Level:Really Easy
-
Total Repair Time:30 - 60 mins
-
Tools:Screw drivers
Was this instruction helpful to you?
Thank you for voting!
Mixer stopped mixing
Remove Beaty band, one screw. Remove four screws holding top. Remove worm gear, by simply lifting it out. Removed all grease. Repacked with fresh grease. Take out gear case/ transmission bearing, clear all old grease, repack with new grease. Install into new gear case housing. Assemble, and Repack new worm gear and front and rear worm gear bearings, utilize old washers (2), and one small ball bearing washer. Rotate worn gear and bushing to spread the new grease throughout the gears. Replace top cover, four screws . Replace beauty ring, one screw. Run unit for 20 to 30 seconds, under no load to distribute the new grease. Works like a charm. 45 minutes to one hour. To complete.
Parts Used:
-
Francis from Pleasant Valley, NY
-
Difficulty Level:Easy
-
Total Repair Time:30 - 60 mins
-
Tools:Pliers, Screw drivers
Was this instruction helpful to you?
Thank you for voting!
Bowl Lift Assembly - Rear mount broke off
The rear 'loop' on the bowl assembly broke off when our cleaning lady tried to wrench the bowl lift handle in the wrong direction. The loop connects to the handle with a rod and spring and the bowl lift mechanism is the piece that slides up and down. I tried to weld the loop back to the bowl lift, but because it is aluminum, it didn't work very well. I purchased the new bowl lift assembly with a new spring (thought I'd lost the first one). This came just as if from the factory, slid it on the track, inserted the rod and screw into the loop and tightened the fastening nut. Easy peasy. Saved myself a $300 - $400 new kitchen aid professional mixer. It did take about 1.5 - 2 weeks to arrive, but it did and that's what counts. Very pleased with my experience.
Parts Used:


-
Scott from Glendale, CA
-
Difficulty Level:Easy
-
Total Repair Time:15 - 30 mins
-
Tools:Screw drivers, Socket set, Wrench (Adjustable)
Was this instruction helpful to you?
Thank you for voting!