




















KP2671XWH2 KitchenAid Mixer - Instructions
Keep searches simple. Use keywords, e.g. "leaking", "pump", "broken" or "fit".
Broken Planetary
-
Yevgeniy from Newbrugh, IN
-
Difficulty Level:A Bit Difficult
-
Total Repair Time:15 - 30 mins
-
Tools:Pliers, Screw drivers, Wrench (Adjustable)
3 of 5 people
found this instruction helpful.
Was this instruction helpful to you?
Thank you for voting!
Mixer slow to turn on and/or register a change in speed
I followed the instructional video closely. My old circuit board was labeled and laid out slightly differently than the new one, so in addition to labeling the wires with "color" or "motor" label from the old board, I also made sure to label with more identifiers that were included on both boards such as "P1" or "P2". Once I labeled the wires with all the information, removal of the old board and installation of the new board was straightforward. This isn't the first repair I've made on my KitchenAid but it was by far the simplest.
Parts Used:
-
Kimberly from MORGAN HILL, CA
-
Difficulty Level:Easy
-
Total Repair Time:15 - 30 mins
-
Tools:Screw drivers
2 of 2 people
found this instruction helpful.
Was this instruction helpful to you?
Thank you for voting!
Teeth in planetary stripped where shaft seated
Removed cover, removed retaining clip from shaft. Removed gear, removed shaft pin. Removed shaft. Installed new planetary and installed pin, gear, retaining clip. Installed covers. Tested Sat.
Parts Used:

-
ROBERT from BEAVER, PA
-
Difficulty Level:Really Easy
-
Total Repair Time:Less than 15 mins
-
Tools:Screw drivers
2 of 2 people
found this instruction helpful.
Was this instruction helpful to you?
Thank you for voting!
Screw cracked on the front of the mixer

-
Mrs Brenda from LYNNWOOD, WA
-
Difficulty Level:Very Easy
-
Total Repair Time:Less than 15 mins
2 of 2 people
found this instruction helpful.
Was this instruction helpful to you?
Thank you for voting!
mixer was very noisy when running and made a horrible grinding sound
My husband removed screws and took top off mixer. Then he took out the gears and cleaned them from all the grease. After he did that he could see the gears that were all worn. We went on line ordered the new gears and in a couple of days the parts were here and he put them back in and greased it all again and put the top and screws back in place. Mixer sounds much quieter. Thank you.
Parts Used:

-
Thomas from Bluffton, IN
-
Difficulty Level:Really Easy
-
Total Repair Time:15 - 30 mins
-
Tools:Screw drivers
3 of 6 people
found this instruction helpful.
Was this instruction helpful to you?
Thank you for voting!
Bad gears
-
Jeffrey from FLINT, MI
-
Difficulty Level:Really Easy
-
Total Repair Time:30 - 60 mins
-
Tools:Screw drivers
2 of 3 people
found this instruction helpful.
Was this instruction helpful to you?
Thank you for voting!
Worm gear wore out
Dismantled gear box pulled all gears out and replaced worm gears
Parts Used:



-
Bunny from WAMEGO, KS
-
Difficulty Level:Easy
-
Total Repair Time:30 - 60 mins
-
Tools:Pliers, Screw drivers
2 of 3 people
found this instruction helpful.
Was this instruction helpful to you?
Thank you for voting!
none
followed directions given, removed all the old grease .did a short test run , then replaced with new grease. the reason the gear was striped was my fault mixing too much bread at one time. we have a coffee house and use the mixer every day.
Parts Used:
-
Joseph from Mentone, CA
-
Difficulty Level:Really Easy
-
Total Repair Time:30 - 60 mins
-
Tools:Screw drivers
2 of 3 people
found this instruction helpful.
Was this instruction helpful to you?
Thank you for voting!
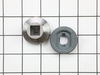
Worm gear had stripped so changed out several gears and parts
Opened the gear housing and removed all gears. Cleaned out all grease. Biggest issue was getting the retaining ring; very tight. Gears were difficult to pull easily. In replacing gears they did not sit easily and took a little rubber hammer to re position worm and upper gear. Be sure to have the right grease for food devices and don’t under grease. And have patience of which I have a short supply.
Parts Used:


-
Michael from MANASSAS, VA
-
Difficulty Level:A Bit Difficult
-
Total Repair Time:1- 2 hours
-
Tools:Pliers, Screw drivers, Wrench (Adjustable)
2 of 3 people
found this instruction helpful.
Was this instruction helpful to you?
Thank you for voting!
Broken thrust bearing kit caused damage to the worn gear
Disassambled the gear-train.Removed all broken pieces and grease from gear case. Cleaned gear case and all parts. Reassembled gear-train with new parts and packed all with suitable quantity of new grease. Test run with variable speeds assuming working smoothly.
Parts Used:
-
Ming from Columbus, OH
-
Difficulty Level:A Bit Difficult
-
Total Repair Time:1- 2 hours
-
Tools:Pliers, Screw drivers
3 of 6 people
found this instruction helpful.
Was this instruction helpful to you?
Thank you for voting!
Gear Stripped was trying to replace
Could not get it properly installed. Had to take to a repair center for completion.
Parts Used:
-
Stuart from Pittsford, NY
-
Difficulty Level:Difficult
-
Total Repair Time:1- 2 hours
-
Tools:Screw drivers
2 of 4 people
found this instruction helpful.
Was this instruction helpful to you?
Thank you for voting!
REPLACE SPEED CONTROL SWITCH
-
FRANCISCO from SAN BENITO, TX
-
Difficulty Level:Really Easy
-
Total Repair Time:30 - 60 mins
1 person
found this instruction helpful.
Was this instruction helpful to you?
Thank you for voting!
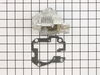
The stand mixer would not rotate at low speed. Upon disassembly found one of the two alignment pins of the upper gear case broken.
1. Removed the decorative band then the upper motor cover.
2. Removed the upper gear case cover. Found one of the two alignment pins broken.
3. Inspected gears.
4. Cleaned out old grease.
5. Repacked with new food grade grease.
6. Reassembled.
2. Removed the upper gear case cover. Found one of the two alignment pins broken.
3. Inspected gears.
4. Cleaned out old grease.
5. Repacked with new food grade grease.
6. Reassembled.
Parts Used:
-
Russell from NEW LONDON, CT
-
Difficulty Level:Really Easy
-
Total Repair Time:30 - 60 mins
-
Tools:Screw drivers
1 person
found this instruction helpful.
Was this instruction helpful to you?
Thank you for voting!
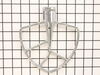
dryer was making a screeching noise
replaced the two Bearing slides thanks to your video repair was quite easy
Parts Used:
-
Edgar from LITCHFIELD, MN
-
Difficulty Level:Really Easy
-
Total Repair Time:30 - 60 mins
-
Tools:Screw drivers, Socket set
1 person
found this instruction helpful.
Was this instruction helpful to you?
Thank you for voting!
Speed control would go from a "mix" setting 1 to a whip setting "10" by itself.
When I ordered a replacement assembly, I was sent a "new" replacement. As I had read up on your site to number the 5 wires BEFORE I removed them, this was a great idea. The new assembly was wired differently than the original board. Although no install instructions came with the new part, it was just a matter of connecting the NUMBERED wires to the new configuration. The first time I fired it up after plugging everything in, nothing happened! I removed all the plug-in wires and reinstalled to ensure I had not gotten a tight connection because of the plastic covers over the end connectors. On my second try, everything worked as advertised! VIOLA!!!! It was a bit tough because of the tight spaces within the motor housing and the new wire routing. Just take pictures of the area BEFORE you disconnect anything and you should do o.k., since I did. 20 minutes.
Parts Used:
-
Joe from CASTLE ROCK, CO
-
Difficulty Level:Easy
-
Total Repair Time:15 - 30 mins
-
Tools:Pliers, Screw drivers
1 person
found this instruction helpful.
Was this instruction helpful to you?
Thank you for voting!